How to use your Samsung AirDresser?
After the installation of Samsung AirDresser, follow the instructions below for details and usage guidelines.

Please take note of below usage guidelines when using your AirDresser.
Before use
• This AirDresser cannot be used to clean items. For best results, wash and dry all items before using the product.
• We recommend washing items with strong odors or items that have been stored for a long time.
• Separate items by odor strength.
• Check all clothing or item labels before using the product.
• Before placing the clothing into the product, make sure to empty all pockets.
• Do not use the product as a storage closet.
• The product may not remove pet hair.
During use
• Make sure items are not touching the bottom of the product. If necessary, use the shelf to stop items that are hung from touching the bottom of the product.
• Hissing noises may occur during a steam process.
• If you need to stop a cycle before it will finish, make sure to run the Dry cycle.
• Operating time depends on the environment and type of items.
• If used consecutively, the product may display a different operating time than the actual.
• Do not open the door while the product is operating.
After use
• The amount of wrinkles removed may vary depending on the fabric type.
• Remove items immediately after a cycle has finished. If you cannot remove items immediately, use Delay End or Keep Fresh.
• When removing items, hold both the items and the hanger.
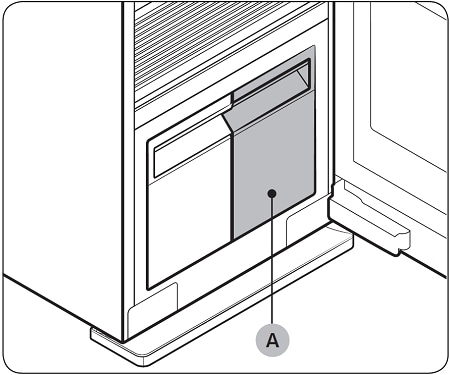
Step1: Make sure the Refill Tank (A) is filled with water. If the tank is not filled with water, the AirDresser will not operate and you will receive an error message.
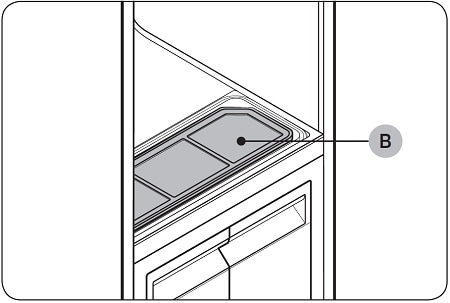
Step2: Make sure the lint filter (B) is clean.
Below is the list of accessories of the AirDresser to help you understand where some of these bits and pieces go.
 |
 |
 |
 |
 |
 |
 |
 |
 |
 |
 |
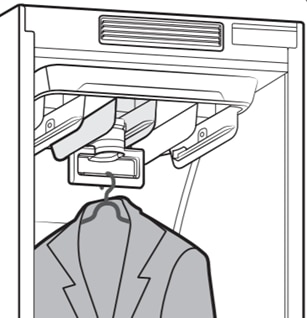
Use the provided Air hangers for items such as jackets, sportscoats, and blazers.

To use the Air hangers
Step1: Hang items on hangers in the same direction.
- To prevent items from falling off the hangers, make sure to button all buttons and zip all zippers.
- Make sure all items are hung flatly. Make sure the hanger clips do not protrude outward.
Step2: Slide the hangers into the air holes until you hear a clicking sound.
- Make sure hangers are facing the same direction.
- If the Air hangers are not properly inserted into the air hole, vibrations and noises may occur.
Please Note:
• Make sure the interior and exterior of the hangers are clean and free of foreign matter.
• Do not use hangers for knits, wools, lingerie.
• The maximum lengths of items must be 110 cm for tops and 100 cm for bottoms.
• Depending on the type or size of the fabric, unwanted wrinkles may form on the neck of your clothing.
• For best results, avoid hanging longer items from the middle hole.
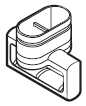
You can use the regular hanger kit to use regular hangers to hang your items. However, for best results, we recommend using the Air hangers. To use the regular hanger kit.
To use the regular hanger kit
Step1: Hang items on hangers in the same direction.
- To prevent items from falling off the hangers, make sure to button all buttons and zip all zippers.
- Make sure all items are hung flatly. Make sure the hanger clips do not protrude outward.
Step2: Slide the regular-hanger kit into the air holes until you hear a clicking sound, and then hang the hangers on the regular-hanger kit.
- Make sure hangers are facing the same direction.
- If the regular-hanger kit is not properly inserted into the air hole, vibrations and noises may occur.
Please Note:
• Use hangers that will not be deformed by heat.
• Make sure the interior and exterior of the hangers are clean and free of foreign matter.
• Do not use plastic/silicone/wooden hanger and hangers with adhesive.
• Do not use hangers from laundry that may become rusty.
• For best results, avoid hanging longer items from the middle hole.
• Make sure the trousers or weight kit does not touch the bottom of the product.
• The maximum length of trousers must be 100 cm
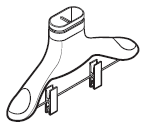
To use the weight kit
Step1: Clip the bottom of the trousers to the Air hanger.
Step2: Clip the other end of the trousers to the weight kit.
Step3: Slide the Air hanger into the air holes until you hear a clicking sound.

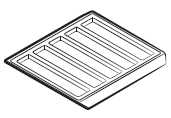
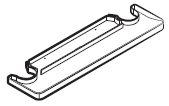
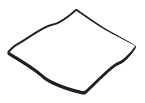
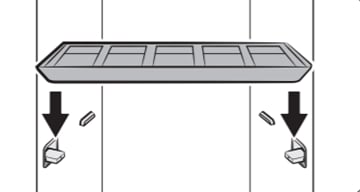
Use the provided shelf for items that cannot be used with hangers.
To use the shelf
Step1: On the side walls, press the bottom part of the shelf holders to turn them out.

Step2: Place the shelf on the shelf holders. Make sure the grooves on the shelf are firmly sitting on the holder. A gap between the sides of shelf and the
side walls is normal.
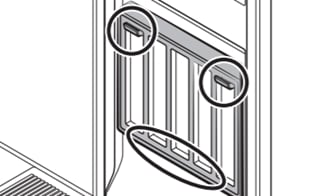
Store the shelf on the door when not in use. Place the shelf on the bottom holder, and then hang it on the top holders.
Thank you for your feedback!
Please answer all questions.
Contact Info
Digital Service Center
![DSC icon image]()
![DSC icon image]()
WhatsApp(English / हिंदी)
![WhatsApp image icon]()
![WhatsApp image icon]()


WhatsApp Us : 1-800-5-726-7864
Available 24 Hours / 7 days


Sign Language
![Sign language image]()
![Sign language image]()
Operation Hour: Monday - Friday 11:00-16:00
24 Hours Phone Support (India)
![image of phone dialer]()
![image of phone dialer]()
1-800-40-726-7864 (1-800-40-SAMSUNG)