Samsung refrigerator shelf/drawer removal and cleaning guide
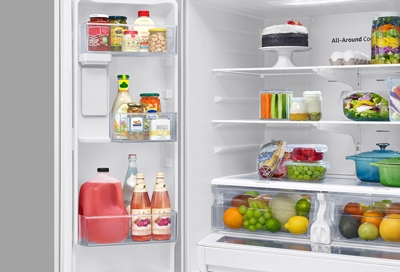
Sometimes messes in the fridge require deeper cleaning and, to get the job done, you have to remove the refrigerator bins, shelves, and drawers. Most of them are made for easy removal, but knowing the right way to remove them makes it even easier. Once they're out, you can really begin cleaning your fridge! We've also included some tips for keeping your refrigerator clean throughout the entire year. If you need to replace bins, shelves, or drawers after removing them, we have information to help with that too.
Check out our printable Refrigerator Care checklist to help keep your fridge running like new!
Door bins, shelves, and crisper drawers
No matter what kind of fridge you have, its door bins, shelves, and crisper drawers can be removed.
Door bins: The top door bin section has a marked line to make removing and reinserting bins easier. To remove a bin, push the bin up with both hands, and then pull it out from the door. To reinsert the bin, simply line it up with the marked section and place it back onto the door.
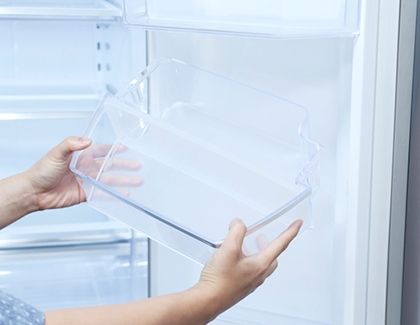
Shelves: To remove a shelf, hold the front of the shelf, and then gently lift up and slide it out.
To reinsert it, hold the shelf at an angle so that the front is higher than the back and then insert the top hook into the top shelf notch. Lower the shelf and insert the bottom shelf hook into the bottom shelf notch.
Crisper drawers: To remove a crisper drawer, you have to first remove the door bins to prevent potentially damaging the drawer. Then, open the drawer all the way and gently lift it up. Pull the drawer out to remove it. To reinsert a drawer, insert the drawer into the frame rails and then slide it inward.
Remove the glass on the vegetable or crisper drawers
Caution: Be careful when working with glass. It can break, cause an injury, or both. Never clean the glass shelf with warm or hot water, as this could cause the glass to shatter. Wait for the glass to reach room temperature and then clean it with lukewarm water.
When you need to clean the glass above the vegetable or crisper drawers, you can remove the glass so it's easier to get to hard-to-reach areas.
If your fridge has the simple shelf setup, removing the shelf isn't complicated at all. Fully open the doors and remove the vegetable drawers. Lift up one side of the shelf with one hand. While supporting the shelf with this hand, slide the shelf out with the other hand.
If your fridge has the more complex setup, you will need to unlatch the glass from the top of the crisper drawers to clean it:
Remove the lower door bins and then remove both of the crisper drawers. To remove the drawers, angle them slightly toward the center of the fridge while sliding them out.
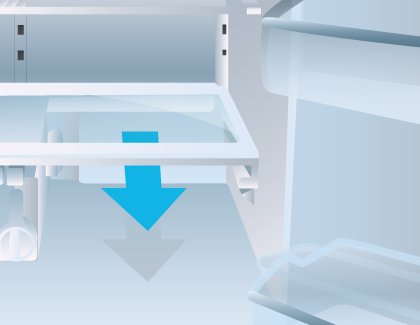
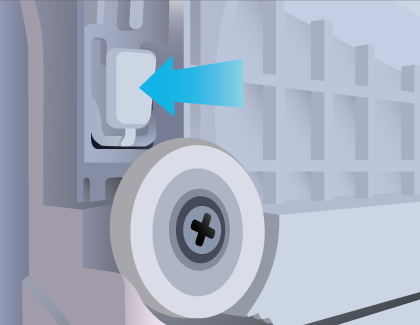
Locate the tabs on both sides of the drawer divider and the water filter housing. There is one on each side, just behind the roller wheel. While holding the water filter housing in place, push and hold both tabs inwards and lift the shelf out from the water filter housing.
Note: The tabs may have a slightly different appearance but will be in the same location.
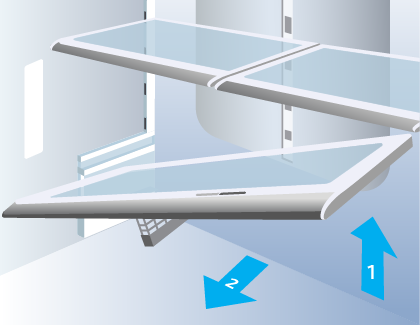
Dislodge the glass shelf from the back wall of the refrigerator by slightly lifting up while pulling it out. To remove it completely from the fridge, angle one side of the shelf downward while pulling it out. Then, carefully turn the shelf over and place it on a clean, flat surface.
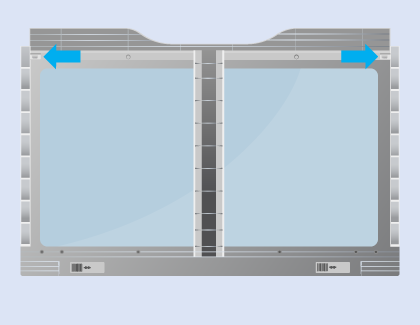
To remove the glass from the plastic frame, locate the shelf's retainer clips. The retainer clips are located on the back left and right corners where the glass meets the white plastic. From the top side (where you'll reinsert them later) they look like small white squares.

Note: Certain models have a glass shelf that does not have retainer clips for removing the glass from the shelf. If food debris, crumbs, or stains get trapped between the glass and plastic frame on this type of shelf, soak it in a water/bleach solution. If this does not clean the shelf enough, the shelf will have to be replaced, since the glass is not made to separate from the frame on these models and attempting to do so could result in physical damage to the shelf.
Now, turn the shelf over and find the clips again. You will remove them from this side.
Each clip has two tabs holding it in place. To remove the clip, push in the tab that is closest to the center of the shelf, while lifting the back corner of the shelf slightly. With enough pressure on the tab, the clip should fall out and the shelf will come loose on that side. Remove the other clip in the same way.
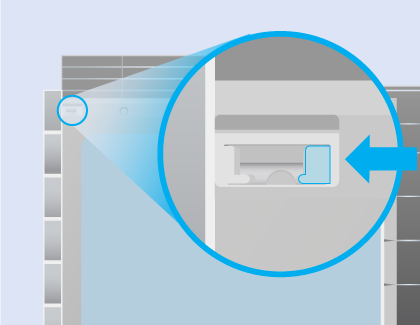
Once both clips are removed, gently raise the shelf and then separate the glass from the shelf frame.
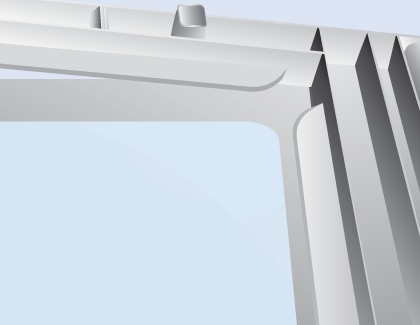
To reinstall the glass shelf, repeat the previous steps in reverse.
FlexZone basket (4-Door French Door refrigerators)
If needed, you can also remove the FlexZone basket.
To remove the FlexZone basket, first fully open the FlexZone drawer. Lift the FlexZone basket up and pull it out with both hands.
To reinsert the FlexZone basket, fully open the FlexZone drawer. Next, lower the basket (back-first) into the rail assembly, and then lower the front of the basket into place.
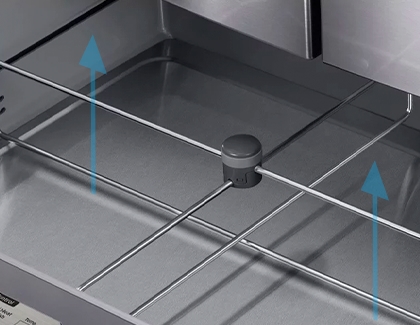
Note: If the divider lock does not function, wipe the bars to remove any moisture on them.
Freezer baskets (French Door refrigerators)
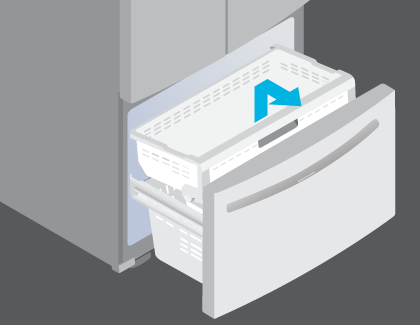
Removing the freezer baskets on your French Door refrigerator is simple. First, lift up the front of the upper basket and then pull to remove it. Next, pull up on the lower basket to remove it from the rail assembly.
To replace the freezer baskets, first place the lower basket onto the rail assembly. Then, place the upper basket above it while aligning the bottom of the basket with the rail assembly.
Refrigerator cleaning tips
Keeping up with regular maintenance will ensure your fridge stays fresh and clean. If you’re not sure where to start, our cleaning plan will help you out.
Check for expired items each day, and remove them before they can cause odors.
Dump unused ice every other week to keep your ice maker fresh. This will also prevent ice clumps.
Immediately clean up when something has spilled. You can use a clean, microfiber cloth and mild detergent if needed.
Do not keep vegetable oil anywhere in your refrigerator. If it leaks, or if some oil gets on the outside of the container, the oil can cause damage to materials in your fridge. Any exposure to vegetable oil should be cleaned immediately. (Examples of vegetable oil include olive oil, corn oil, grape-seed oil, cooking oil, etc.)
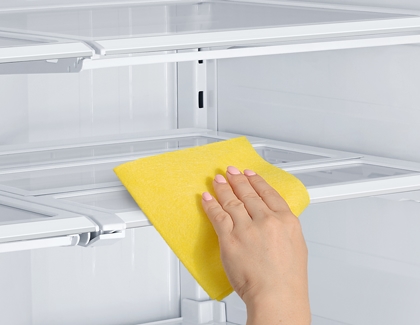
Wipe down the fridge’s exterior using a clean, microfiber cloth or a damp cloth with mild detergent. Do this monthly, and also check for any missed spills, crumbs, or other messes.
Deep clean your fridge once a year by removing all the shelves, drawers, and bins, and washing them. Please see the previous sections for removal instructions. Before replacing the shelves, drawers, and bins, wipe down the interior of the fridge and all the rubber seals, and then dry everything. Lastly, raise the leveling legs and pull the fridge out so you can clean behind and underneath it. Brush any dust off the back, including on the coils, before sliding it back into place.
Replace the water filter every six months. You'll know your water filter needs to be replaced when water dispenses very slowly, but is perfectly fine with the filter removed. Be sure to always use Samsung brand filters to avoid damaging your fridge.
Deodorize as soon as there is a smell
If there is a lingering odor in your fridge, you should remove the offending food item and then clean the area it was on.
If the offender was on a shelf or in a drawer, remove it and wash it in warm, soapy water.
Sprinkle baking soda on a pan or plate, and place it in the fridge for 24 hours.
To help the baking soda, sprinkle some ground coffee on another plate and place it in the fridge for 24 hours.
You can also slice an orange and leave it in a bowl in the fridge to ensure that a fresh smell will stay behind.

Purchase replacement bins and drawers
Do you need to replace your refrigerator's bins, shelves, or drawers? You can visit Samsung Parts and search for your refrigerator's model code. All of the available parts will appear, and you can purchase what you need.
Other answers that might help
-
Mobile 8 AM - 12 AM EST 7 days a week
-
Home Electronics & Appliance 8 AM - 12 AM EST 7 days a week
-
IT/Computing 8 AM - 9 PM EST 7 days a week
-
Text Support 24 hours a day 7 Days a Week
Contact Samsung Support
