Enjoy Z Fold2 5G Camera with Flex mode
Let’s examine some of the highlighted flagship camera features of Z Fold2 5G. A whole new way to take a photo/video with a hands-free camera and experience auto-framing to keep you centered and in focus.
Camera specifications
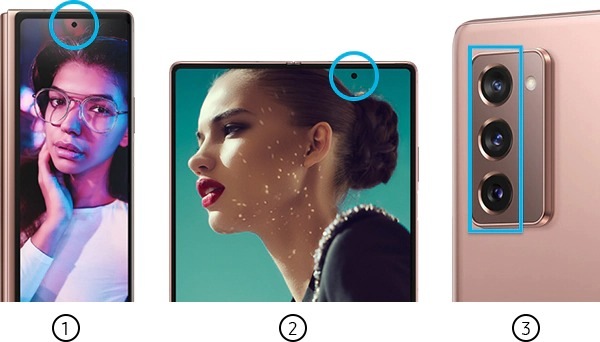
① Cover ② Inner front ③ Rear
Galaxy Z Fold2 5G vs. Galaxy Fold comparison in camera specifications
|
Z Fold2 5G |
Fold |
|
|
Rear |
12 MP FF (Ultra Wide/F2.2) + 12 MP 2PD OIS (Wide, F1.8) + 12 MP AF OIS (Tele/F2.4) |
16 MP FF (Ultra Wide/F2.2) + Dual Pixel 12 MP AF OIS (Wide/F1.5/F2.4) + 12 MP AF OIS (Tele/F2.4) |
|
Inner |
10 MP FF (F2.2) |
10 MP FF (F2.2) + 8 MP (RGB Depth) |
|
Cover |
10 MP FF (F2.2) |
10 MP FF (F2.2) |
Flex mode experience
It is engineered to give you the flexibility to do more. Flex mode lets you fold Galaxy Z Fold2 5G at an angle and hold it anway you like – or not hold it at all. UIWith an optimized UI, Flex Mode offers upper screen viewing while bottom screen controls. Free-standing angles of device are from 75 to 115 degrees to support your work and play time. You can enjoy a hands-free camera experience by capturing life moments even without a tripod.
Note: The hinge hardware supports Flex mode at angles between 75° and 115°. For your convenience, Flex mode can also be set to activate before or after 75° and 115°. It may be difficult to maintain Flex mode while moving due to shaking or other movement. It is recommended to keep the phone stationary while in Flex mode.
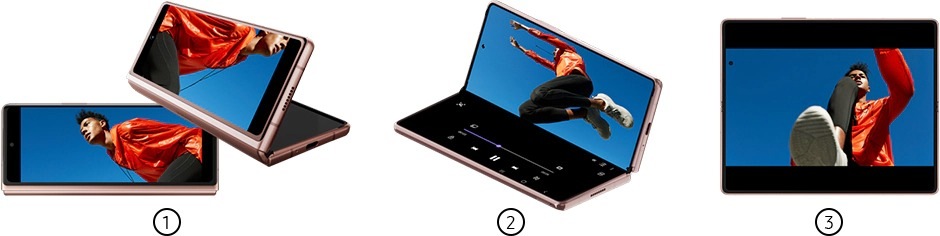
① Cover View ② Flex View ③ Full View
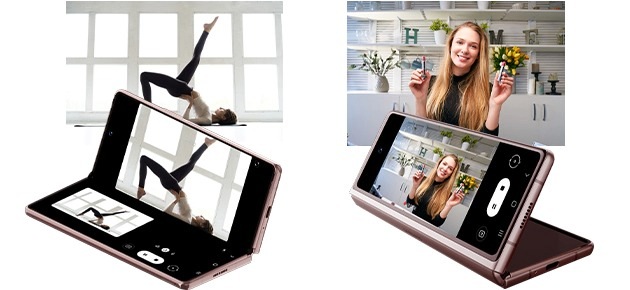
Capture life moments even without a tripod using Z Fold2's 5G Rear, Inner front and Cover camera. You can even show your palm to shoot for taking a selfie.
Note:
- Palm shot is supported for photo only when shooting with the Inner front camera and Cover camera.
- Palm shot is also supported with the Rear camera only for Rear Cam Selfie and Dual Preview etc., if the Cover screen is on.
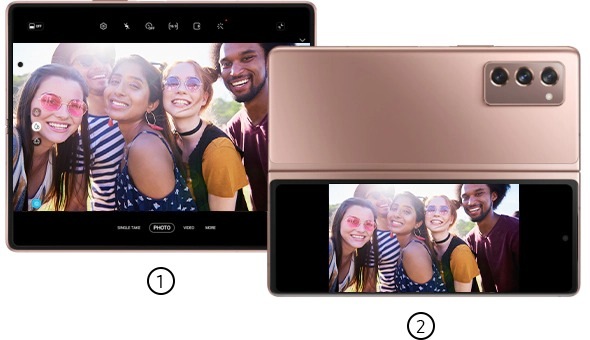
You no longer need to go back and forth between camera and gallery. Using Capture View Mode, you can see the preview for both photo and video and final result at the same time. You can instantly delete the result not entering the gallery. You can capture and view together by Half-folding the device (landscape & portrait) or tap 'Capture & View' icon on the top right side.
Note: The hinge hardware supports Flex mode at angles between 75° and 115°. For your convenience, Flex mode can also be set to activate before or after 75° and 115°. It may be difficult to maintain Flex mode while moving due to shaking or other movement. It is recommended to keep the phone stationary while in Flex mode.
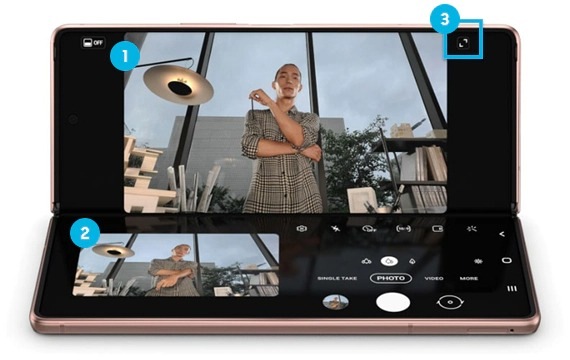
① Camera ② Gallery ③ 'Capture & View' icon
Note: Gallery will display up to 5 recent photos/videos.
Auto framing in Rear, Inner front and Cover camera shifts the view to stay centered and in focus, going wider or closing in depending on how many people are in view. And when there's only one person, it can follow their motion to keep you centered.
Step 1. Open the Camera app > Tap Video
Step 2. Tap ‘Auto framing’ icon on the bottom left.
Note: When more than 2 people are detected, the frame zooms out.
Unique camera experience
You can take photos or record videos using the cover screen while the device is either fully folded or unfolded.
When taking a photo or video, a preview is displayed on the cover screen at the same time. This allows the subjects of the photo/video to see how the result would look in Dual Preview.
① Main screen (Preview1) ② Cover screen (Preview2)
How to use Dual Preview screens
Step 1. On the preview screen, tap 'OFF' icon. The Cover screen will turn on.
Step 2. Tap Camera button to take a photo or tap Record button to record a video.
Note: This feature is only available in some shooting modes.
Take a selfie with the high-resolution rear camera while checking the preview on the Cover screen. Main screen will be automatically turned off when taking a selfie with the rear camera.
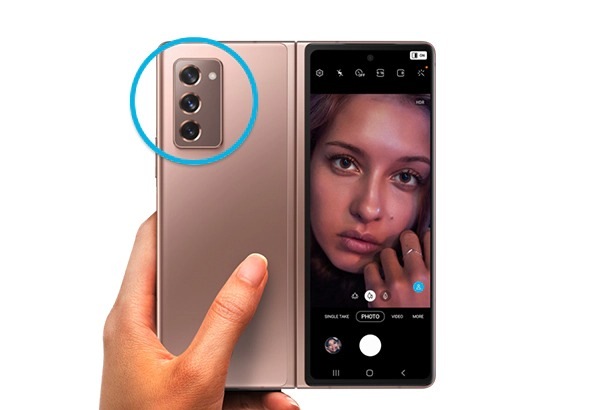
How to take a photo with Rear Cam Selfie
Step 1. Launch the Camera app on the Cover screen.
Step 2. Tap SELFIE.
Step 3. Unfold the device and face the rear camera.
Step 4. Tap Camera button to take a photo or tap Record button to record a video.
Note:
- This feature is only available in some shooting modes.
- Main screen will be turned off when taking a selfie with the rear camera.
Pro Video mode
Pro Video mode enables smooth 120fps video with 120Hz display on the Main Screen as well as cinematic 24fps video. Pro-level control provides Zoom speed control and sound recording options. You can experience high-quality video, and professional video shooting. The Pro Video function allows you to take various shots by adjusting each zoom and sound as if you were a professional.
To activate Pro Video Mode, on the camera shooting modes, tap MORE → PRO VIDEO.
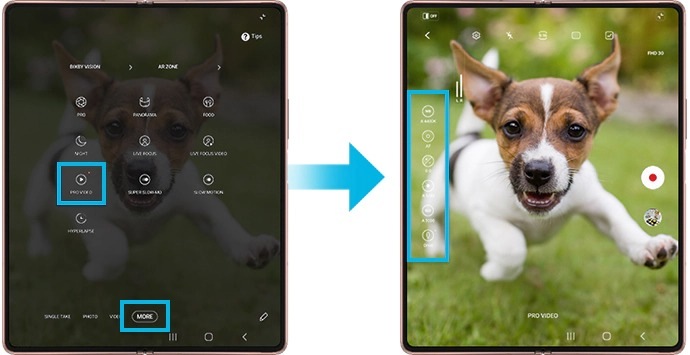
Note: 120fps FHD video recording is only available in Pro Video mode.
Available effects using Advanced Single Take
AI captures min. 2, max. 14 kinds of photos and videos in just one shot. Single Take results are displayed in the Gallery. The S20’s effects are still available, and Colour Picking Portrait and Filter with My Filter are added in the Single Take function.
Note: The format and amount of Single Take results may differ based on original capture. Results may also differ between rear and front camera captures.
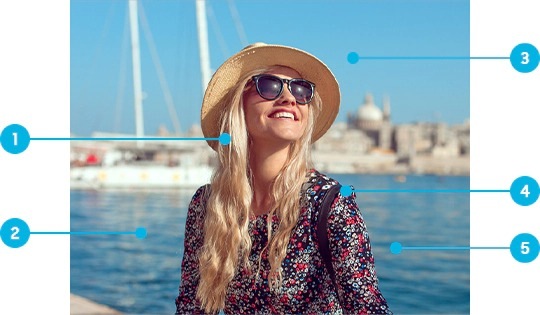
① Facial Expression ② Clarity (Blur/noise)
③ Exposure ④ Color dynamic ⑤ Composition
Note:
- The format and amount of Single Take results may differ based on original capture.
- Single Take results may also differ between rear and front camera captures.
Note: Device screenshots and menu may vary depending on the device model and software version.
Thank you for your feedback!
Please answer all questions.
The coding for Contact US > Call > View more function. And this text is only displayed on the editor page, please do not delet this component from Support Home. Thank you