Using the My Files app to organize and manage files on your Galaxy phone

Galaxy devices have a My Files app to access and manage files such as documents, pictures, videos, audio files, and downloads. You can also move files to a micro SD card or a cloud service if you need more storage space.
My Files app automatically organizes your files into categories, making your documents easy to find. You can find your downloaded files in the Downloads tab.
Step 1. Launch the My Files app.
Step 2. Tap Downloads under Categories. Then you will see the downloaded files.

Note: Not all downloaded content will be available in My Files. Content that has been downloaded within a streaming app that allows listening or viewing offline will normally be available only within that app itself. For example, downloaded video from YouTube can only be found and played through YouTube app.
If your device has an SD card slot and the SD card is in it, you can move your files and folders from internal storage to SD card (sold separately).
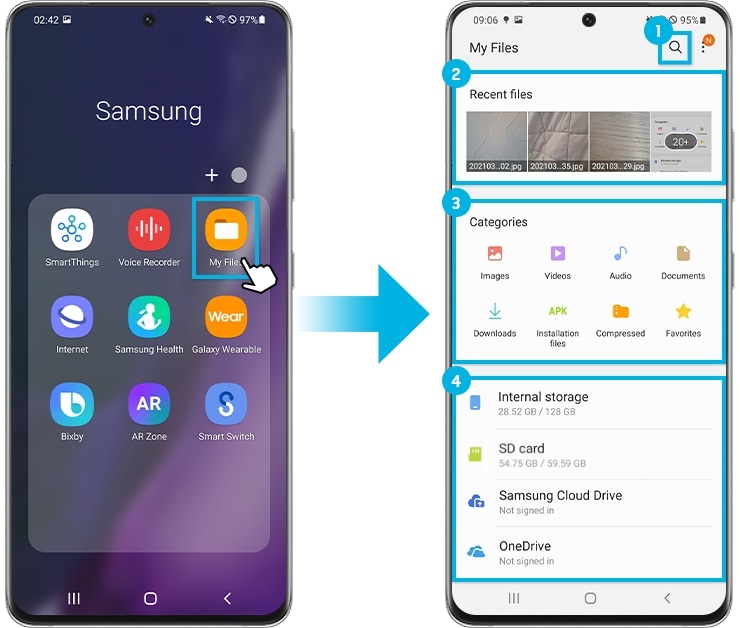
Step 1. Launch the My Files app.
Step 2. Find the files or folders you want to move.
① Search: Tap the icon to search for a file by name.
② Recent files: Most recently used files are displayed here. Tap the last file to see all of your recent files.
③ Categories: Saved files on your device have been organized into categories based on the type of file they are.
④ Storage locations: Depending on how you use your device, your files could be stored in different locations. Tap one of the storage options to see all of the files that are saved to it.
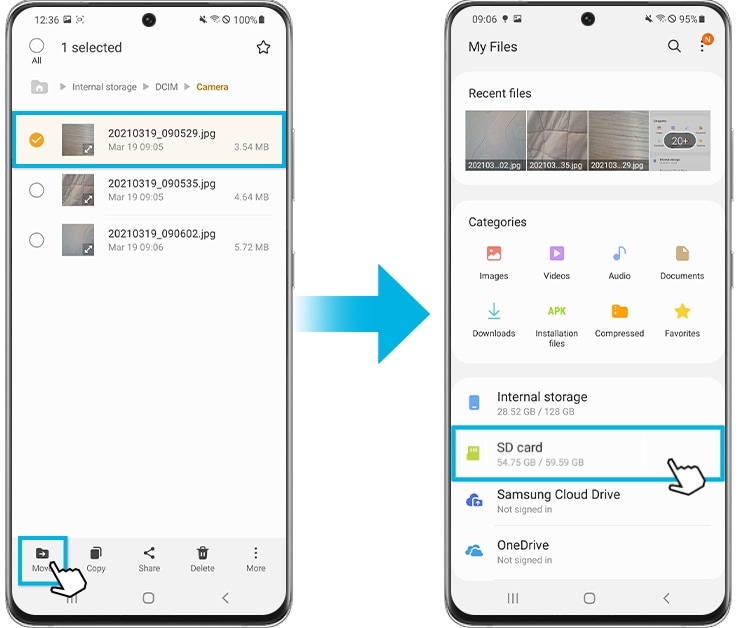
Step 3. Touch and hold to select the files or folders, and then tap Move or Copy.
Step 4. Go back to the main screen of My Files app, and then tap SD card.
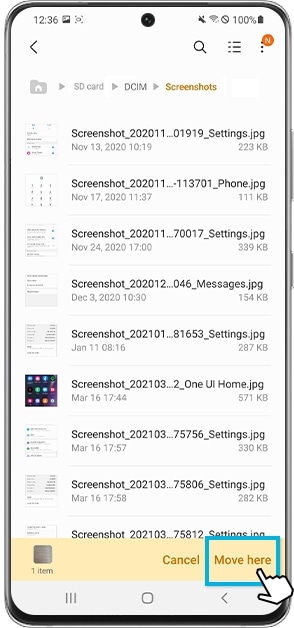
Step 5. In the SD card, navigate to the folder you want to move the files or folders to, and then tap Move here to finish.
Note: No SD card slot is included for Galaxy S21 models.
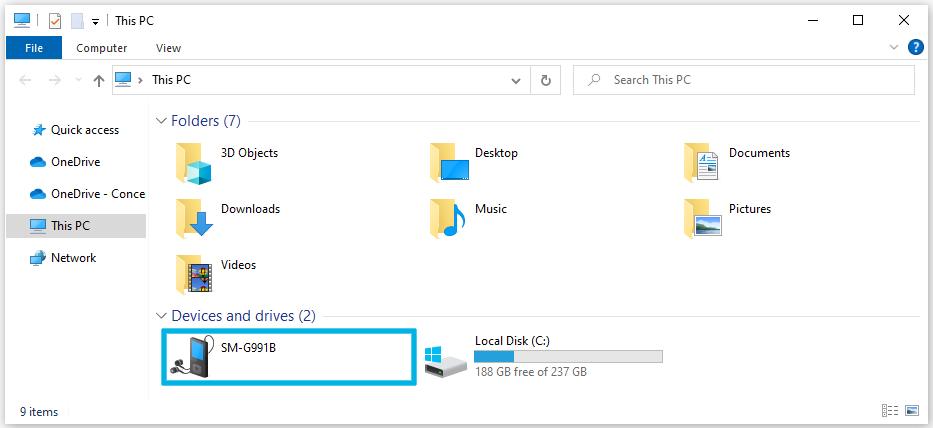
Step 1. Unlock your mobile device, and then connect it to your compatible PC or laptop using a USB cable.
Step 2. If it's the first time you are connecting this device and PC, you may have to give permission for the connection. Tap Allow on the pop-up window of the mobile device.
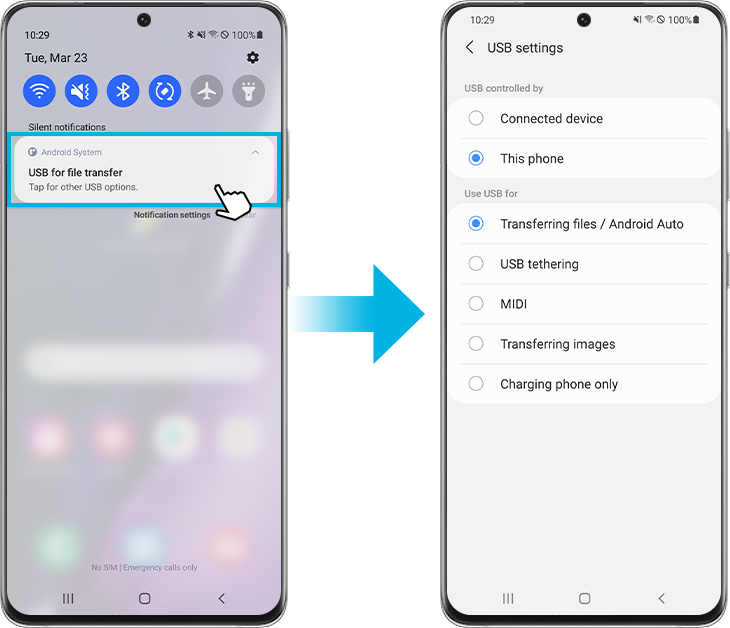
Step 3. By default, the connection will be configured for file transfers. For file transfers, make sure you have selected Transferring files / Android Auto. USB mode settings are available if you tap the USB notification on your device’s Quick panel.
Step 4. You can now use your PC's File Explorer app to browse and copy files.
If your device does not have enough storage or there are files you don’t need, you can delete them from the My Files app.
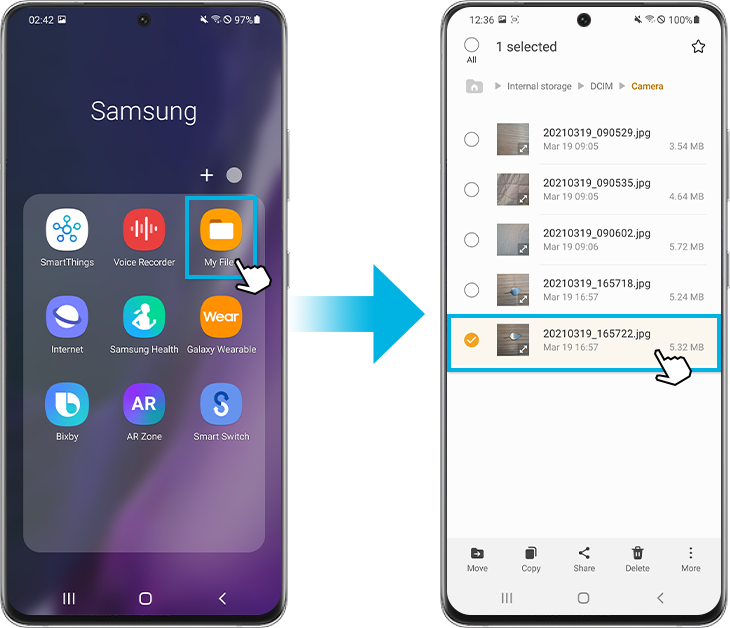
Step 1. Open the My Files app and find the file you want to delete.
Step 2. Touch and hold the file to select.
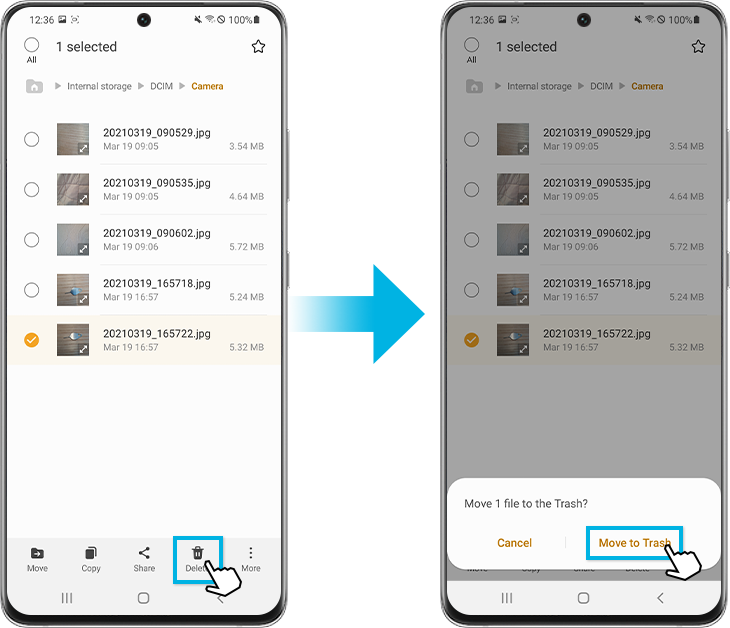
Step 3. Tap Delete.
Step 4. Tap Move to Trash. The file will stay in the Trash for 30 days before being permanently deleted.
Note: Trash feature may not be supported for some device models.
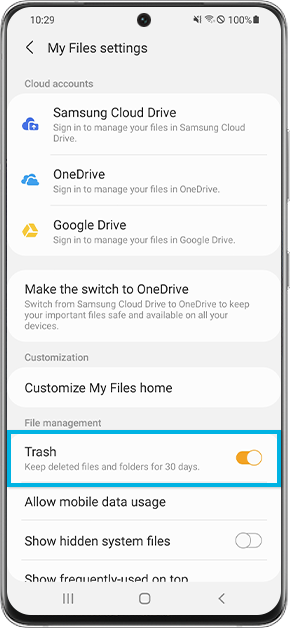
The Trash feature in My Files should be on by default, but you should make sure it's turned on just in case.
Step 1. Open the My Files app and tap More options (the three vertical dots).
Step 2. Select Settings.
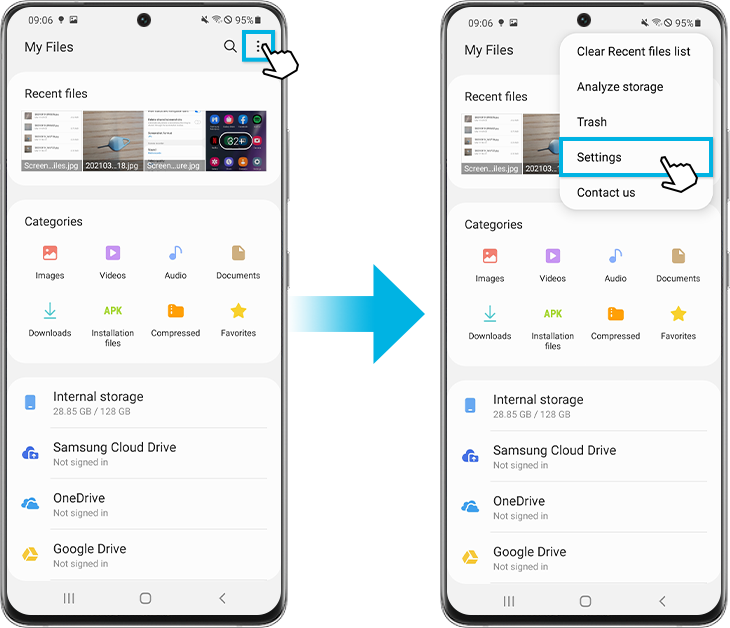
Step 3. Check that the switch next to the Trash is turned on.
_JPG$)
Thank you for your feedback!
Please answer all questions.
The coding for Contact US > Call > View more function. And this text is only displayed on the editor page, please do not delet this component from Support Home. Thank you