Learn how to use your Samsung Galaxy Note 9 S-Pen

The new S Pen is equipped with Bluetooth, so you can use it as a remote control. It’s perfect for selfies, presentations, and more. Beside, the battery charges quickly when you insert your S Pen into your phone, so there’s no rush. Just click the S Pen button, and launch a new experience.

With the new Galaxy Note9’s S Pen remote control function, you can click the S Pen button to launch the camera, choose the right camera mode, and snap a remote selfie. Capture more natural poses, intuitively and conveniently.
• Press and Hold: Launch camera
• Single press: Take a picture
• Double press: Change between front & rear camera
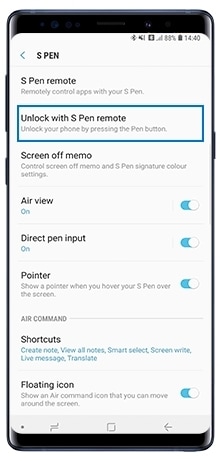
When you set up your S Pen as a remote control, you can customize its functions. For example, if you want to launch your favorite app in an instant, you can opt to press and hold the S Pen button. You can also decide which app functions to control with a single or double press.
Gallery App
• Single Press : Next Item
• Double Press : Previous Item
Media Player
• Single Press : Play / pause
• Double Press : Next Track or Video
Presentation
• Single Press : Next Slide
• Double Press : Previous Slide
Please note: All 3rd party music player apps based on Android OS standard can support the remote control feature
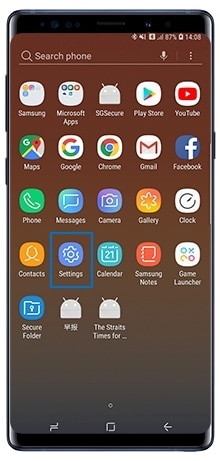
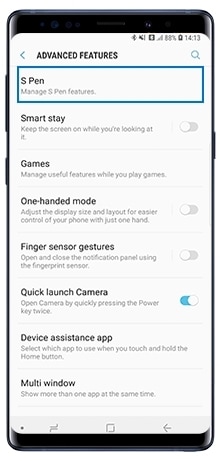
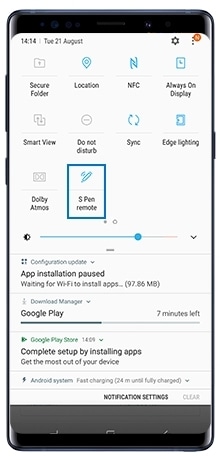
How to activate or connect to S Pen?


Please note:
• You can only connect Samsung-approved S Pens that support Bluetooth Low Energy (BLE)
• Do not detach the S Pen from the device when it is being connected. Doing so will interrupt the process
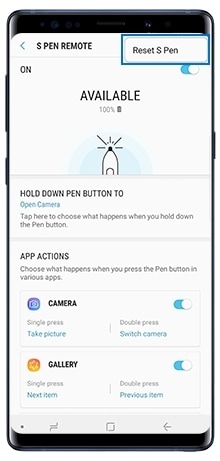
How to reset new S Pen?
In the S Pen Remote screen, select More (3 vertical dots icon on the right) and tap Reset S Pen
If the screen is locked while the S Pen is connected, you can unlock the screen by pressing the S Pen button (Default OFF).


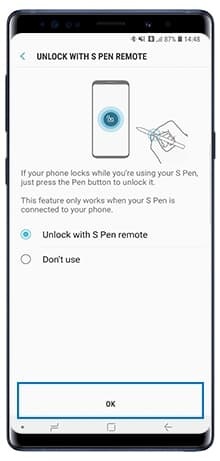
Please note:
• The Unlock with S Pen remote feature is available only when the screen lock method is set
• To use this feature, the S Pen must be connected to your device
The S Pen must be charged before you can control Apps remotely by using the S Pen button. When you insert the S Pen into the slot, charging will automatically start. It take 40 sec to fully charge the S Pen with usage of 30 min. standby time or 200 clicks.
Please note:
• If the back of your device comes into contact with a magnet, the device may not recognize the S Pen and it will fail to charge the S Pen
• Even if the S Pen has been fully discharged, you can use other S Pen features, such as tapping the touchscreen or the Air command features

Live Message has gotten even better, with three new writing styles and the option to customize the background. You can also select a picture, tap Share by Live Message and add a handwritten note before sending it. It gives your messages a personal touch. Show you care in a creative, fun way.
• Three formats to choose from: High-res GIF, standard GIF, MP4
• Share Live Messages directly from Gallery
In Galaxy Note9, screen off memo function has also improved with the ability to write in the same colour as the S Pen's exterior colour. The S Pen's color can be also applied as-is, even if the memo's pinned to the AOD.
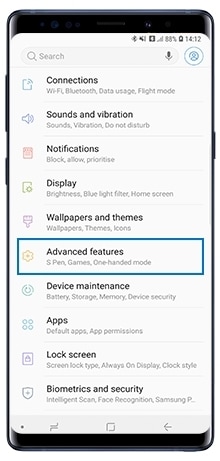
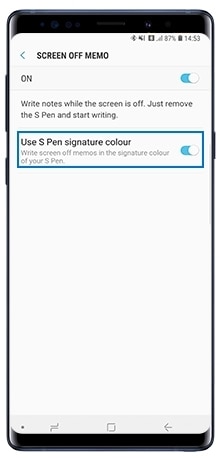
By default, the color is the same as the S Pen's exterior color. However, the user can change it to gray, as supported by Screen off memo, by changing the settings:


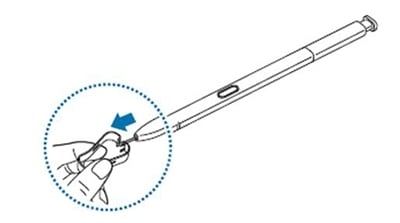
To replace the S Pen nib, follow these steps:

Please note:
• Do not reuse old nibs. Doing so may cause the S Pen to malfunction
• Do not press the nib excessively when inserting the nib into the S Pen
• Do not insert the round end of the nib into the S Pen. Doing so may cause damage to the S Pen or your device
• Do not bend or apply excessive pressure with the S Pen while using it. The S Pen may be damaged or the nib may be deformed
• Do not hard press on the screen with the S Pen. The pen nib may be deformed
• If you use the S Pen at sharp angles on the screen, the device may not recognize the S Pen actions
• If water enters the S Pen slot, gently shake the device to remove the water from the slot before using it
If your S Pen was damaged during use, please contact an authorized Samsung Service Centre with your damaged S Pen. It will be covered by In warranty at authorized Samsung Service centre only.
Type of damages:
• End Tip damage

• Tail Cap damage

• Rear Joint damage


Thank you for your feedback!
Please answer all questions.
Sign Language Support
Samsung Members
![]()
![]()


Repair Services
![]()
![]()


RC01_Static Content