How to configure an E-mail account manually in Samsung Smartphones?
STEP 1. GETTING STARTED
Note: The following illustration is based on Samsung Galaxy Note-II as an example of Jelly bean based Android system. The screen images shown below may vary between different models.
To know the advantages of configuring E-mail account on phone ,click here
a) Tap the "Application" button from the home screen of your phone
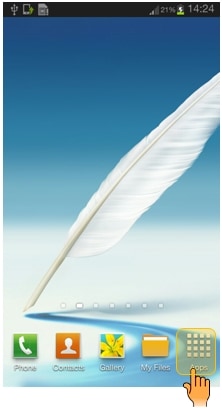
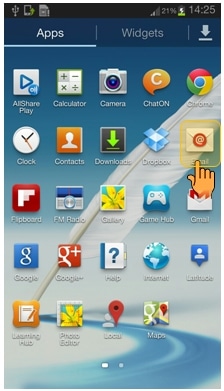
b) Now tap the "E-mail" icon.
STEP 2. SETTING UP MAIL
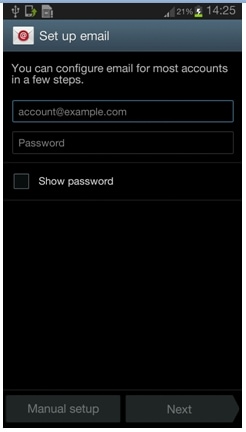
c) If this is your first e-mail account that you want to configure on your phone, then you will be provided with an email setup screen as shown below:
d) Add your email id and password by clicking on the respective boxes.For your convenience we have entered an example as shown below:
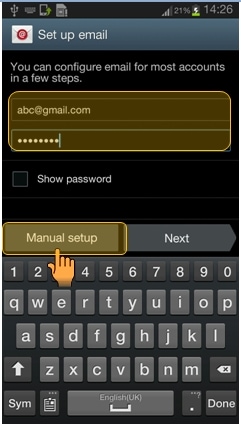
e) Once complete ,tap on "Manual setup".
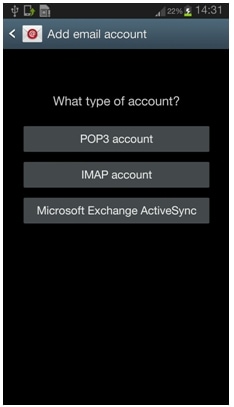
STEP 3. ADDING EMAIL ACCOUNT
e) You will obtain a screen as shown below. You can select any one of the three depending on your account type.
To know about POP3 and IMAP email servers , click here
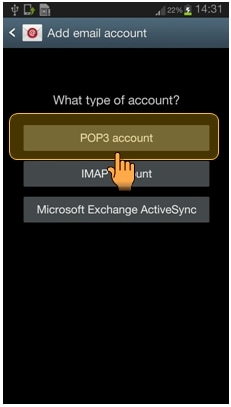
f) Tap on "POP3" Account.
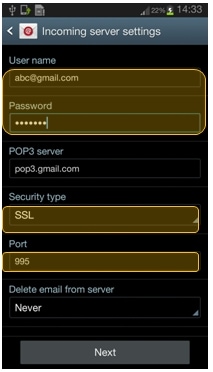
STEP 4. INCOMING SERVER SETTINGS
g) Under 'User name', type full email address. And under 'Password' ,type full email password.
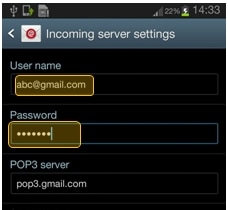
h)Enter the name of the secure email server under 'POP3 server'. For Example(pop3.gmail.com)

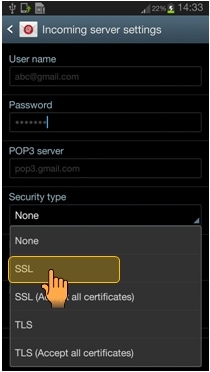
i) Enter the 'Security type' as SSL (always).This will help in making secure connection between your mobile and server.Enter the port number as 995 if not automatically written.
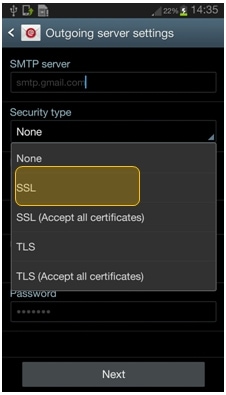
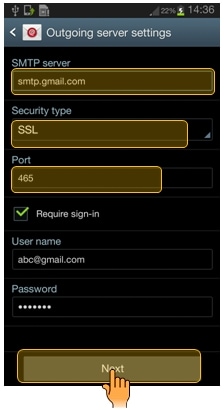
STEP 5. OUTGOING SERVER SETTINGS
j) Enter the secure e-mail server name in 'SMTP server' box.Enter the 'security type' as SSL(always).
k) Now Enter the secure port number.The settings should look like as shown below.Now Tap Next.
STEP 6. COMPLETING THE SETTINGS
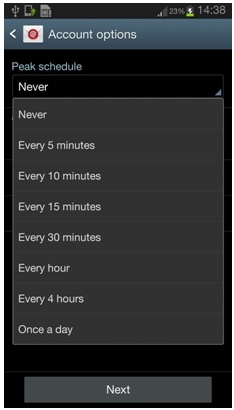
l) Now the device will search for Internet connections.Please make sure that your internet connection is 'On'.
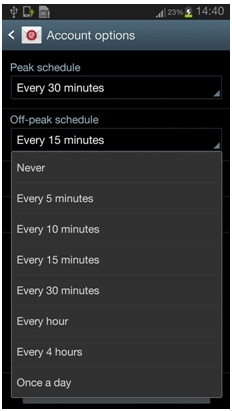
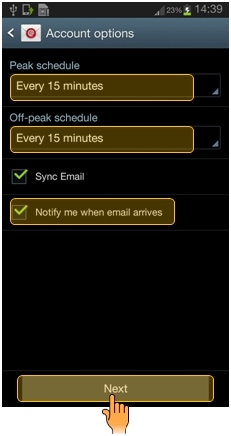
m) Once the Internet is detected, you will get Account options. Select the time frame as "Every 15 minutes" in peak schedule and 'Every 15 minutes' in non-peak schedule.
n) Always check the box 'Notify me when email arrives' .This will make you notified whenever a new mail arrive in your inbox. Click on 'Next'.
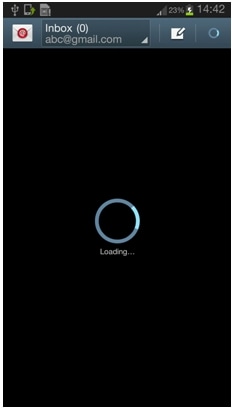
o) This will complete the complete the configuration of your email account in your phone.
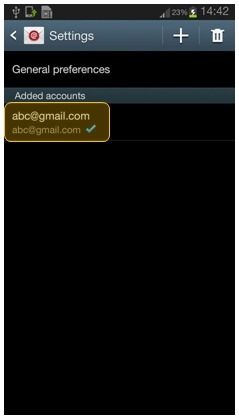
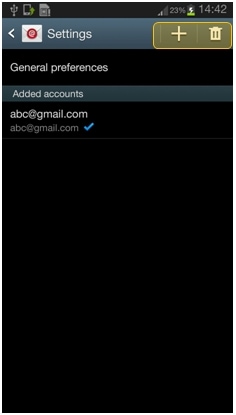
Note: You can also add new account or delete an already existing one by
tapping ![]() , visting
Settings and clicking on options as shown below.
, visting
Settings and clicking on options as shown below.
Thank you for your feedback!
Please answer all questions.
Contact Info
Digital Service Center
![DSC icon image]()
![DSC icon image]()
WhatsApp(English / हिंदी)
![WhatsApp image icon]()
![WhatsApp image icon]()


WhatsApp Us : 1-800-5-726-7864
Available 24 Hours / 7 days


Sign Language
![Sign language image]()
![Sign language image]()
Operation Hour: Monday - Friday 11:00-16:00
24 Hours Phone Support (India)
![image of phone dialer]()
![image of phone dialer]()
1-800-40-726-7864 (1-800-40-SAMSUNG)