Galaxy Buds+ Device Layout & Functions
With a 2-way dynamic speaker system and booster driver, you can now enjoy powerul bass and crisp high notes when listening to the Galaxy Buds+. The below guide explains the basic device layout and functions of the Galaxy Buds+. If you haven't already paired your Galaxy Buds+ to your compatible smartphone, check out our guide Pair a device with the Galaxy Wearable app for step-by-step instructions.
Note: This help content is only applicable to the product purchased from Indian retailers. If you require help for the products purchased from US, Kindly visit Samsung US support section and for other countries, kindly contact your local Samsung Subsidiary.
Device Layout
Earbud

- If foreign materials are place on the touch-sensitive sensor, they may cause the sensor to malfunction. Before wearing the earbuds, clean the sensor first.
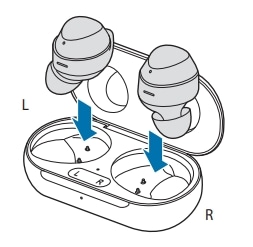
Charging case

- If there is swear or liquid on the charging contacts, corrosion may occur on the Galaxy Buds+. When there is sweat or liquid on the charging contacts or earbuds, clean them before inserting the earbuds on the charging case.
- Close the charging case when you store or charge the earbuds.
Attaching ear tips
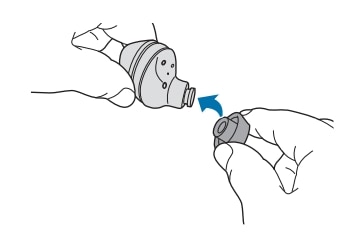
- Do not put the earbuds in your ears without ear tips, doing so may hurt your ears.
- Do not pull the ear tip excessively when you attach or detach it. The ear tip may tear.
Attaching the wing tips

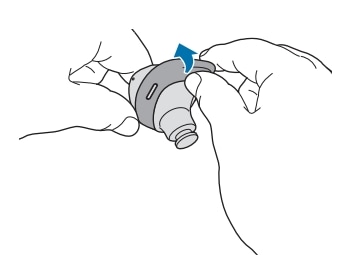
- Do not put the earbuds in your ears without ear tips, doing so may hurt your ears.
- Do not pull the ear tip excessively when you attach or detach it. The ear tip may tear.
- Do not put wing tips on the earbuds the wrong direction. The earbuds will not fit in your ears properly.
Charging the battery
Type-C USB charging
It is recommended to fully charge the battery before using the earbuds for the first time or when they haven't been used for extended periods. The earbuds will power on while charging, when you charge the battery for the first time or when the battery is completely discharged it needs at least 10 minutes to start to work.

- Connecting the USB cable improperly may cause seros damage to the charging case.
The batteries of the earbuds and charging case are charged simultaneously.
Wireless charging
It is recommended to fully charge the battery before using the earbuds for the first time or when they haven't been used for extended periods. The earbuds will power on while charging, when you charge the battery for the first time or when the battery is completely discharged it needs at least 10 minutes to start to work.
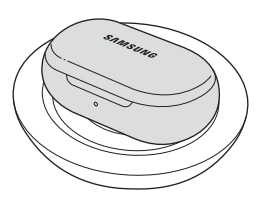
- Do not place the charging case on the wireless charger when conductive materials (metal objects & magnets) are placed bwteen the charging case and the wireless charger.
- Ensure that you use Samsung approved wireless chargers. If you use oher wirless chargers, the battery may not charge properly.
Wireless charging using Wireless PowerShare

The location of the wireless charging coil may vary by device. Adjust the device and the charging case to make a strong connection.
- To charge properly, do not move or use either the device thats functions as a wireless charger or the charging case while charging.
- If you charge the Galaxy Buds+ while charging the the device that functions as a wireless charger, the charging speed may decrease or the Galaxy Buds+ may not charge properly, depending on the charger type.
- If the remaining battery power of the device that functions as a wireless charger drops below a certain level, power sharing will stop.
Understanding the Light Indicators
The battery indicator lights inform you of your earbuds and the charging case's status. The earbud battery indicator light is located inside the charging case and shows you the charging status of the earbuds. The charging case battery indicator light on the front of the charging case indicates the charging status of the case itself.
Earbuds battery indicator light

Charging case battery indicator light

|
Colour |
Status |
|---|---|
|
Continuously red |
Charging |
|
Continuously green |
Fully charged |
|
Flashes red (rapid pace) |
Charging blocked due to abnormal temperatures |
|
Flashes red (flashes after closing the charging case) |
Battery power is low (lower than 10%) |
|
Red (stays on for 5 deconds after closing the charging case) |
|
|
Yellow (stays on for 5 seconds after closing the charging case) |
Battery power is moderate (between 30% and 60%) |
|
Green (stay on for 5 seconds after closing the charging case) |
Battery power is high (more than 60%) |
Thank you for your feedback!
Please answer all questions.
Contact Info
Digital Service Center
![DSC icon image]()
![DSC icon image]()
WhatsApp(English / हिंदी)
![WhatsApp image icon]()
![WhatsApp image icon]()


WhatsApp Us : 1-800-5-726-7864
Available 24 Hours / 7 days


Sign Language
![Sign language image]()
![Sign language image]()
Operation Hour: Monday - Friday 11:00-16:00
24 Hours Phone Support (India)
![image of phone dialer]()
![image of phone dialer]()
1-800-40-726-7864 (1-800-40-SAMSUNG)