How can I connect my air purifier to SmartThings?
Enjoy a more comfortable life with the Samsung SmartThings app. Connect your Samsung air purifier on the SmartThings and manage everything with a simple touch. Control how clean and fresh the air is before you’ve even reached home. You can check the quality of the air at home and change the fan speed through the SmartThings app without the remote control.
Requirements for connection

Check your device operating system
The SmartThings app is available on Android/iOS. Before connecting your smartphone to your Jet Bot, ensure that the following requirements have been met first.
|
Android |
iOS (iPhone) |
|
|---|---|---|
|
OS |
Android 6.0 or more |
iOS 10.0 or more |
|
Device Type |
Smartphone, Tablet |
iPhone 6 or more, iPad |
|
RAM Size |
2 GB or more |
2 GB or more |
|
Support resolution |
1280*720(HD) 1920*1080(FHD) 2560*1440(WQHD) |
1334*750 1920*1080 |
|
App preload criteria |
RAM 2 GB or more Bluetooth profile 4.0 or higher Terminal capable of Wi-Fi mirroring |
RAM 2 GB or more Bluetooth profile 4.0 or higher Terminal capable of Wi-Fi mirroring |
Connect your smartphone to the Wi-Fi network
- On your smartphone: Tap Settings > Connection > Wi-Fi > Select a router to connect to (enter password when setting security).
- When connected properly, the selected router in the current network will show as Connected.
Installing the SmartThings app
- Download and install the SmartThings app from the app store (Google Play Store, Apple app store, or Samsung Galaxy apps).
- To find the app, use the keyword SmartThings.
Set up your Samsung account
- You must sign into a Samsung account before using the SmartThings app.
- To set up a Samsung account, you can follow the directions provided by the SmartThings app.
- Or, if you have a Samsung smartphone, you can add your Samsung account in the setting app of your smartphone. Then, it will automatically sign into your Samsung account.
Note:
- All functions are available under a Wi-Fi connection. Therefore, to use the SmartThings app and functions, connect the mobile to a Wi-Fi router before changing settings.
- Ensure both appliance and smartphone are connected to the same router.
- Router name (SSID) is set in English, symbols, and numbers (special characters are not supported).
- A 2.4 GHz connection is necessary when connecting a Jet Bot to the Wi-Fi network.
- At least 3 Wi-Fi network antennas should be receiving.
Start Connection
Here is the step-by-step guide to connecting your air purifier to the SmartThings app. Choose your smartphone operating system and follow.
Make sure your air purifier and Wi-Fi router are connected to the power before starting. Then, connect your smartphone to a Wi-Fi network, and open the SmartThings app.

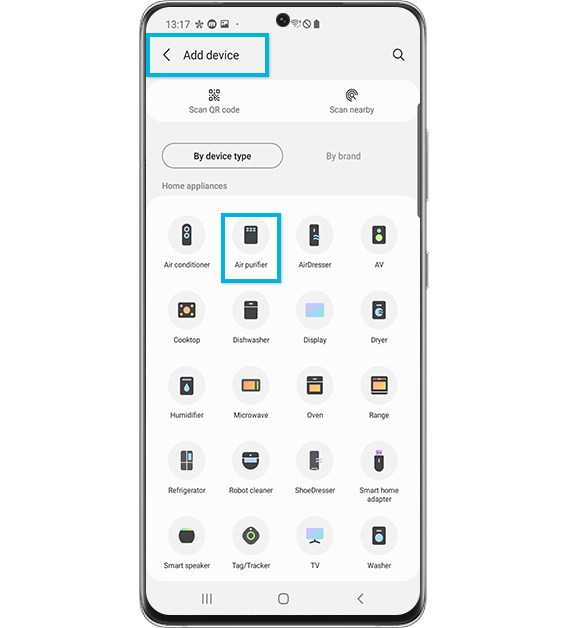
Step 1. Open the SmartThings and tap the + icon. Select Add device and select Air purifier.

Step 2. Select Samsung.
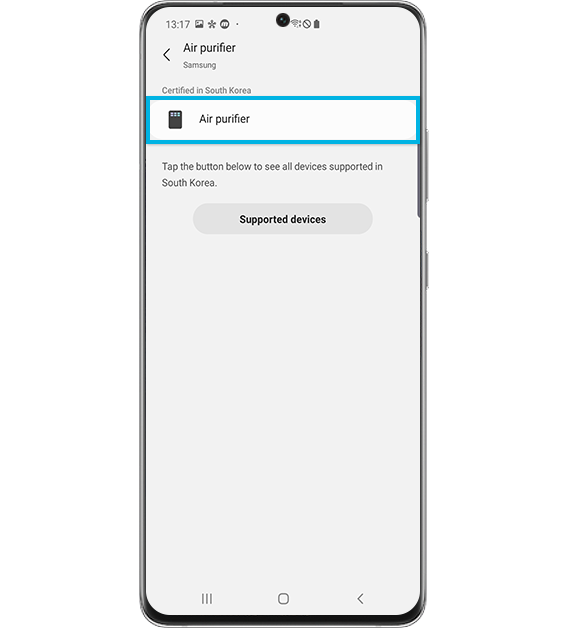
Step 3.Select Air purifier.

Step 4. Select Start.
Next steps depending on the smartphone operating system
Here is the step-by-step guide to connecting your Jet Bot to the SmartThings app. Choose your smartphone operating system and follow.

Step 5. Turn on the air purifier and press and hold the Square button for more than 5 seconds until AP appears. Then your smartphone will be connecting to the air purifier.
Step 6. And then, press and release the POWER button on your air purifier. (Do not press and hold the button.)


Step 7. Select the Wi-Fi network on your air purifier will use.
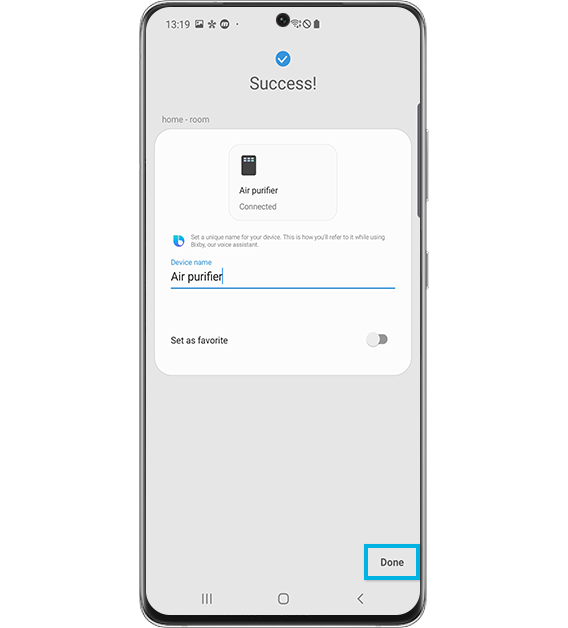
Step 8. After connecting the Wi-Fi network, your air purifier is being registered to your Samsung account. Then set the name of air purifier and tap Done. The registration is Complete.
Note: Jet Bot has a home monitoring function through the camera, so two-step security is provided when connecting to the SmartThings app.

Step 5. Tap Start.
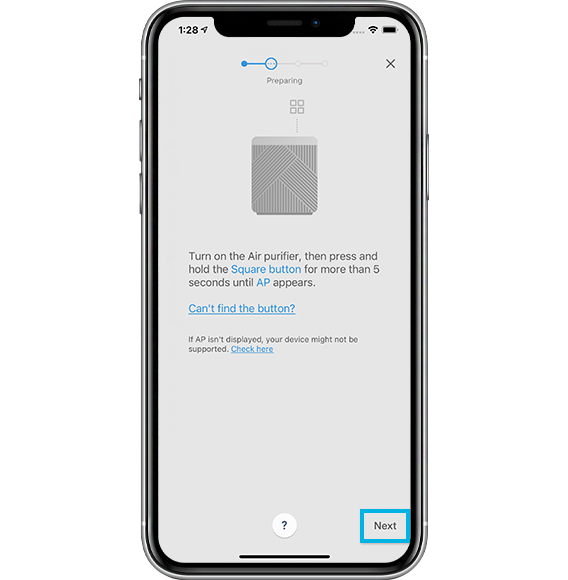
Step 6. Turn on the air purifier and press and hold the Square button for more than 5 seconds until AP appears.

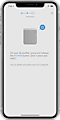
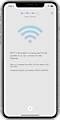
Step 7. There are two-step verification pop-ups will be shown. Tap the OK for continue.
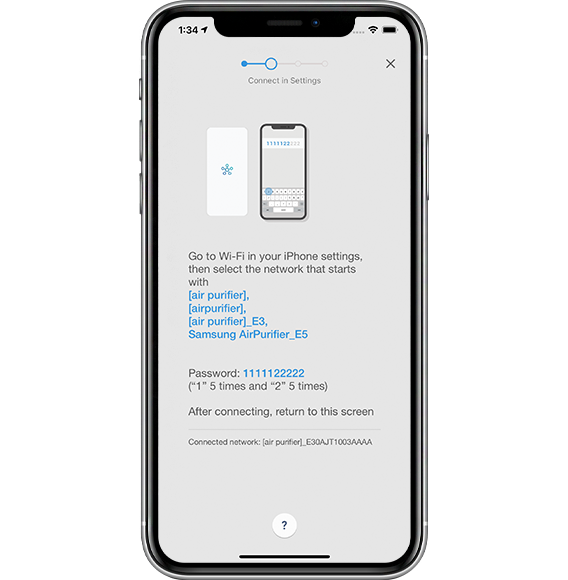
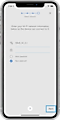
Step 8. Check the screen and move to Settings app to connect to the Wi-Fi.
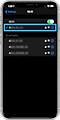

Step 9. Select Wi-Fi
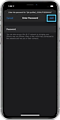

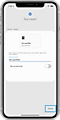
Step 10. Enter the password 1111122222 (five 1s and five 2s) and tap Join.
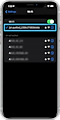

Step 11. Once the device is connected to the Wi-Fi network, move back to the SmartThings app.

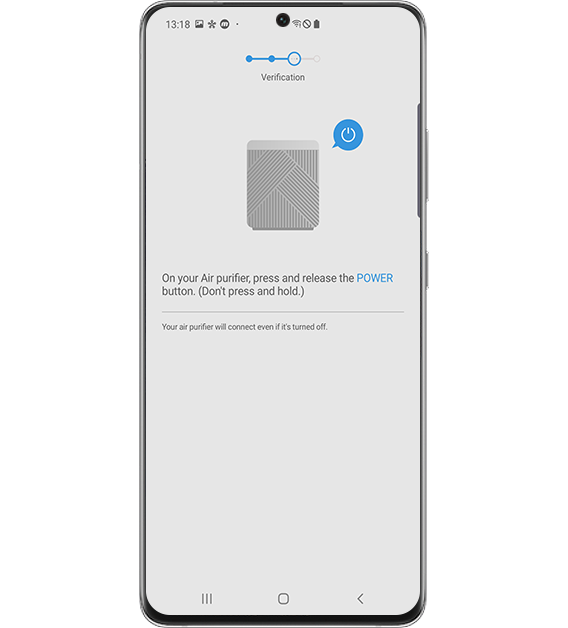
Step 12. Press and release the POWER button on your air purifier. (Do not press and hold the button.)

Step 13. Enter your Wi-Fi information to connect the device to a Wi-Fi network. After, tap Next.

Step 14. The Wi-Fi information will be sent to the air purifier.
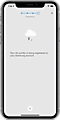

Step 15. After connecting the Wi-Fi network, your air purifier is being registered with your Samsung account.

Step 16. Set the name of the air purifier and tap Done. The registration is Complete.
Note:
- Available technologies and functions may vary depending on the country, service provider, network environment, or product.
- Before you try out the app connection, be sure to check if your device's software and related apps are updated to the latest version.
- Mobile screen images on this content may vary depending on the device model you have.
_JPG$)
Thank you for your feedback!
Please answer all questions.
Contact Info
WhatsApp - 24/7
![WhatsApp]()
![WhatsApp]()


Attention 24 hours a day
LiveChat - 24/7
![LiveChat]()
![LiveChat]()


Attention 24 hours a day