Replacing the Clean Station Dust Bag

Last Update date : 2023-05-07

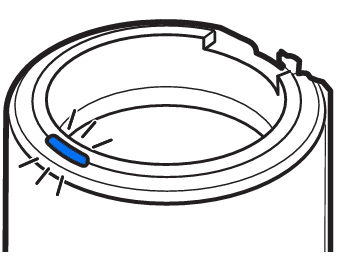
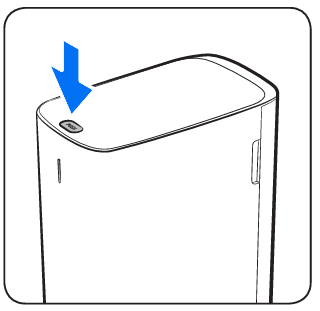
Make sure that you always empty the bag at the right time. So to ensure you don’t forget, a blue LED indication light on the front turns red when it’s full. It means you can quickly and intuitively check the status of the dust bin, while also adding an elegant ambiance to its surroundings.

Its slim design makes it easy to dispose of the dust hygienically and doesn’t take up much space in the room. The Clean Station™ also has a firm, airtight design from the inlet to the exhaust filter that prevents dust from leaking.

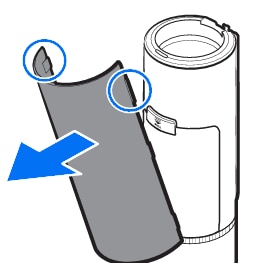
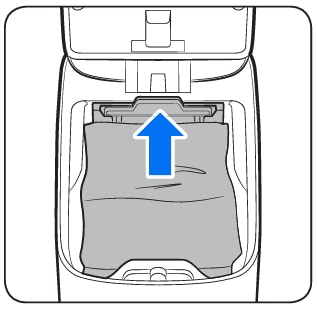
The dust bag is designed to shut the opening hole with a plastic lid when pulling out from the Clean Station™, preventing dust from leaking out when replacing. When the LED notification turns Red, the dust bag needs to be replaced. However, replacing the dust bag every 2 -3 months is recommended to prevent odours.

Follow the steps below for a guide on how to replace the dust bag.

Note: 

  • For a guide on how to properly set up your Clean Station™, please click here.
  • If you would like to learn more about emptying your Clean Station™, please click here.
  • For more information on maintaining your Jet Stick, please click here.
1 Open the front cover of the Clean Station™ by placing your hands in the grooves on both sides and pulling forwards.
Opened front panel of Clean Station.
2 Push down on the release button and pull the cover for the dust bin toward you.
Opened cover for dust bag component.
3 Hold down the plastic casing that holds the dust bag and pull the dust bag out.
Arrows showing directions for pushing casing down and bag out.
4 Insert the new dust bag while holding down the plastic casing and reverse the steps to put the covers back on.
Arrows showing directions for pushing casing down and bag out.
1 Once the START/STOP button turns red, you should replace the dust bag.
Opened front panel of Clean Station.
2 Open the front cover of the Clean Station™ by placing your hands in the top grooves on both sides and pulling forwards.
Opened front panel of Clean Station.
3 Using the PULL tab, take off the second cover.
Opened front panel of Clean Station.
4 Pull out and remove the dust bag.
Opened front panel of Clean Station.
5 Replace with a new dust bag.
Opened front panel of Clean Station.
6 Slide the new dust bag in and put the covers back on.
Opened front panel of Clean Station.
1 Press the [PUSH] button on the top of the Clean Station™ to open its cover.
Opened front panel of Clean Station.
2 Pull the top of the Dust Bag holder gently.
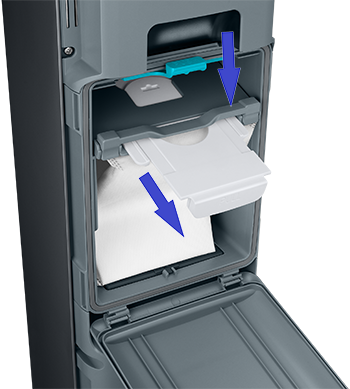
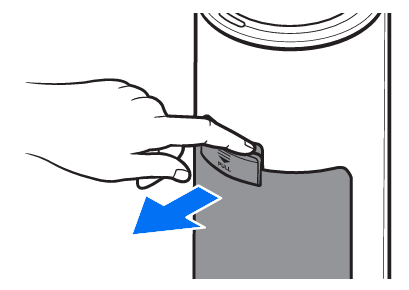
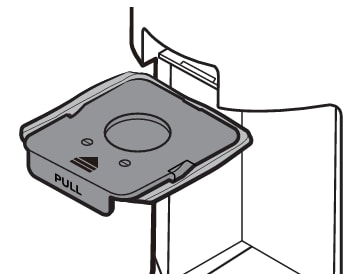
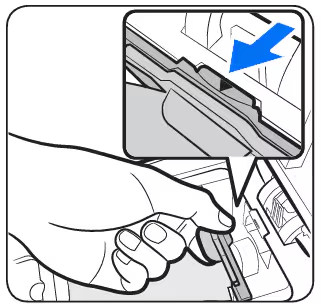
– If you do not pull the Dust Bag holder, you cannot replace the Dust Bag due to the safety device.
Opened front panel of Clean Station.
3 Remove the old Dust Bag and put a new Dust Bag into the Dust Bag holder by fitting into the grooves on the holder.
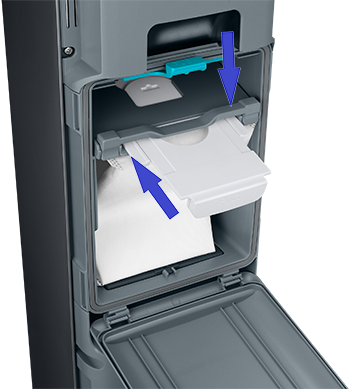
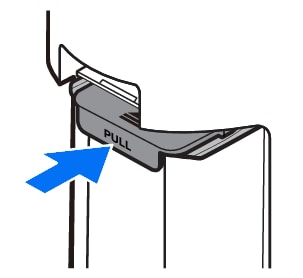
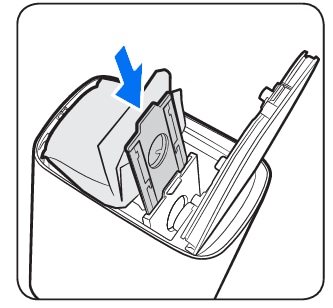
– Push the Dust Bag to the end.
Opened front panel of Clean Station.
4 Push the top of the Dust Bag holder gently until you hear it click. Then, close the Clean Station™'s cover.
Opened front panel of Clean Station.

Note: For further assistance or questions, please Contact us.

Thank you for your feedback!