How to improve the Galaxy Z Flip4 battery life
One of the biggest improvements of the Galaxy Z Flip4 is its battery. With a capacity of 3700 mAh, you can also use some of the features of the phone to extend the battery life.
Galaxy Z Flip4 battery capacity comparison
Galaxy Z Flip4 is equipped with a 3700 mAh battery, which is an improvement of longer usage time than its predecessor, Galaxy Z Flip3, which was equipped with a 3300 mAh battery. Check all the battery differences below:
|
Model |
Z Flip3 |
Z Flip4 |
|---|---|---|
|
Battery capacity (mAh, Typical) |
3300 |
3700 |
|
Audio play time |
Up to 51 hours |
Up to 56 hours |
|
Charging capacity |
15W super-fast charging (Charger sold separately) |
25W super-fast charging (Charger sold separately) |
Please note: Audio play time may vary depending on network environment, usage patterns and other factors.
After purchasing a new product, you usually install and activate many applications and perform various functions to initially set up your new device. At this time, because of the high background battery consumption, you may feel that the battery life of your new phone is shorter than the previous model.
Device optimisation helps to reduce battery consumption by cleaning up apps running in the background and cleaning up abnormal battery usage.
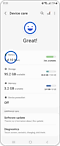
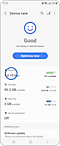
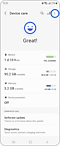
Through Device care:
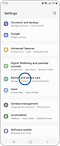

Step 1. Go to device Settings and tap “Battery and device care”.
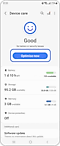

Step 2. Tap “Optimise now”.
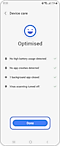

Step 3. Tap “Done”.
Through deep sleeping apps:
Apps that detect battery draining issues can reduce battery drain by putting them to deep sleeping apps via push notifications.
When the device automatically detects an app that consumes a lot of battery in the background and sends a push, check the notification to put the app into a deep sleeping state.

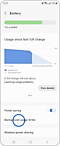
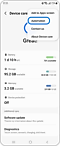
Step 1. Go to Battery and device care and tap “Battery”.
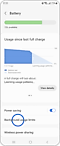

Step 2. Tap “Background usage limits”.
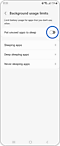

Step 3. Turn on the “Put unused apps to sleep” toggle button.


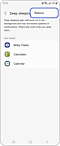
Step 4. Tap “Deep sleeping apps”.
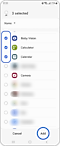

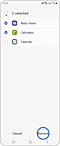
Step 5. Tap the add icon and select the apps you want to put to deep sleep. Then tap “Add”.
Apps that go to deep sleep may not receive updates or other notifications.
Remove apps that you use frequently or need to receive important notifications from the deep sleep state app list.

Step 1. Go to Battery and device care and tap “Battery”.

Step 2. Tap “Background usage limits”.


Step 3. Tap “Deep sleeping apps”.

Step 4. Tap the more options icon and tap “Remove”.

Step 5. Tap “Remove” after selecting an app.
You can automatically set optimisations once per day and clean up apps to free up RAM. When the following feature is activated, the most recently used apps remain open and all background apps are closed.
This only applies when the screen is off or the phone is not in use. You can set a time when the phone is not in use below for more convenient optimisation.

Step 1. Go to Battery and device care and tap the more options icon.

Step 2. Tap “Automation”.
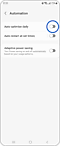

Step 3. Turn the “Auto optimise daily” toggle button on.
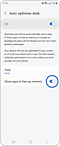

Step 4. Set the time for optimisation. You can also turn on the “Close apps to free up memory” toggle button to get more space in your memory.
If you still experience issues with the battery, try this:
- Turn off Wi-Fi, GPS (location), and Bluetooth functions when not in use.
- Turn off the data synchronisation function for Samsung and Google accounts.
(Settings > Accounts and backup > Manage accounts > Select Samsung/Google account ID > Sync account > (Contacts/Calendar, etc).
- Delete unnecessary files or unused apps.
- Lower the screen brightness.
- If the product generates a lot of heat and the issue persists for a long time, stop using the product for a while. If the temperature does not go down, contact Samsung Support.
Please note: Screen images and names are based on Android 12 (S OS) and are solely for explanation purposes. There may be differences depending on the software version.
Thank you for your feedback!
Please answer all questions.