[2023] How to use the SmartThings app on your Samsung Smart TV
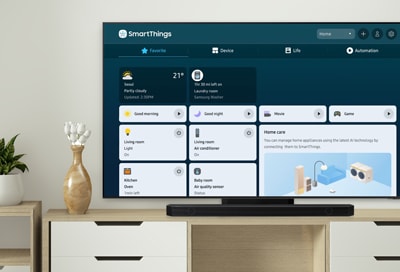
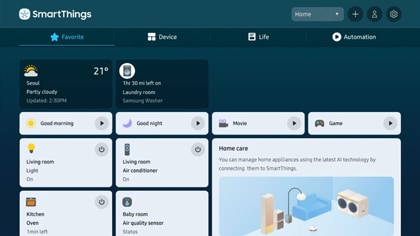
The SmartThings app on your Samsung TV lets you control your home’s smart devices right from your TV’s screen! You’ll be able to view your devices, run automations and scenes, configure sensors, and use the SmartThings Hub feature. Plus, you can control the notification settings for SmartThings so you’re always alerted about device activity.
You can control devices registered to the SmartThings cloud as well as devices connected directly to the TV when using your remote control. Just navigate to your TV’s Home screen, then select Connected Devices, and then select SmartThings.
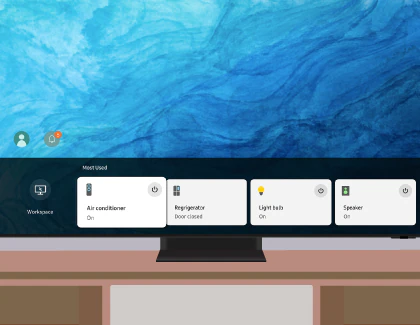
You can also easily control your recently used devices using the Preview menu, without the need to access SmartThings while you are watching.
You can use the following options on SmartThings app:
- SmartThings devices: For details, please visit the SmartThings products page. SmartThings devices can also be controlled from the mobile app.
- Devices for IR remote control: Air conditioner, air purifier, robot vacuum, electric fan, humidifier.
- Bluetooth devices: Speaker, headset, soundbar, keyboard, mouse, gamepad.
- Place: Displays all places connected to the SmartThings app.
- Devices near TV: Displays all the detected devices that can be connected and controlled. You can run the control options after selecting a device. The available options may differ depending on the device.
For more information about managing and controlling your devices, please see our additional SmartThings guide.
Notes:
- This function may not be supported depending on the product or model.
- Functions that can be controlled by the remote control may not work depending on the location of the TV or device. In this case, you can move the location of the device.
- The image on your Samsung Smart TV may differ from the image above depending on the model and geographical area.
The SmartThings app on 2023 Samsung Smart TVs and Samsung smart monitors comes with Map view. This feature will provide the location of your devices using a visual floor plan. This makes it more intuitive, convenient, and fun to create and edit device configurations.

In Map view, you can see devices that are directly connected to the TV, as well as devices that have been automatically connected. If you log in with the same account as your mobile SmartThings app, you can see the devices registered through the app as well as through the TV. After logging in and registering your Smart TV with SmartThings, you can edit the floor plan using the Edit Map view option in the mobile SmartThings app. You can also see useful device information with the Map view feature.
In 2023, you’ll be able to enjoy a home monitoring experience without using separate sensor devices. Instead, you can use the sensors included in certain Samsung products, such as TVs and monitors. There are two types of sensors: light and sound.
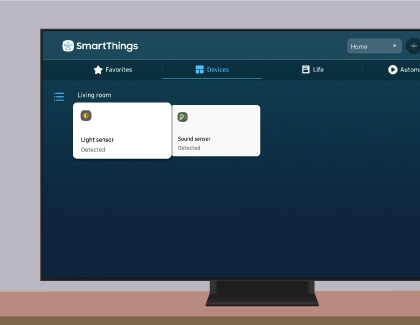
When a sensor is activated, you’ll see the sensor device card on the SmartThings Device tab on your TV. Then, when you are creating a scene or routine in the mobile SmartThings app or in the SmartThings Home Monitor service, you will be able to include your Samsung TV or monitor. In other words, you will not need to purchase or use a separate IoT sensor device.
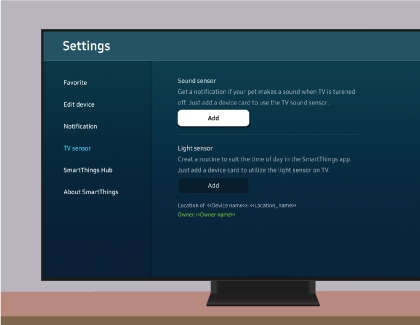
Note: Each sensor can be activated with user consent. Certain sensors may not be supported depending on the model.
Set notifications for registered devices
You can receive notifications for devices registered in SmartThings through your TV. Use the following steps to set up notifications:
Note: Notifications may not be supported depending on the device model and type registered.
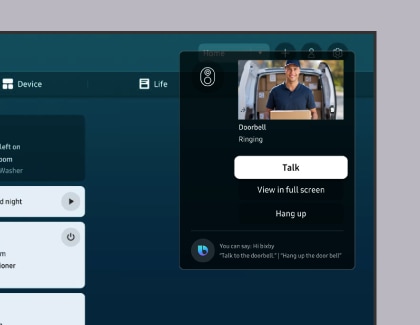
Set notifications and use a doorbell on your Smart TV
Note: This function is only supported on Samsung Smart TVs and smart monitors produced in 2022 or later. (To use the function in TVs produced in 2021, a software update may be required.) This function requires a SmartThings compatible doorbell. Only Ring doorbells (3 or Pro) support the two-way talk function. This list will include additional doorbells in the future.
The SmartThings app on your TV or smart monitor provides a notification setting function, as well as a two-way doorbell talk function. From SmartThings settings, you can choose which devices to receive notifications from, so that the notifications won’t interfere with your viewing experience. With a Smart Doorbell, you can check the camera from your TV and see who is at the front door. You can even talk to them without pausing the TV. Please use the following steps to enable notifications:
Note: You can select Motion as well, but this will display a notification any time there is movement around the doorbell, even if it is not pressed.
Note: If you are having trouble with your Samsung Smart TV, you can check for available software updates, as these may contain a fix for your issue. Device screenshots and menus may vary depending on the model and software version.
Thank you for your feedback!
Please answer all questions.