How to manage the notifications and permissions of apps through settings on a galaxy phone
How to
Your Galaxy phone is optimized for using and configuring apps. If necessary, you can set access permissions for all kinds of apps at once, select and configure notifications for apps individually. To manage notifications and access permissions through settings, see the guide below.


If app notifications are disabled, you will not receive notifications for incoming messages from the app. Also, if you want to remove unwanted notifications separately, follow the steps below.
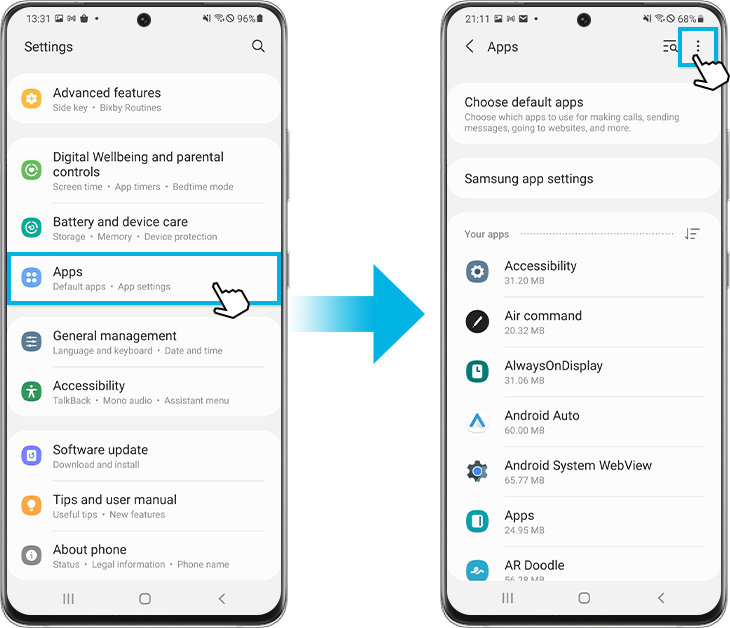
Step 1. Go to Settings and then select the Applications menu.
Step 2. Choose an application that you want to manage from the list of applications.

Note: To find the apps you want, search using the magnifying glass or the search icon in the upper right.
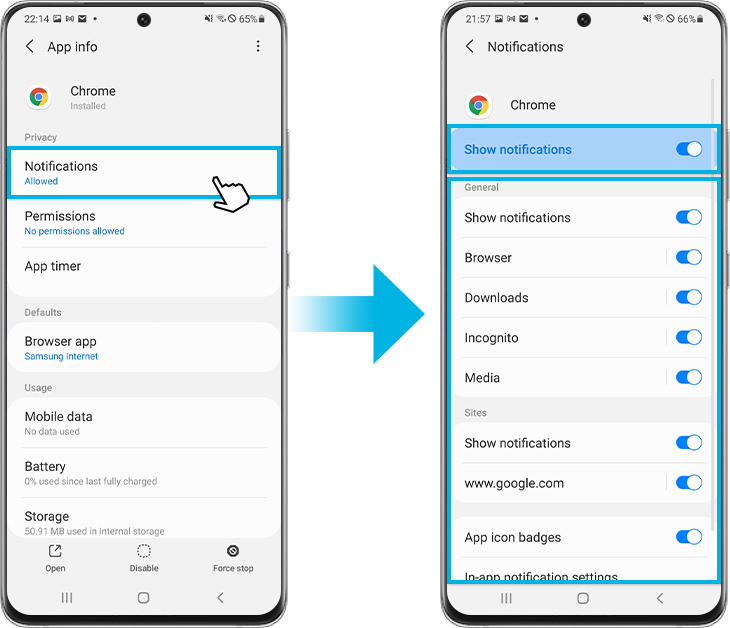
Step 3. Touch the notifications.
Step 4. You can turn notifications on or off at the same time by tapping the Show notifications switch, and you can also select the functions for which you want to receive notifications, such as browsers, social networks, games, etc.
Note: The characteristics of the notification settings may differ from each application.
While installing or using the app, you may be asked to give your permission to access various features. For example, email may request permission to view your contacts so that you can import your friends' contact information. If you have given permission by accident, you can always change the settings. Access permissions can be managed through the permission manager at the same time.
Step 1. Go to Settings and then select the Applications menu.
Step 2. Tap the more options icon (three vertical dots).
Step 3. Choose the permission manager.
Step 4. You can check the list of permissions. Select the role for which you want to verify permissions.

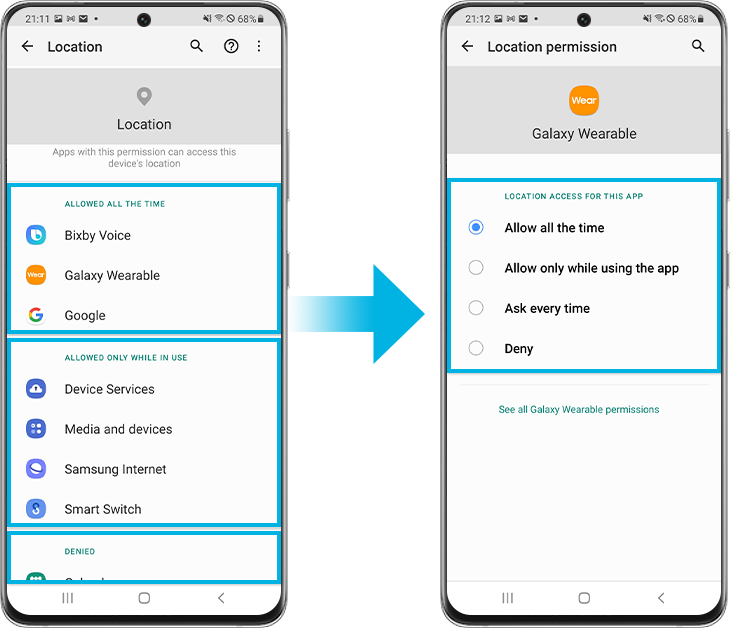
Step 5. If you want to change the access of certain applications, select the one you want to allow or deny. For example, the Galaxy Wearable app that has access to the Location feature.
Step 6. You can choose one of the following:
Allow all the time: the application accesses this data, even when it is not in use.
- Allow only while using the app
- Ask when you want
- Deny
Note: Denying certain permissions can affect the operation of some applications. In this case, a notification may appear.
You can also access information about the permissions of an individual application. It starts with the Applications settings menu.
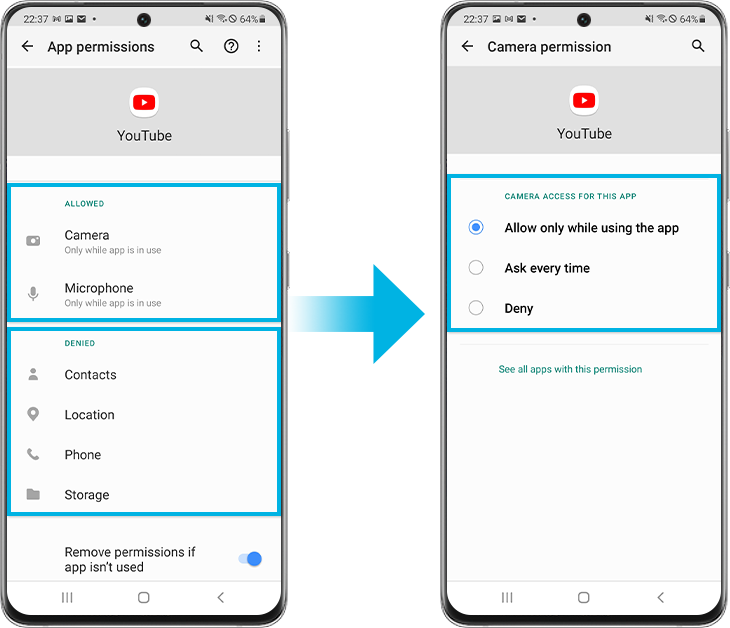
Step 1. Choose an application that you want to manage from the list of all installed applications, such as YouTube, social networks, etc.
Step 2. Tap on Permissions.
Step 3. You can check the details of the application permissions. Select one of the permissions to change to allow or deny it.
Note: Screen shots and device menus may vary depending on device model and software version.
If you have difficulties with your Samsung mobile phones, tablets or portable devices, you can send us a question in the Samsung Members application.
This allows us to take a closer look at what is happening. The data is kept anonymous and is only kept during the investigation. Learn more about submitting a bug report via "How to use the Samsung Members app"
Thank you for your feedback!
Please answer all questions.
Contact Info
WhatsApp
![WhatsApp]()
![WhatsApp]()


Monday to Sunday
8:00 a.m. a 12:00 a.m.
LiveChat
![LiveChat]()
![LiveChat]()


Monday to Sunday
8:00 a.m. a 12:00 a.m.