Setting Up and Maintaining the Slim Ice Maker of your Single Door Freezer
![]() Please Note: The information on this page is for Australian products only. Models, sequences, error codes or settings will vary depending on location and/or where the product had been purchased. To be redirected to your local support page please click here.
Please Note: The information on this page is for Australian products only. Models, sequences, error codes or settings will vary depending on location and/or where the product had been purchased. To be redirected to your local support page please click here.
On select Samsung Single Door Freezers*, there is a built-in slim ice maker in the door that doesn't take up much space. This frees up room on the shelves, giving you more storage space. The slim ice maker can store 5x the amount of ice it can make each tray, so you won't ever be short of ice either.
Please see the quick guide below on the layout of your slim ice maker and how to set it up.
Slim Ice Maker Layout

Note: If you do not intend to make ice, remove the Slim Ice Maker to secure more room for storage. In this case, you can use the ice bucket (03) as a multipurpose storage bin.
Step 1. Pull up the handle of the water bin to open and fill the bin with water up to the max line. Gently close the bin so that water does not drop or leak.
Note:
- Do not exceed the max line. Excessive water causes the ice to jam and not dispense well.
- Use only potable water. Other liquids, such as green tea or milk may not dispense well.
- Gently close the water bin. Otherwise, the water may drop or leak.
- If you encounter a water leak, open the water bin and check if the water bin’s passage to the ice template is frozen. If this is the case, pour lukewarm water into the water bin up to the max line. Let the passage melt.
- It is recommended to clean the water bin’s passage to the ice template on a regular basis because the passage is likely to freeze.
Step 2. Check if the ice freezes completely. Only when the ice has frozen completely, pull up the ice maker lever to rotate the ice tray. This will dispense the ice to the ice bucket.
Note:
- Do not pull up the lever until the ice has frozen completely. Half-frozen ice may jam and damage the ice bucket.
- Do not tilt without lifting the ice bucket. The ice bucket may break.
- Do not pour water directly into the ice bucket for ice making. The ice bucket may break.
- Do not leave the freezer door open. The ice in the ice bucket melts and jams.
- In case of a power failure, make sure to empty the ice bucket before making ice.
- Use only potable water.
- The ice cubes may not dispense at once, depending on the ice state. In this case, try pulling the lever several times.
- If the ice does not dispense because an excessive amount of water was filled, remove the ice template and empty. If this issue continues, uninstall the Slim Ice Maker unit and empty.
Step 3. To dispense ice, slightly lift up the ice bucket and tilt to the front.
Removing the parts:
Note:
- When cleaning the component parts of the Slim Ice Maker such as the water bin, ice bucket, and ice tray, make sure they are completely dry after cleaning.
- When cleaning the Slim Ice Maker unit, make sure to completely dry the inner and outer parts of the unit after cleaning. Incomplete dryness may cause the ice maker lever to fail. In this case, dry the Slim Ice Maker completely for 2-3 days. Then, try again.
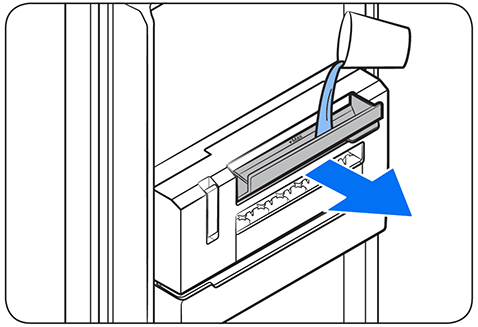
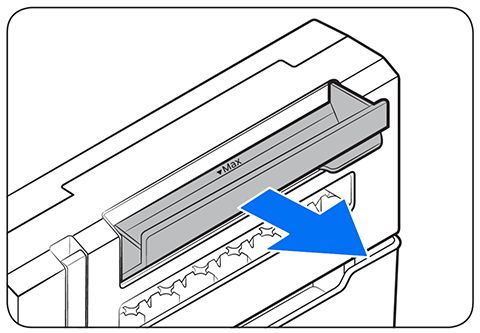
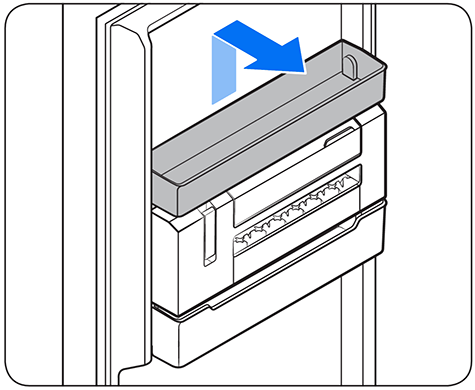
WATER BIN
Fully open the water bin, and then pull out.
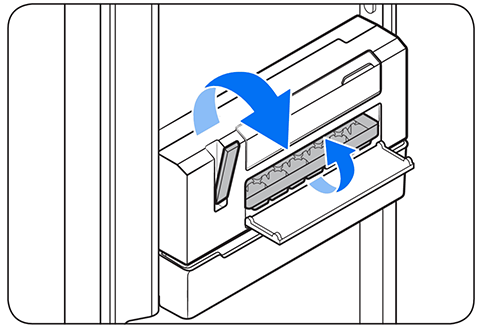
ICE TRAY
Step 1. Open the ice tray cover to reveal the ice tray.
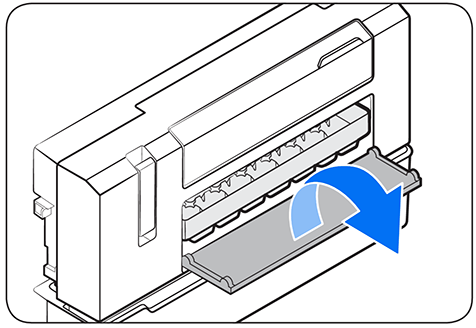
Step 2. Slightly pull out the left side of the ice tray, and then pull out the other side to remove.
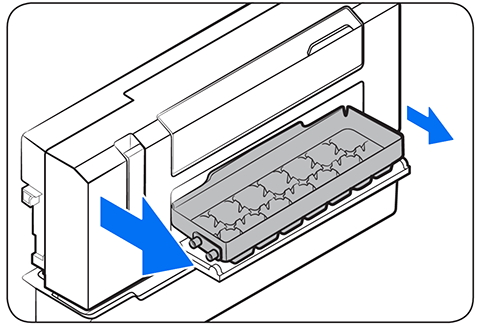
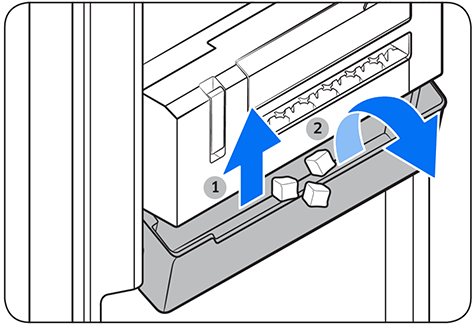
SLIM ICE MAKER
Step 1. Remove the multipurpose bin first, which is immediately above the Slim Ice Maker.
Step 2. While holding the marked area on either side of the Slim Ice Maker unit with both hands, lift up the unit and pull out to the front.
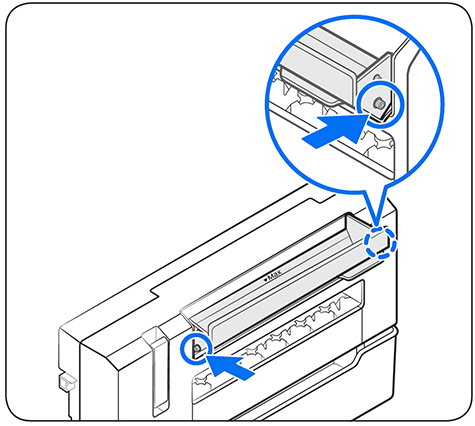
To reinsert the parts:
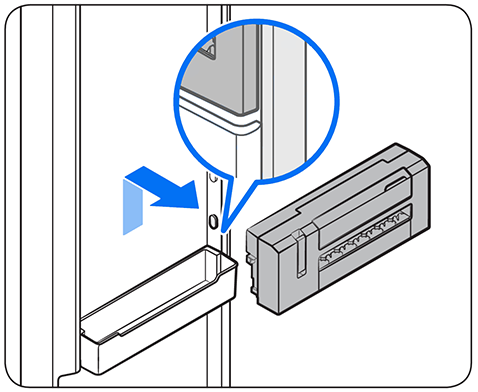
WATER BIN
Fit either side of the water bin into the corresponding hook on the water bin housing. Make sure to fit until you hear a clicking sound.
For further assistance, please contact our Chat Support or technical experts on 1300 362 603. To find your Samsung product's User Manual, head to Manuals & Downloads.
Thank you for your feedback!
Please answer all questions.
Samsung Online Store
![online store]()
![online store]()
Join Members Community
![samsung members]()
![samsung members]()
Warranty Information
![Warranty Information]()
![Warranty Information]()
Apps & Services Customer Support
Samsung Rewards : 1300 362 603
Find My Mobile : 1800 216 454
Galaxy Store : 1800 216 454
Galaxy Themes : 1800 216 454
Samsung Account : 1800 216 454