Heat Pump Smart Dryer Panel Layout and Drying Cycles
![]() Please Note: The information on this page is for Australian products only. Models, sequences, error codes or settings will vary depending on location and/or where the product had been purchased. To be redirected to your local support page please click here.
Please Note: The information on this page is for Australian products only. Models, sequences, error codes or settings will vary depending on location and/or where the product had been purchased. To be redirected to your local support page please click here.
Heat Pump technology offers a gentle and energy-efficient way to dry clothes. It also optimises your drying performance and helps you achieve the best results by using OptimalDry™.
Before using all of the great features on your Heat Pump Smart Dryer, you will first need to understand the layout, control panel, and drying cycles of your dryer.
NOTE: Please keep in mind, designs and functions can vary. Please refer to your user manual to check details specific to your oven model.
Heat Pump Smart Dryer Layout
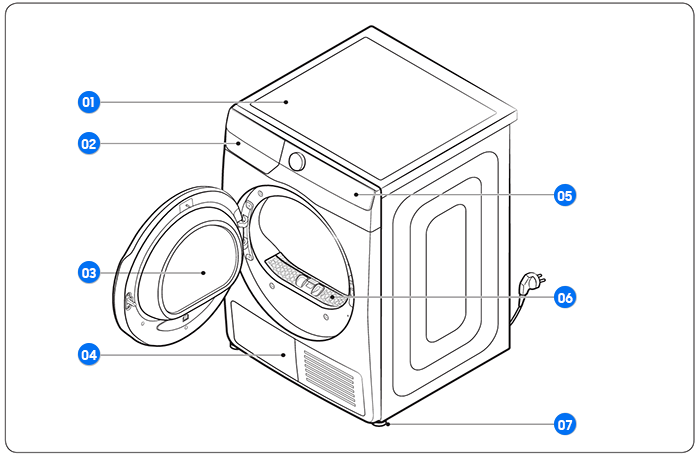
01. Top Cover
02. Water Tank
03. Door
04. Heat Exchanger
05. Control Panel
06. Lint Filter
07. Levelling Leg
Control Panel
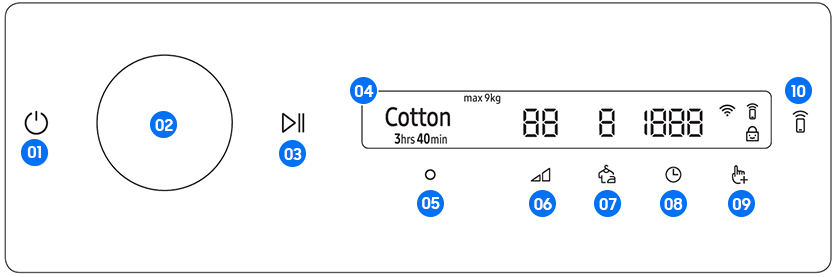
01. Power
02. Navigation Dial
03. Start/Pause
04. Display
05. OK (to confirm a selection)
06. Dry Level
07. Wrinkle Prevent
08. Time (to select cycle time for Time Dry, Warm Air, or Cool Air)
09. Additional Functions
10. Smart Control
*On BESPOKE models, there is an added Quick Drive feature. With this feature, you can reduce the overall drying time of the selected course. Quick Drive may be available for Cotton and Synthetics. Tap to activate or deactivate.
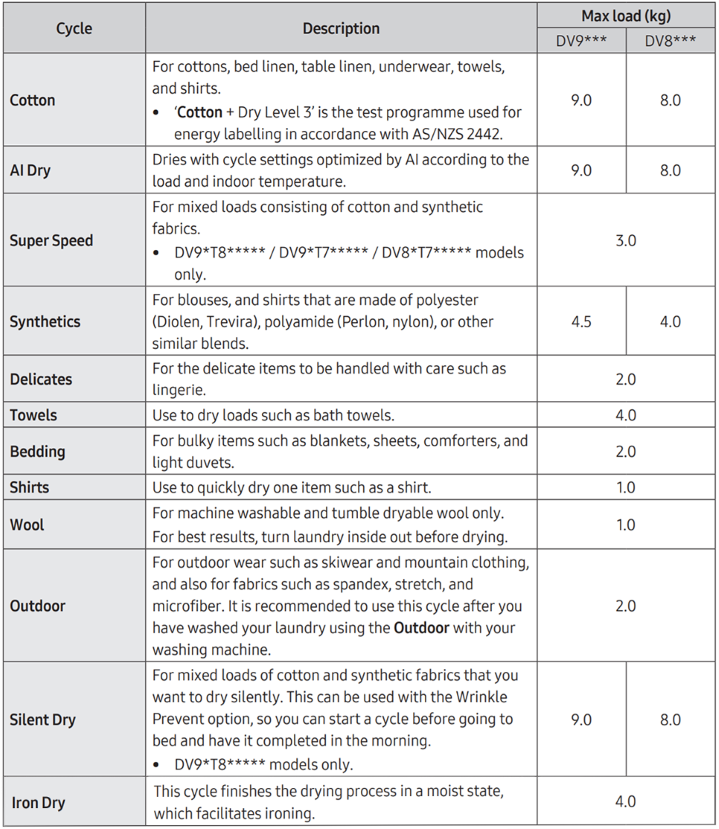
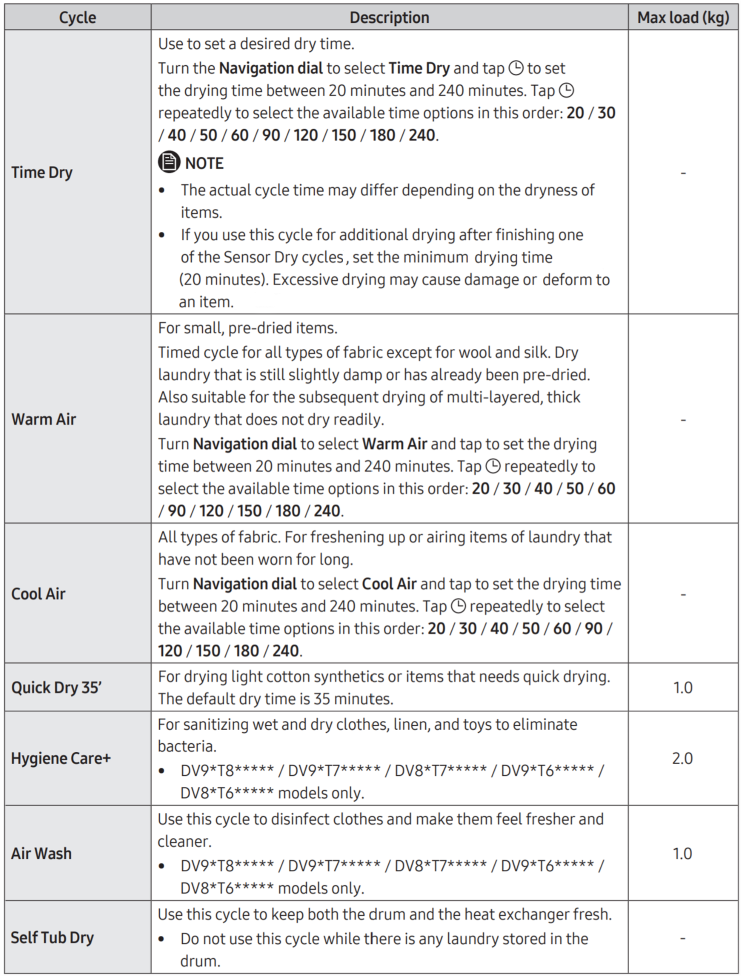
Dry Cycles
For further assistance, please contact our Chat Support or technical experts on 1300 362 603. To find your Samsung product's User Manual, head to Manuals & Downloads.
Thank you for your feedback!
Please answer all questions.
Samsung Online Store
![online store]()
![online store]()
Join Members Community
![samsung members]()
![samsung members]()
Warranty Information
![Warranty Information]()
![Warranty Information]()
Apps & Services Customer Support
Samsung Rewards : 1300 362 603
Find My Mobile : 1800 216 454
Galaxy Store : 1800 216 454
Galaxy Themes : 1800 216 454
Samsung Account : 1800 216 454