Galaxy A12: Device Layout & Functions
Expand your view to the 6.5-inch Infinity-V Display of Galaxy A12 and see what you've been missing. Thanks to HD+ technology, your everyday content looks sharp, crisp and clear.
**Measured diagonally, the screen size is 6.5" in the full rectangle and 6.4" accounting for the rounded corners. The actual viewable area is less due to the rounded corners and the camera cut-out.
Device Layout

If you would like to review the Galaxy A12 User Manual please click here. To view the Galaxy A12 device Specs click here.
Charging the battery
It is recommended to charge the battery before using it for the first time or when it has been unused for extended periods. Please ensure you charge your device only with Samsung approved chargers and cables. Unapproved chargers and cables could damage your device. The Galaxy A12 has an in-built fast charging feature, you can easily enable this by heading into your Settings > Device Care > Battery > Charging > Toggle on Fast charging.
Please Note: The Galaxy A12 can not be wirelessly charged. If you are trying to enable Fast Charging function within the Device Care settings ensure that you are not cable charging the device prior to activating.

Inserting the SIM card
For Indian variant Galaxy devices, the Galaxy A12 only comes in a single nano-sim. Follow the below instructions to learn how to correctly insert and remove your nano-SIM card.

Inserting the SIM card
With 64GB internal and up to 1TB external storage, you'll have plenty of room to stream, download and post. Please note that some SD cards may not be compatible with your device depending on the memory card manufacturer and type.

Powering the Device On / Off

There are a few different ways of powering your Galaxy A12 off. Either through your Quick Panel or using the hard keys." Click one of the drop-down menus below to learn all the different ways of powering down your Galaxy A12.

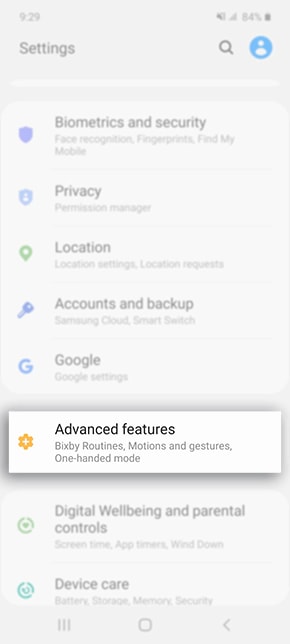
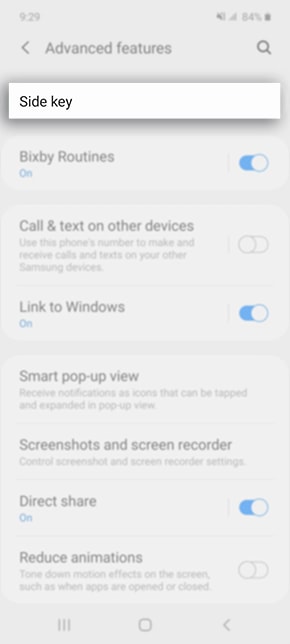
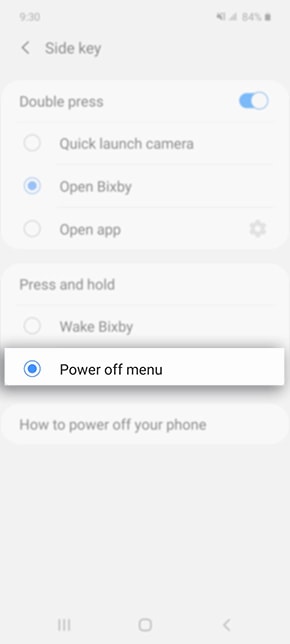
Powering off via Side Key
On Galaxy A12, you can remap the power off menu by pressing and holding the Side key unlike previous devices. If you are pressing the side key and noticing an application is being launched instead, you may need to customise your Side key functions.
Using the Side & Volume Keys
Thank you for your feedback!
Please answer all questions.
Contact Info
Digital Service Center
![DSC icon image]()
![DSC icon image]()
Scan to access
WhatsApp
![WhatsApp image icon]()
![WhatsApp image icon]()


Languages offered : English/ हिन्दी/ Indian Regional Languages
Available 24 Hours / 7 days
WhatsApp@ 1-800-5-726-7864

Scan to access
Remote Service
![Image of RM icon]()
![Image of RM icon]()
CEO Office
![Image of CEO icon]()
![Image of CEO icon]()
Phone Support (India)
![image of phone dialer]()
![image of phone dialer]()
Phone Support (Bangladesh, Sri Lanka, Nepal)
![Image of caller icon]()
![Image of caller icon]()
RC01_Static Content : This text is only displayed on the editor page