What should I do when my laundry is not drying well?
If you put an excessive amount of laundry in, it will not dry evenly. It will also cause severe wrinkles. On the other hand, damp laundry may happen because of lint on the filter or water tank leakage. We recommend that you check your laundry and appliance to ensure optimal laundry efficiency.
Check the laundry
When using your machine from washing to dry, it is good to put the laundry below the product-specific drying capacity. For effective drying, it is recommended to dry 50 to 60 percent of the maximum capacity. In addition, it is always recommended to use a standard drying course, which weighs the laundry and uses it to determine the recommended drying time itself.
- Put one wash load in the dryer at a time.
- To improve drying efficiency for one or two items, add a dry towel to the load.
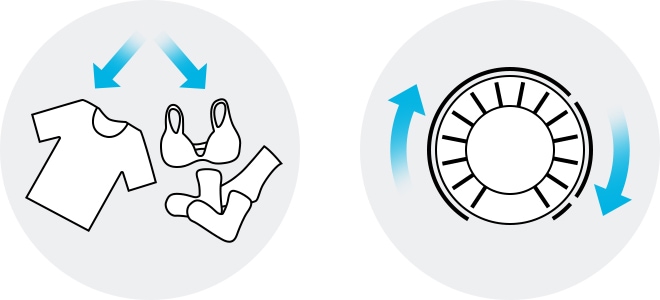
- For best results, untangle the laundry items before inserting them into the dryer. Tangled items may degrade the drying efficiency or cause the door to open.
Note:
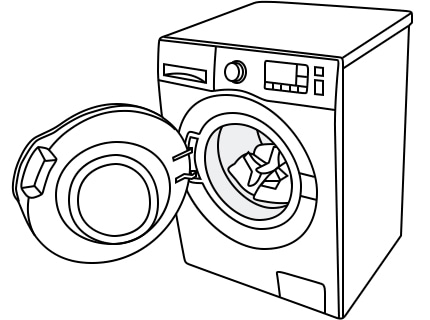
- Add or remove items into or out of the dryer with the lint filter installed.
- If the filter is not in place, small items can fall into the filter slot and cause the dryer to malfunction.
If you mix thick and thin fabrics together, all the thin fabrics will dry after the course is completed but the thick fabrics will be less dry. Please sort out similar fabrics into groups and dry them that way.
- Do not mix heavy and lightweight items together.
- Wash and dry dark-colored items separately from light-colored items.
- Unless recommended on the care label, do not dry wool or fiberglass items.
- Do not dry items soiled with oil, alcohol, gasoline, etc.
- Avoid drying unwashed items
- Do not dry wet items that have not been fully spin-dried after washing. This could cause an odor inside the dryer or cause the dryer to malfunction.
- Using a laundry net is recommended for baby socks and other small, light items.
- Turn dark-colored clothes inside out before drying them. This will prevent fabric damage due to friction during the drying process and protect the internal parts of the dryer from discoloration and damage.
- Turn the items with buttons or embroideries inside out before drying them.
Warnings
- Empty the pockets. Metallic objects such as coins, pins, and buckles on clothing may damage the other laundry items as well as the drum.
- Remove any metallic objects attached to items, pull up zippers, and latch hooks before drying. Metallic objects attached to items may damage the other items as well as the drum.
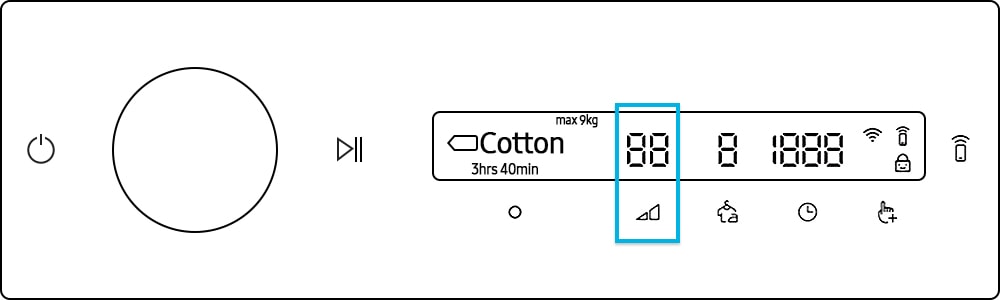
You can select the dry levels 1 to 3 with your laundry type.
- Level 1: Gently dries items to protect the fabric. Suitable for delicate items or items you want to naturally dry (by hanging or lying flat on a drying rack) while they are damp.
- Level 2: Standard drying level.
- Level 3: Suitable for large and thick items.
Note:
- The actual design and dry level operation may differ depending on the product that you have.
- Please find a user manual with the specific model number that you have.
How to step
Step 1. Tap to turn the dryer on.
Step 2. Turn the Navigation dial left or right to navigate through the cycles and functions. The display shows your selection (such as the cycle, additional functions, and system functions).
Step 3. Tap to start the operation.
Step 4. The display shows the current cycle, estimated time remaining, cycle options, and other useful or alert messages.
Step 5. Tap to confirm the function or setting you selected.
Step 6. Tap to change the dry level for the selected cycle. You can select from levels 1 to 3, but the available level depends on the selected cycle.
Step 7. Tap to turn the Wrinkle Prevention function on (if needed).
Step 8. Tap to select the cycle time for Time Dry, Warm Air, or Cool Air. You can set the drying time between 20 minutes and 240 minutes. The available drying time depends on the selected cycle.
Step 9. Tap to enter the additional functions menu.
Check the appliance
There are some sections of your dryer that need regular cleaning. It is especially recommended to clean the filter and tank every time you use it. Find the filter cleaning instructions below.
Empty the water tank after each use to prevent leakage. Be aware that the water bottle is dedicated to the dry only model.
Step 1. Please separate the water bottle from the drawer.
Step 2. Empty the water through the drain hole and slide the water bottle into place.
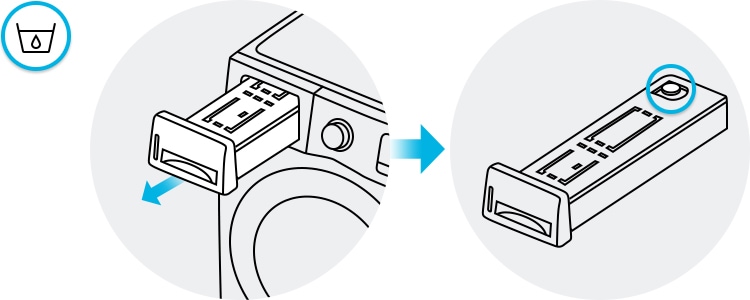
Note: Be careful when taking out the bucket full of water.
Clean the lint filter after each load. If you use the dryer with a wet lint filter, it may cause mold, bad odors, or a decrease in drying performance. Therefore, clean and dry the lint filter after each load.
Step 1. Open the dryer door and pull the filter upwards to remove it. (Do not remove the rubber packing after removing the filter.)
Step 2. Open the external filter and remove the internal filter.

Step 3. Open the inner and outer filters, respectively.
Step 4. Remove the lint from each filter as well as any remaining dust with a brush.

Note: Clean the filters in running water, and then dry them completely (if needed).
Step 5. Attach the clean filter to the external filter and slide it back into place.

Note: Do not operate the dryer without the inner filter inside the outer filter.
It is recommended to clean the heat exchanger at least once a month (or when the buzzer sounds, and the heat exchanger indicator lights up on the display). It will improve the heat pump efficiency. To avoid physical injury and burns, do not touch or clean the heat exchanger with your bare hands. Do not use water to clean the heat exchanger.
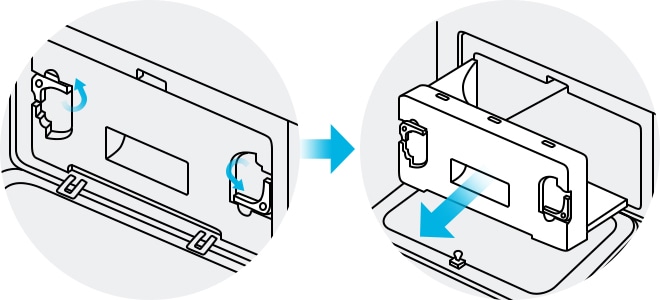
Step 1. Press the top part of the outer cover to open it.
Step 2. Turn both fixers to unlock it. And then, take out the inner cover.
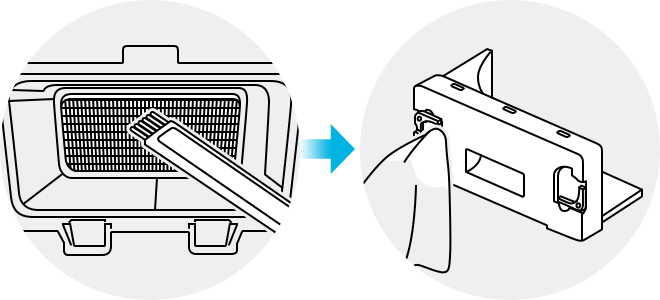
Step 3. Clean the heat exchanger with the provided cleaning brush (or a vacuum cleaner with a brush attachment.) If the filter has excessive dust, clean the inner cover with a smooth, damp cloth.
Note:
- Do not bend or damage the heat exchanger fins when cleaning.
- This may lead to a decrease in drying performance.
Step 4. Reinsert the inner cover. After that, screw in both fixers to lock the inner cover. After the entire process has finished, close the outer cover.
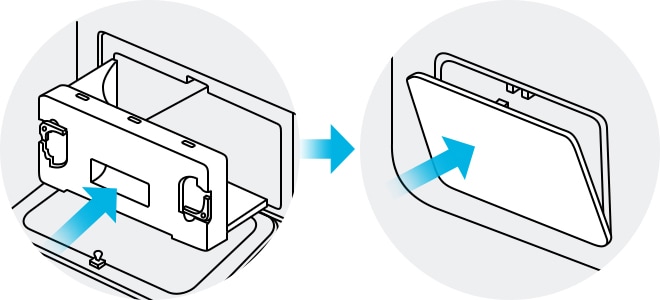
Note: Make sure that the fixers are locked completely.
Thank you for your feedback!
Please answer all questions.
Samsung Members
![Samsung Members app icon]()
![Samsung Members app icon]()


Always here for YOU
![Always here for YOU]()
![Always here for YOU]()

