Installation guide for Samsung FlexWash Combo
To ensure proper installation of your Washing Machine and to prevent accidents when doing laundry, follow these installation guide:
• Place on a solid, level surface without carpeting or flooring that may obstruct ventilation
• Avoid positioning the Washing Machine in direct sunlight and keep it away from heat source
• Ensure adequate room for ventilation and wiring
• The ambient temperature must be higher than the freezing point (0 ˚C)
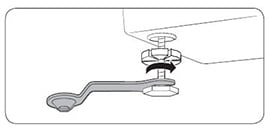
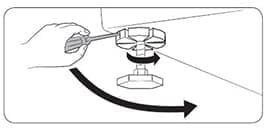
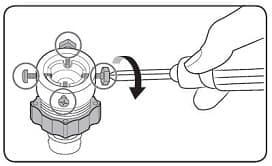
Please note: Keep the shipping bolts for future use
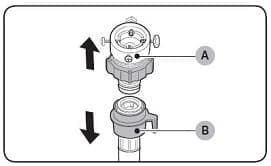
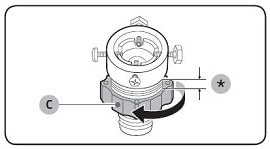
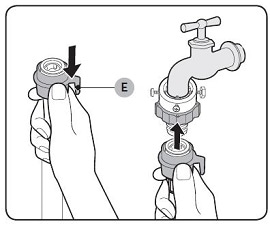
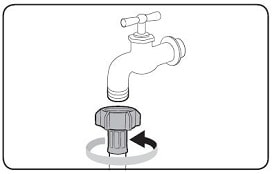
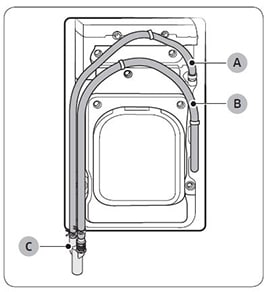
The pipe connector is attached on the product
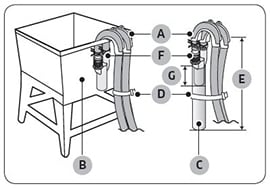
A : Upper drain hose | B : Lower drain hose | C : Pipe Connector
In a wall standpipe drain system
The drain hose must be placed into a wall standpipe drain system.
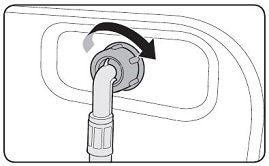
After inserting the 2 drain hoses into the pipe connector, use tie straps to bind the drain hoses together, and then insert the pipe connector into the wall standpipe.
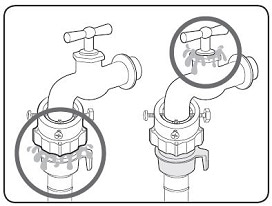
When complete, use the tie straps to bind the drain hose to the water hose.
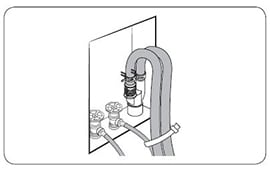
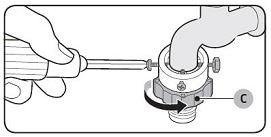
Please note: Make sure to use the pipe connector before inserting the drain hoses. Without the pipe connector, the drain hose will not be positioned securely inside the wall standpipe, causing a water leak.
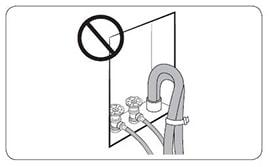
The pipe connector can be positioned in the following ways:
The pipe connector (B) must be placed at aheight of between 60 cm and 90 cm fromthe floor.
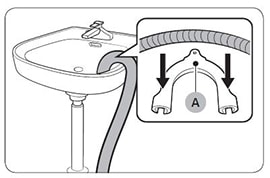
To keep the spout of the drainhose bent, use the supplied plastic hoseguide (A). Secure the guide to the wallusing a hook to ensure stable drainage.
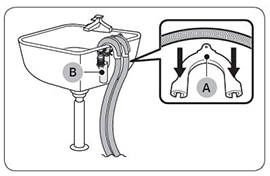
The laundry tub (B) or standpipe (C) mustbe no shorter than 46 cm and no higheror longer than 245 cm. Make sure thepipe connector and the standpipe arenot airtight. The height of the standpipe(E) must be 1100 mm or higher from thefloor.
Please note: A: Hose guide / D: Tie straps / F : PipeConnector / G: 85 mm
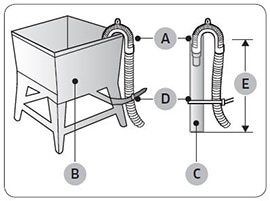
If pipe connector is not available, each drain hose can be positioned in the following ways:
The drain hose must be placed at a heightof between 60 cm and 90 cm from thefloor.
To keep the spout of the drain hosebent, use the supplied plastic hose guide(A). Secure the guide to the wall using ahook to ensure stable drainage.
The laundry tub (B) or standpipe (C) mustbe no shorter than 46 cm and no higher orlonger than 245 cm.
Make sure the drainhose and the standpipe are not airtight.The height of the standpipe (E) must be1100 mm or higher from the floor.
Please note: A: Hose guide / D: Tie straps
• If this is the first time that the Washing Machine is being used, make sure to remove the dehumidifying agent (silica gel) from inside the upper Washing Machine
• The protective cover may form moisture on its surface after the Washing Machine has checked for a leak to ensure normal operation. This is normal, and does not indicate a defective part. Open the cover for a moment to remove the moisture.
• Plug the power cord into an AC 230 V / 50 Hz approved electrical outlet and press POWER to turn on the Washing Machine

Thank you for your feedback!
Please answer all questions.
Samsung Members
![]()
![]()


RC01_Static Content