How Do I Use The Remote Control Of My Air Conditioner?
With the remote control of your Samsung air conditioner, enjoy the various modes and functions. Every single touch will lead you to a very cool and convenient life. These instructions cover various models. The exact characteristics and functions of your air conditioner may differ from those described. For further instructions and functions, please read the provided product manual.
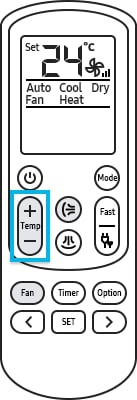
Overview of the remote control
Have a look at the basic functions of the Samsung air conditioner remote control. You can manage the various functions with the remote control, and this will help to make your stay even cooler and convenient.

Note: The actual design of the remote controller may differ based on the model you have.
Major functions of the remote control
How to set the function
Step 1. To control the temperature in each mode, press the temperature ( +, -) button.
Step 2. Select and change the temperature mode as Auto, Cool, Heat, Dry, Fan.
Tips
- Auto, Cool, Heat: Adjust by 1 ℃ from 16 ℃ to 30 ℃.
- Dry: Adjust by 1 ℃ from 18 ℃ to 30 ℃.
- Fan: No temperature control.
Note:
- The actual design of the control panel may differ from your model.
- The lowest setting temperature of the remote control may vary by country.
You can use the auto mode to perform the powerful cooling or heating function to automatically reach the desired temperature. After the difference between the room temperature and the set temperature decreases, the air conditioner controls the fan speed and airflow direction.
- When the room temperature is higher than the set temperature, the air conditioner automatically produces cool air.
- When the room temperature is lower than the set temperature, the air conditioner automatically produces warm air.
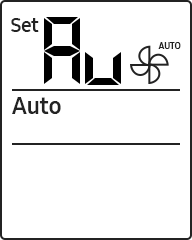
Note: The actual design of the control panel may differ from your model.
How to set the function
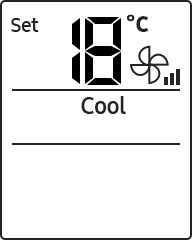
Step 1. Press the Mode button and select Cool.
Step 2. After selecting Cool mode, you can also select the desired function, temperature, and fan speed as well.
Tips
- To cool more quickly, select a lower temperature and a faster fan speed.
- To save energy, select a higher temperature and a slower fan speed.
- As the room temperature nears the set temperature, the compressor motor will slow down to save energy.
- It is recommended to keep the temperature difference between the indoor and outdoor air within 5 ℃ for comfort.
Note: The actual design of the control panel may differ from your model.
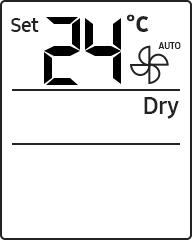
The dry mode acts like a dehumidifier by removing moisture from the indoor air. This will help you in rainy or humid weather.
The outdoor unit will repeatedly and automatically turn on/off for maximum dehumidification according to the temperature difference of the current and desired temperature. Therefore, when the outdoor unit operates, cool air may come out from the indoor unit.
Tips
- Press the Mode button and select Dry to use the function on a remote control.
- The proper set temperature range for dehumidifying operation is 24℃ to 26 ℃.
- If you feel that the current humidity seems high, use a lower set temperature.
Note:
- The actual design of the control panel may differ from your model.
- The dry mode is not for heating.
You can use the Fan mode to run the air conditioner like a floor fan, providing a breeze for to the room without heating or cooling.

Note: The actual design of the control panel may differ from your model.
You can adjust the airflow direction. Press the Airflow button to select the desired airflow direction. Furthermore, you can keep the airflow in a constant direction by stopping the movements of the vertical air flow blades.
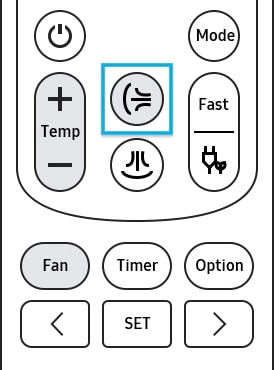
Tips
- If you adjust the vertical airflow blade manually, it may not close completely when you turn off the air conditioner.
- Always use the remote control to adjust the airflow blades.
- Do not move the blades manually. They may not operate normally thereafter.
- You cannot control the vertical airflow direction in Cool mode when the good'sleep function is on.
Note:
- The actual design of the control panel may differ from your model.
- Some remote controls have airflow function buttons on it, but the product models may not have corresponding functions itself.
You can turn the lighting of the indoor unit display on and off with the Display lighting function.
Press the Options button on the remote control and Select Display. Then, press the Set button.
Tips
- Even though you change the current mode or function when the Display lighting function is on, the display lighting will turn on again when the product restarts.
- QMD 2020's new product changes its current mode or function when the display lighting function is on, and then the display light turns on for five seconds and then turns off again.
- To turn the Display lighting function off, run the method above again or turn the product off and on.
- The display lighting function is specialized in some limited models, but it may differ from the model.
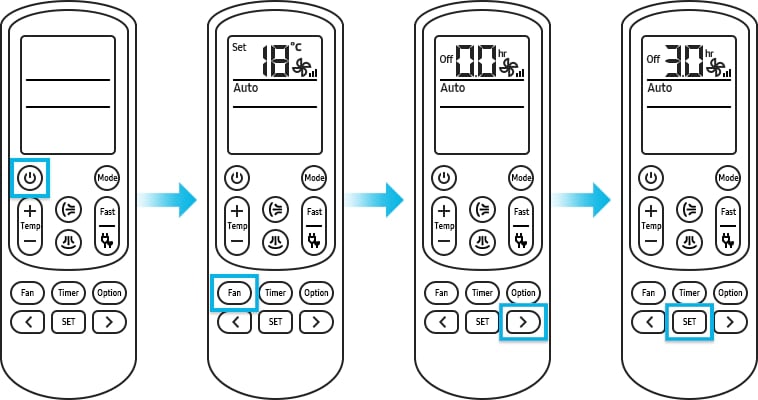
It is very convenient to use the time on/off function to turn the air conditioner on or off after a set duration. You can schedule the duration before the air conditioner turns on or off and it will help you to use the air conditioner economically.
How to set the function
Step 1. Press the Power button to turn the air conditioner on and press the Timer button to select the On function.
Step 2. Press the select button to set the desired time and then press the SET button.
Step 3. Press the Power button to turn on the air conditioner on and press the Timer button to select the Off function
Step 4. Press the Select button to set the desired time and then press the SET button.
Tips
- If you want to turn the time on/off function off, set the duration to 0.0.
- You can set the duration to from 0.5 hours to 24 hours.
- You cannot set the same duration for both Timed on and Timed off functions.
- When you start the Timed on/off function, the timer indicator appears on the indoor unit display.
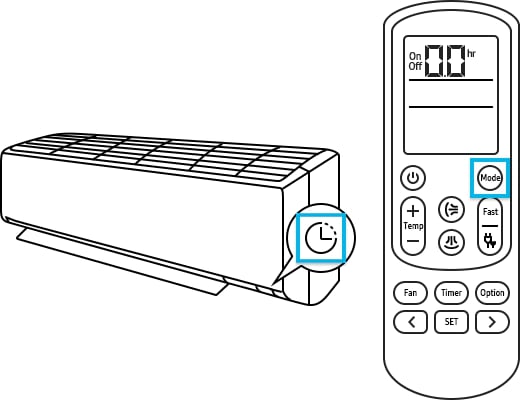
Note: The actual design of the control panel may differ from your model.
More efficient way to use
- It is recommended to keep a 10m distance between the indoor unit and remote control.
- For better and smooth electric communication, use the remote control toward the indoor unit direction.
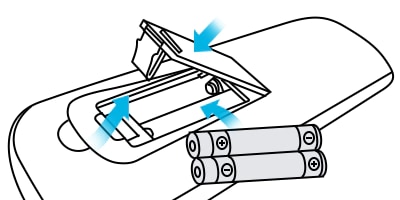
Replacing the remote control batteries
- When the battery is almost finished, the icon will be displayed on the remote control's display. The indoor unit also displays the Low batteries on the display, either.
- The remote control requires two 1.5 V triple-A type batteries.
Cautions
- Do not hit, shake, drop, or attempt to disassemble the remote control.
- It is recommended to remove the batteries from the remote control when you do not use the remote control for a long time.
- Once the batteries on the remote control have been replaced, all the modes will be reset.
- When replacing the remote control batteries, keep them out of the reach of infants. If an infant eats a battery, contact a doctor immediately.
Thank you for your feedback!
Please answer all questions.
Samsung Members
![]()
![]()


RC01_Static Content