How do I manage my contacts?

How do I manage my contacts?

The Samsung Contacts app gives you all the tools you need to stay in touch with the important people in your life. Your contacts are more than just names and numbers and you can show that by adding a range of additional information including a photo, your relationship and their address. You can even give your contacts personalised ringtones and vibration patterns so that you know who is getting hold of you before your phone has even left your pocket.

Please note: depending on your device and operating system the following screens may look different but the steps should be the same.

To add someone you have never dialled or received a call from before, follow the steps below. 

1 Open the Contacts app

Please note: If you can’t find the Contacts app, you can search for it by going to the apps screen and then searching for it in the search bar at the top of the screen.

Open the contacts app
2 Tap the + icon
Tap the + icon
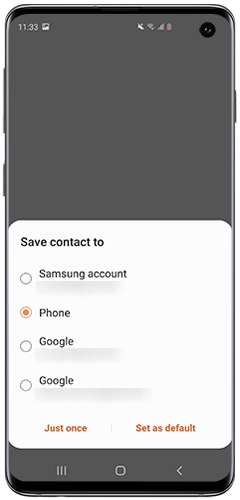
3 Choose where you want to save this contact
Tap where you want the contact to be saved
4 Enter your contact's details

Please note: you don't need to complete every section to save a contact. Only one section needs to be completed to add a contact.
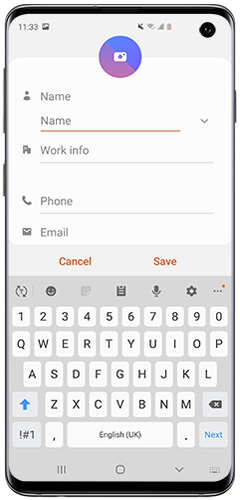
Enter your contacts details
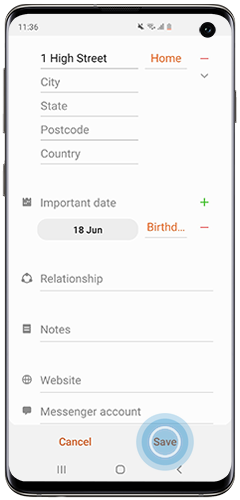
5 Tap Save
Tap save

If you want to add a contact of someone who has called you recently you can do this through the Phone app, by following the steps below.
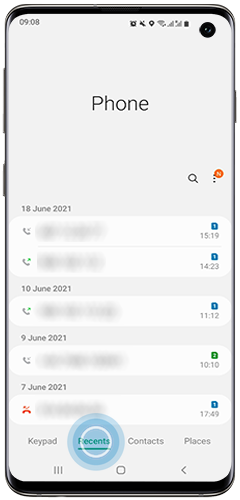
1 Open the Phone app and tap Recents to find the number of someone who has recently called you
Open the phone app and tap Recents
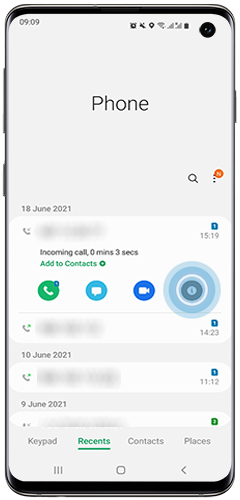
2 Tap on the number you want to save, and tap the i icon
Tap the i icon
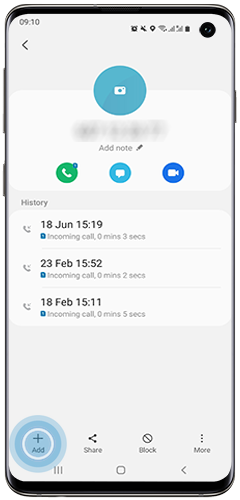
3 Tap + Add to add to contacts
Tap + to add to contacts
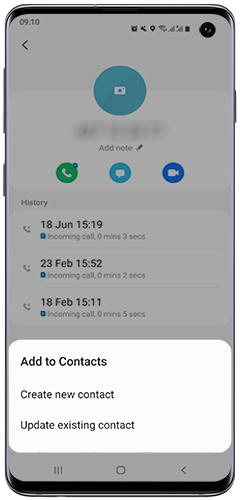
4 You will be give the options Create new contact or Update existing contact. If you choose Update existing contact you will be given the choice of which contact to add the number to. If you choose Create new contact, follow step 4 from the section above to add their details
Choose option to create new contact or update existing contact

You can edit a contact to add additional information such as an email, address, birthday and relationships with other contacts. This keeps all the information in one helpful place and allows you to link with other apps such as your calendar and email. Follow the steps below to learn how to edit a contact.
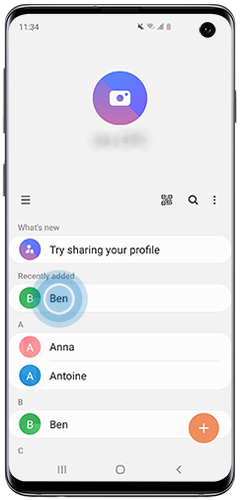
1 Tap the contact you want to edit
Tap the contact you wish to edit
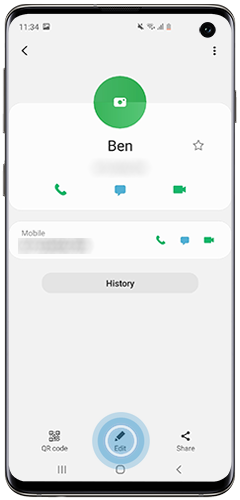
2 Tap Edit
Tap Edit
3 Tap View more to show all editable information

You can add and edit information like an email address, postal address, work information, important dates, relationships with other contacts, as well as adding notes.
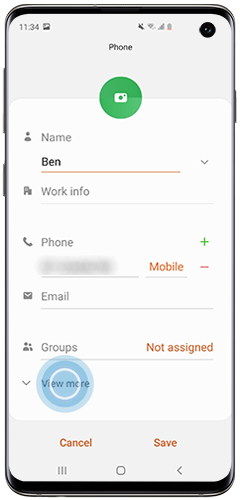
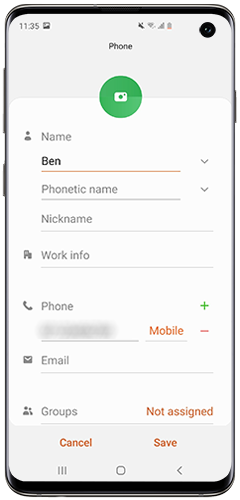
Tap View more
4 Tap any section to edit its contents
Tap any section to edit it
5 When you've finished editing this contact, tap Save
Tap Save
6 Once saved, you can view this information by tapping on the selected contact
You can view information by tapping on the selected contact
1 Tap the contact you wish to delete
Tap the contact you want to delete
2 Tap the More icon. It will appear as three vertical dots
Tap the options icon
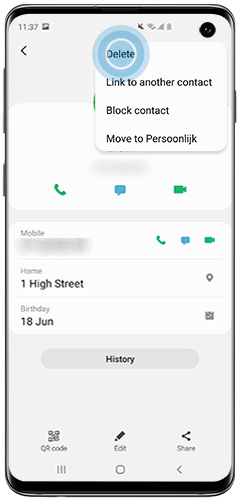
3 Tap Delete and then move to move your contact to your recycle bin
Tap Delete and then delete again to confirm

Please note: SIM cards are not designed for storage and can only hold a certain amount of contacts. If you are saving contacts to a SIM because you are swapping phones, the Smart Switch app makes the process quick and easy.
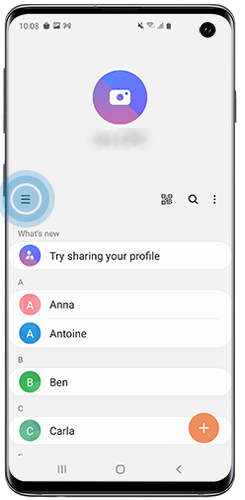
1 Open your contacts app and tap the menu icon. It will appear as three lines in the upper left of the screen
Tap the menu icon

Please note: if you don't see a menu icon, tap the more icon (three dots) in the top right of the screen instead.
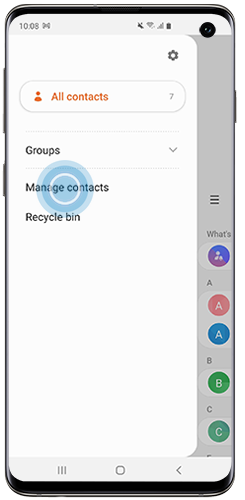
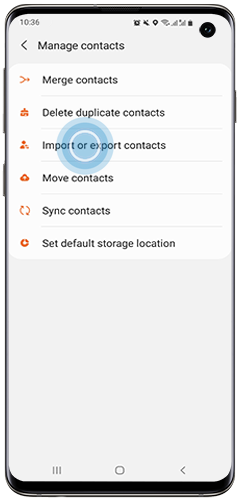
2 Tap Manage contacts
Tap Manage contacts
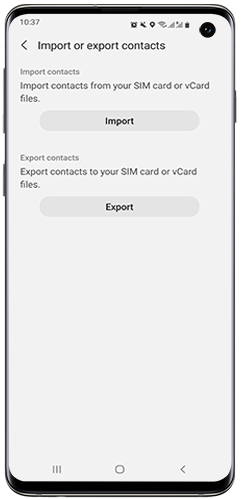
3 Tap Import or export contacts
Tap Import or Export contacts
4 Tap Import to move files from a SIM card or SD card to your phone, or tap Export to move contacts from your phone to a SIM card or SD card
Tap Import or Export
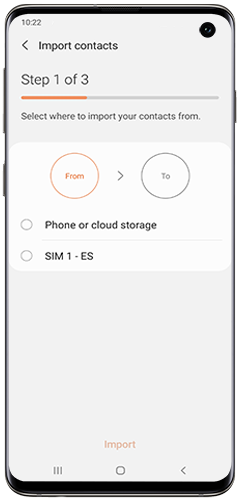
5 If you selected import, choose where you are moving your contacts from. If you selected export, skip to step 9
Choose where you are moving your contacts to
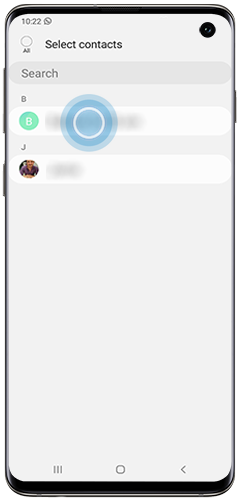
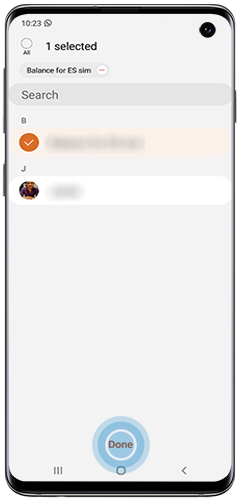
6 Select the contacts you wish to import
Select the contacts you wish to import
7 Tap Done
Tap Done
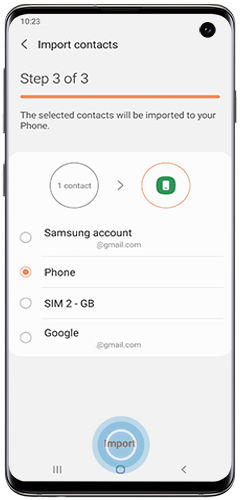
8 Choose where you want the imported contacts to be saved, and tap Import to move your contacts
Choose where you want the imported contacts to be saved and tap Import
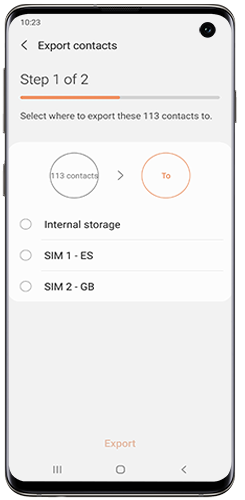
9 If you selected Export, choose where you are moving your contacts to
Choose where to export your contacts to
10 If prompted, select which contacts to move. If you are not prompted, all of your contacts will be moved automatically
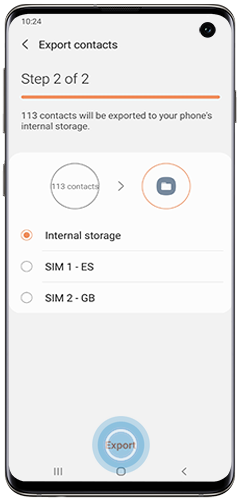
11 Tap Export to move your contacts
Tap Export to move your contacts
1 Open your contacts app and tap the menu icon. It will appear as three lines in the upper left of the screen
Tap the menu icon
2 Tap Manage contacts
Tap Manage contacts
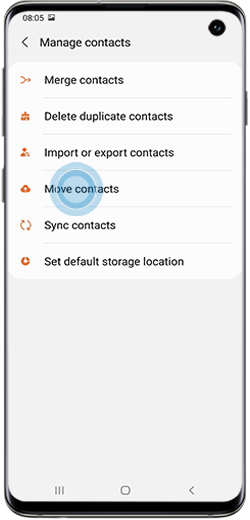
3 Tap Move contacts
Move contacts selected
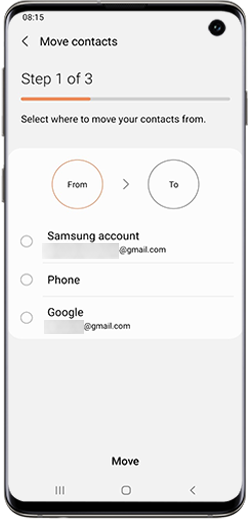
4 Select where you want to move your contacts from
Select where you want to move your contacts from
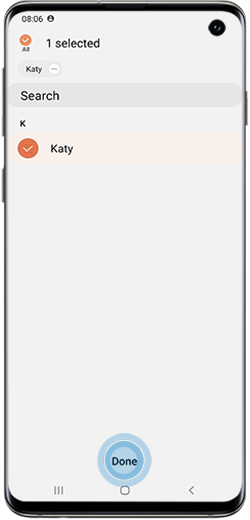
5 Select the contacts you want to move and then tap Done
Select the contacts you want to move and then tap move
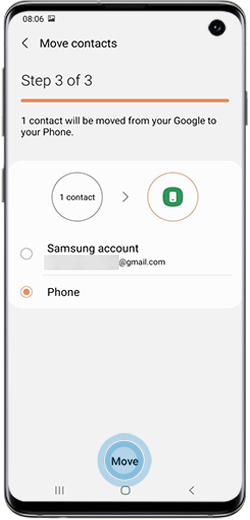
6 Select where you want to move your contacts to and then tap Move. You will receive confirmation that your contact has been moved, then tap OK
Select where you want to move your contacts to and tap move

Adding a contact to your speed dial means you can call someone quickly without having to look up their number. Once you have added someone to your speed dial just hold down the number assigned to the contact you wish to call on the keypad. Follow the steps below to learn how to add a contact to your speed dial.

1 Open the phone app and tap Contacts
Tap contacts
2 Tap the options icon. It will appear as three dots
Tap the options icon (three dots)
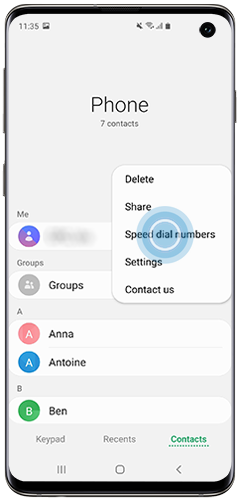
3 Tap Speed dial numbers
Tap Speed dial numbers
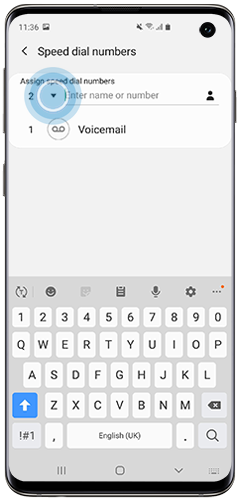
4 Tap the down arrow to change the speed dial number
Tap the down arrow to change the speed dial number
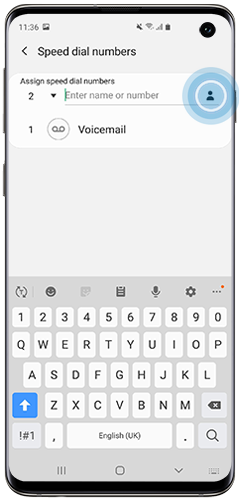
5 Tap the contact icon to add an existing contact or type out the phone number
Tap the contact icon
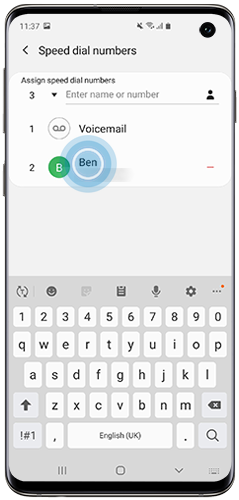
6 To remove a speed dial number, tap the - next to the number you wish to remove
Tap the - to remove a speed dial number

Creating a Caller Group allows you to group related contacts together, making it easier to contact people in the group. You can also identify when someone from the group is calling by setting a specific ringtone. Samsung smartphones come with the automatic suggestion of an Emergency Contact group, allowing you to group together people you may want to contact in an emergency. Follow the steps below to create a caller group or add to your emergency contact group.

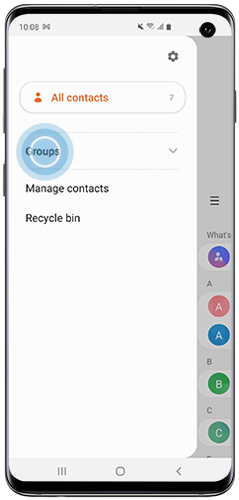
1 Open your Contacts app and tap the menu icon. It will appear as three lines in the upper left of the screen
Tap the menu icon
2 Tap Groups
Tap Groups
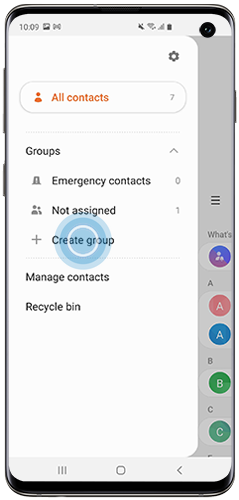
3 Tap Create group
Tap Create group
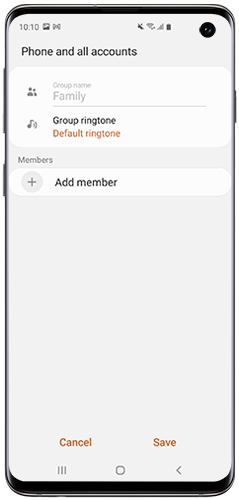
4 Give your group a name
Give your group a name

If you wish, you can set a ringtone for the group. This is a good way of quickly identifying who is contacting you.
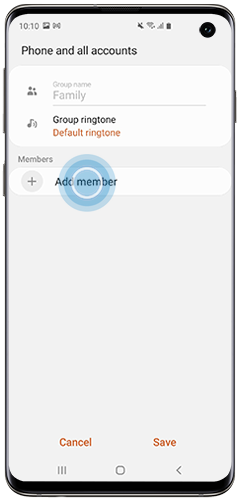
5 Tap Add member
Tap Add member
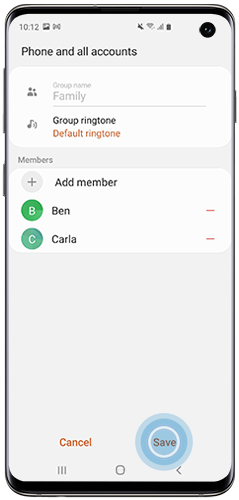
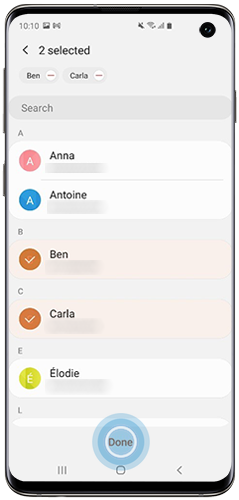
6 Select the contacts you wish to add to the group, and then tap Done
Select the contacts you wish to add and then tap Done
7 Tap Save
Tap Save

If you're experiencing unusual behaviour on Samsung mobiles, tablets or wearables, you can send us an error report or ask us a question in the Samsung Members app.

This allows us to take a closer look at what is happening. The data is anonymised and only held for the duration of the investigation. Find out more about sending an error report through the Samsung Members app.

Thank you for your feedback!