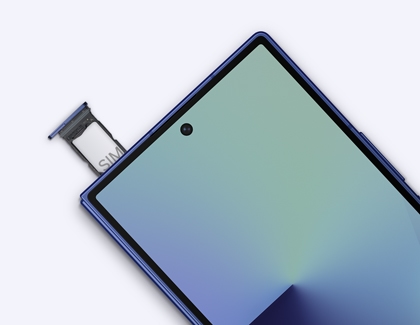
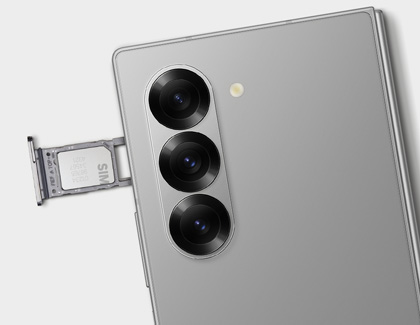
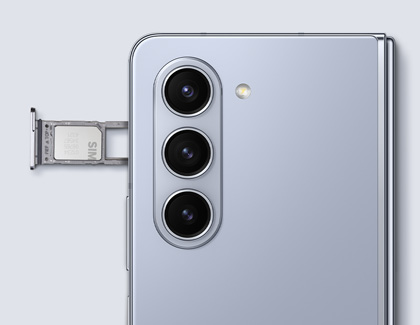
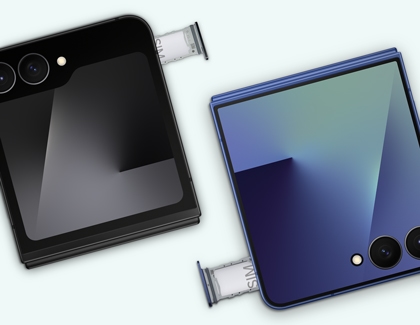
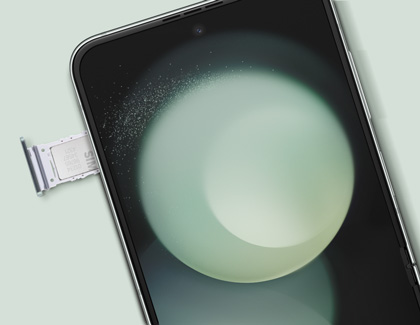
An eSIM is an embedded version of a physical SIM card within your device, providing connectivity to your carrier's network without the need for a physical card. Activated using your carrier account information, it allows you to use the eSIM alongside a physical SIM to add a second phone number or carrier. This setup offers flexibility to transfer or convert your SIM configuration, as well as switch between SIMs for calls and messages, enhancing convenience and efficiency in managing multiple numbers or carriers on a single device.
Primary SIM Set Up:
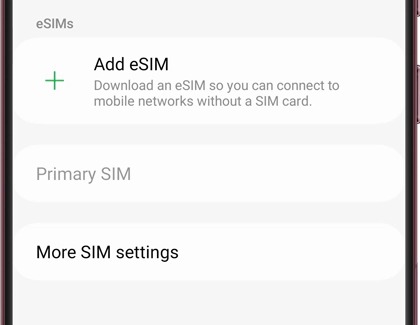
- Navigate to and open Settings, and then tap Connections.
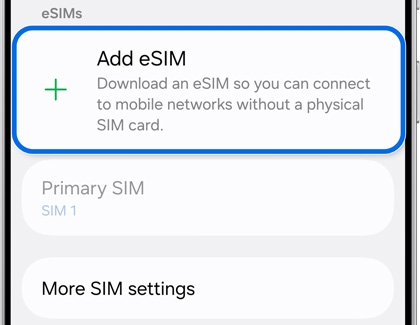
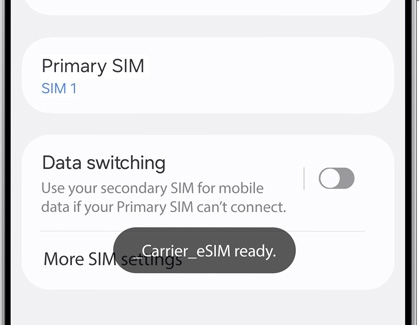
- Tap SIM manager. From here, you can tap the switch next to your physical SIM or activated eSIM to enable or disable their connections. You can also tap Primary SIM to change the default connection for making calls, sending texts, and using data.
To start using the eSIM, follow your carrier's instructions.
eSIM Activation Options:
Carrier Discovery Server
- Existing eSIM profile is found; tap Add.
- eSIM profile is downloaded.
- Restart the device to apply the eSIM profile.
Network Carriers that may allow Carrier Discovery Server
Asia-Pacific and Australia
- Australia: Telstra
- India: JIO
- Japan: KDDI, NTT Docomo, Softbank
- Korea: KT, LGU+, SKT
- New Zealand: Spark, 2degrees
- Thailand: AIS, Dtac, TrueMove H
Europe
- Austria: A1, Drei
- Belgium: Telenet, Promixus
- Czechia: Vodafone
- Denmark: Telia
- Finland: Telia
- France: SFR, Free Mobile
- Germany: Telekom
- Italy: TIM
- Norway: Telia
- Sweden: Telia
- Switzerland: Swisscom
Central and South America
Middle East
North America
- Canada: Bell, Fido, Freedom, Koodo Mobile, Rogers, SaskTel, Lucky Mobile, TELUS, Virgin Plus
- US: AT&T, Boost Mobile, Cellcom, Consumer Cellular, Cricket, C-Spire, FirstNet, Metro by T-Mobile, Mint Mobile, Spectrum Mobile, T-Mobile, Tracfone, US Cellular, Verizon, Xfinity Mobile
Carrier Push Notification
- eSIM ready notification appears. Tap the notification, and then tap Add.
- eSIM profile is downloaded.
- eSIM profile added to the device. Restart the device to apply.
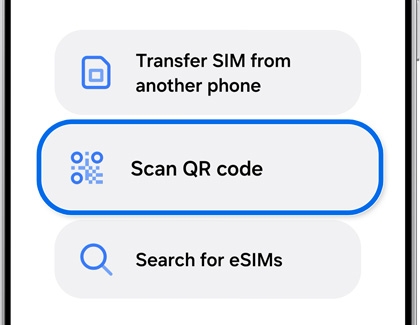
Transfer your SIM:
Transfer SIM
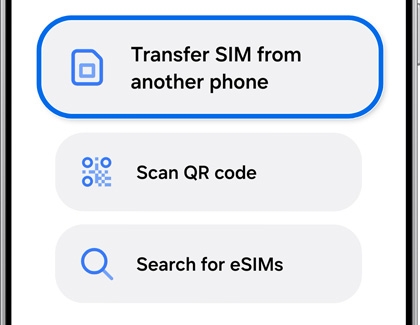
- On your new device, navigate to and open Settings, and then tap Connections.
- Tap SIM manager, then tap Add eSIM, and then tap Transfer SIM from another phone.
- On your old device, tap Transfer. Enter the code displayed on your new device into your old device.
- On your new device, select the SIM you want to transfer, then tap Transfer. Next, tap Transfer on your old device.
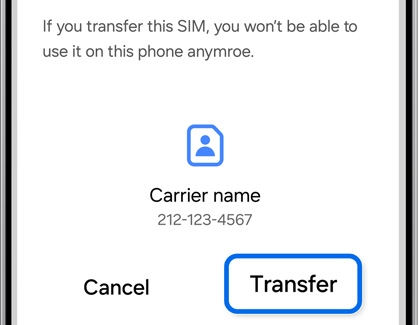
- Once the transfer is complete, tap Done on your old device. The SIM in your new device will be activated.
Network Carriers that may allow eSIM Instant Transfer
Asia-Pacific and Australia
- India: Jio
- Japan: NTT Docomo, KDDI, SoftBank, UQ Mobile
- Korea: KT, LGU+, SKT
- New Zealand: 2 Degrees
- Thailand: AIS
Europe
- Austria: Spusu, Drei, Magenta Telekom, A1
- Belgium: Proximus
- Czechia: T-Mobile, Vodafone
- Finland: Telia
- France: Free Mobile, SFR, Orange
- Germany: Telekom, Vodafone, 1&1
- Italy: TIM
- Lithuania: Telia
- Norway: Telia
- Portugal: MEO
- Slovakia: Telekom
- Slovenia: A1
- Spain: MasOrange, Movistar
- Sweden: Halebop, Telia
- Switzerland: Sunrise, Swisscom
- UK: O2, Spusu UK, EE
Central and South America
- Brazil: Vivo
- Mexico: AT&T Mexico
Middle East
- Bahrain: Zai
- Israel: Cellcom
- Kuwait: stc, Zain
North America
- Canada: Bell, Koodo Mobile, TELUS, Virgin Plus, Lucky Mobile, Rogers, SaskTel, Fido, Freedom Mobile
- USA: AT&T, Boost Mobile, Cricket, FirstNet, Mint Mobile, Spectrum Mobile, T-Mobile, U.S Cellular, Verizon, Xfinity Mobile
To transfer eSIM from an iOS device
You can transfer your eSIM from your iOS device to a Galaxy device seamlessly without contacting your network carrier. This is available only for supported carriers. You can find the list of carriers below.
In the case that your carrier is not on the list, you need to contact your network carrier to help move your eSIM to a new device.
Note: Both of your devices must be updated with the latest software. Both also must be connected to Wi-Fi and Bluetooth.
- On your new device, go to Settings > Connections > SIM manager > Add eSIM.
- On your new device, tap Transfer SIM from iPhone.
- On your new device, you will see instructions for SIM transfer from an iPhone. Tap Next.
- On your new device, the QR code for connecting devices will be generated.
- On your old device, scan the QR code. If you cannot scan the QR code, tap Enter a passcode instead on your new device and follow the instructions.
- On your old device, select a phone number from the list, then tap Continue.
- On your old device, confirm SIM transfer by tapping Continue.
- The selected number will be transferred to your new Galaxy device from your old device.
- On your new device, tap Settings and go back to the Settings menu.
Network Carriers that may allow eSIM Instant Transfer from an iOS device
Asia-Pacific and Australia
Europe
- Germany: Telekom
- France: Orange, SFR
- Switzerland: Swisscom
- UK: EE
Central and South America
North America
- Canada: Lucky Mobile, Koodo Mobile, Virgin Plus, Bell, TELUS
- US: AT&T, FirstNet, T-Mobile, Verizon
Convert SIM
- Navigate to and open Settings, and then tap Connections.
- Tap SIM manager, then select the SIM card, and then tap Convert to eSIM.
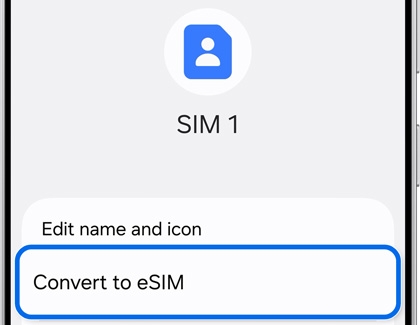
- Your information will be transferred from the physical SIM (pSIM) to the phone's eSIM.