The ideal location for your AirDresser should be between 50-95°F, with enough space so you can easily access it. Once the installation is complete, you can start refreshing your clothing, bedding, pillows, and other items.
- When choosing a spot in your home, make sure it has a solid, level surface. The perfect place will meet these guidelines:
- The AirDresser should not be installed in very hot or cold places, or in direct sunlight.
- If the temperature is too high or too low, your AirDresser may not ventilate properly, which could lead to condensation on the exterior walls.
- Make sure you install the AirDresser in an area with enough space to access it easily. You'll also need to make sure there is enough clearance on all sides of the appliance.
The AirDresser's dimensions are as follows:
- Width: 17 inches
- Height: 72 inches
- Depth: 29 inches
The necessary amount of clearance needed for the AirDresser:
- Top: 1 inch
- Sides: 1/4 inch
- Rear: 3/4 inch
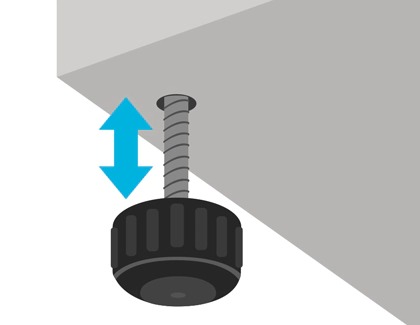
- Adjust the height of your AirDresser as needed, and make sure it's leveled so there is no chance of it tipping over. You can do this by turning the leveling feet clockwise or counterclockwise. Continue this until your AirDresser is level.
Note: If the AirDresser wobbles or if you want to raise the height of the rear side, assemble the provided rear leveling feet on the bottom-rear sides of the product.
- Next, insert the water tray. The side of the tray marked “TOP” should face upward.

- Plug your AirDresser into a 120 V/60 Hz grounded outlet. You can contact a service center for another method if you do not have grounded outlets.
- If needed, you can secure your AirDresser with the anti-tip strap. This will provide extra security to prevent the AirDresser from moving or wobbling. To avoid injury, make sure you unplug the AirDresser before attaching the anti-tip strap.
Keep in mind that your AirDresser will consume extra water when used for the first time. You will need to fill the water tanks more than once.


