Step 1: Gather the necessary tools.
Before you begin, make sure you have the following:
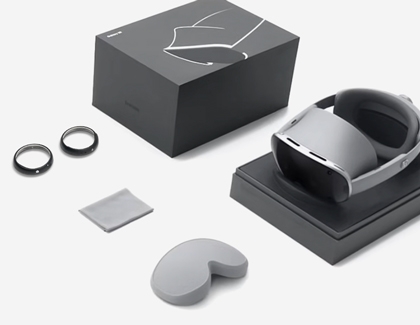
- Samsung Galaxy XR headset
- Protective cover for the visor window
- Supplied lens cleaning cloth (ensure it's clean)
- Optical lenses (provided with your device or purchased separately)
Read more
Read less
Step 2: Power Off your headset.
Power off your Samsung Galaxy XR and disconnect the power cable.
- To turn off your device when wearing, press and hold the Top and Volume down buttons simultaneously, then select Power off from the Power menu.
- To disconnect the power cable, press the Release button, then gently slide the cable up and away from the power connector. Press the USB release button, and then gently pull the power cable out of the battery pack.
Read more
Read less
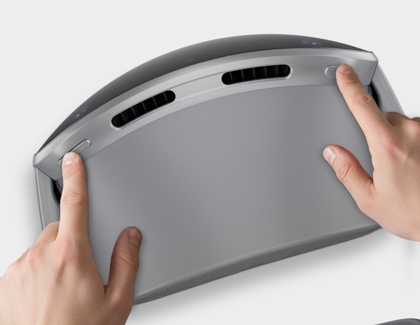
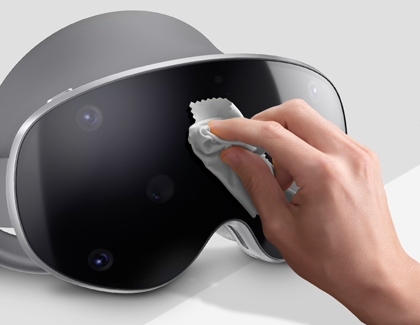
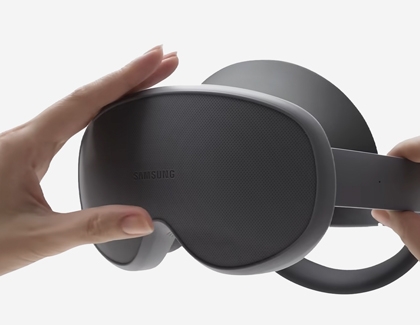
Step 3: Reattach the protective cover.
Wipe the visor and inside of the protector cover with the lens cleaning cloth. Then, align the cover with the visor and press firmly on the edges to secure it. Ensure it stays in place without shifting.
Read more
Read less
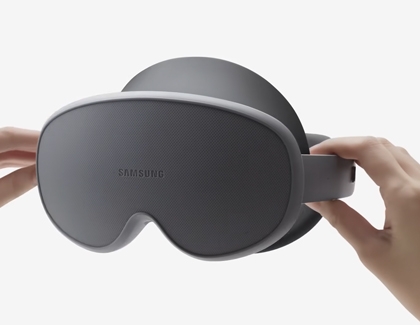
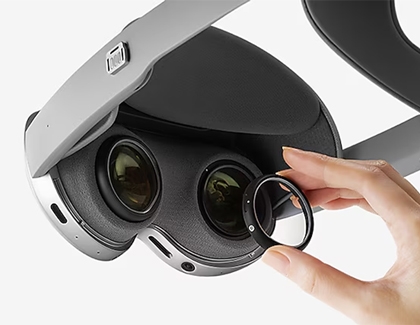
Step 4: Remove the light shields.
Locate the light shields below the lenses. Gently slide them off and store them safely. Clean with the provided lens cleaning cloth if needed.
Read more
Read less
Step 5: Clean the lens area.
Use the supplied lens cleaning cloth to gently clean the lens area on your headset.
Read more
Read less
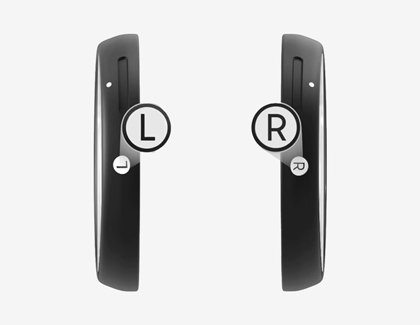
Step 6: Match the engraved markers.
Ensure the engraved markers (L for left, R for right) on the optical lenses are correctly matched for proper alignment.
Read more
Read less
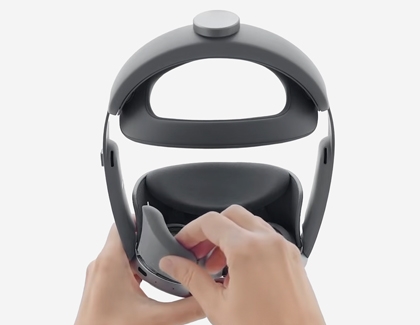
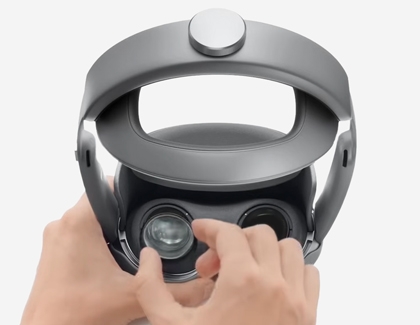
Step 7: Align the lenses.
Carefully align the right and left prescription inserts with the circular slots on your headset, matching the L and R engravings.
Read more
Read less
Step 8: Insert the lenses gently.
Press the inserts into place until they are securely seated. Avoid excessive force to prevent damage.
Read more
Read less
Step 9: Attach the power cord.
Slide the cable into the headset's power connector until it clicks. Connect the other end to the battery pack.
Read more
Read less
Step 10: Remove the protective cover.
Press the edges of the cover to release it, then slowly slide or lift it off.
Read more
Read less
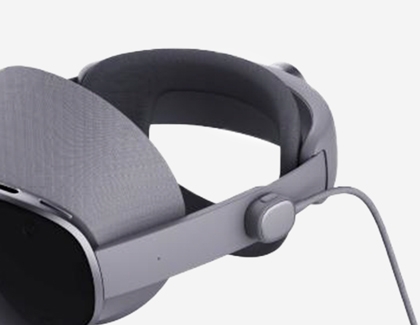
Step 11: Put on the headset.
Note
Clear your surroundings to prevent accidents. Only use the device in a spacious area free of obstacles.

Adjust its position on your forehead until the screen center is clear. Turn the rear dial to fit it securely to your head.
Read more
Read less
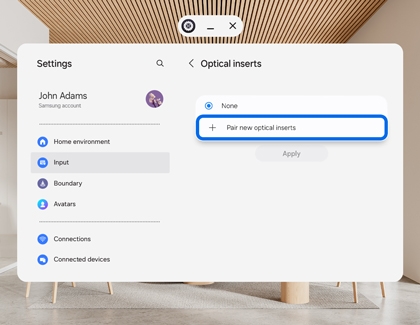
Step 12: Complete the optical inserts setup.
After inserting the inserts and wearing the device, a pop-up will appear instructing you to set up the optical inserts. Follow the on-screen instructions to complete the setup.
To manually register the lenses, press the Top button on the headset to open the Launch menu. Select Settings, then select Inputs, and then select Eye Calibration. Select Optical Inserts, and then select Pair new optical insert.
Read more
Read less


