Welcome to the
! Please enjoy our special offers for you

Galaxy S25 Back Cover

If your Galaxy S25’s back cover becomes damaged or detached, you can replace it by following the proper disassembly and reassembly steps. This guide will walk you through the safe removal and installation process, including heating and adhesive application, to help ensure your device is properly sealed and protected after repair. Always take precautions to avoid damaging internal components or injuring yourself during the procedure.
Galaxy S25 with a cracked back glass near the camera and bottom edge.

Galaxy S25 Back Cover

Galaxy S25 Back Cover Disassembly

Galaxy S25 Back Cover Disassembly
Caution
When removing the back cover, ensure that the device is fixed on a flat surface.
1

Heat the microwaveable heating bag and apply it on the back cover for 3 minutes to soften the adhesive.
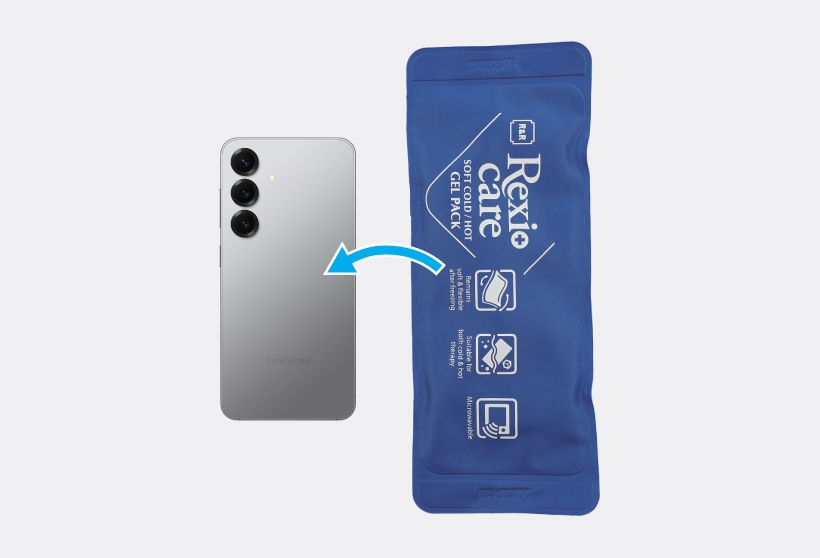
Blue heating bag next to the Galaxy S25.

Warning
  • It is possible for the device or battery to be damaged by heat.
  • Do not heat the device in a microwave. Doing so could cause an explosion.
  • If your device’s glass breaks, debris can cause injury to your hands or other body parts. For your safety, attach an acrylic protective cover before disassembling the device.
Caution
  • Follow the heating bag’s instructions. The recommended time is 50 seconds in a 1000 W microwave and 70 seconds in a 700 W microwave. (Recommended temperature: 131-149 °F / 55-65 ℃.)
  • Be careful not to damage the device through excessive heat. (It is recommended to disassemble the device in a temperature-controlled area.)
2

Place the suction cup on the center of the left edge of the back cover, and lift it upward carefully.
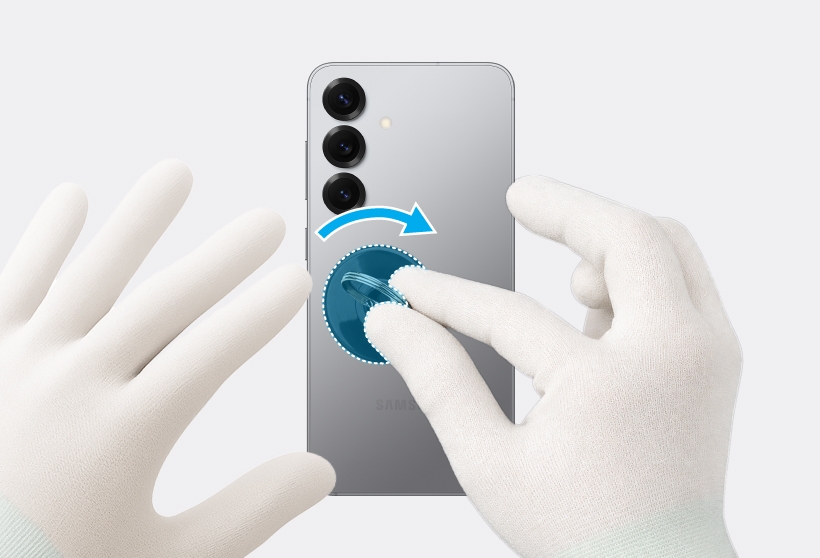
Gloved hands rotating the suction cup on the Galaxy S25 back glass to lift it.

Warning

For separable handle suction cups, be careful not to injure yourself as the handle can be parted during use.

Close-up of a suction cup tool attached to the Galaxy S25 back glass.

Caution
  • As the back cover can be damaged by excessive force, be careful not to damage the back cover.
  • Be careful that the suction cup does not adhere to the area where the tape or sticker is attached.
Note
If you have trouble creating a gap, heat the microwaveable heating bag additionally, and apply it on the back cover to further soften the adhesive. When reheating, it should be heated no longer than 30 seconds.
3

While pulling up the suction cup with strong, steady force to create the gap between the back cover and the screen module, place the opening pick in the gap between the back cover and the screen module and slide the opening pick back and forth along the edge to slice through the adhesive. Repeat this on all sides of the back cover and slice through the adhesive. Lift up the back cover slowly and remove it gently from the device.
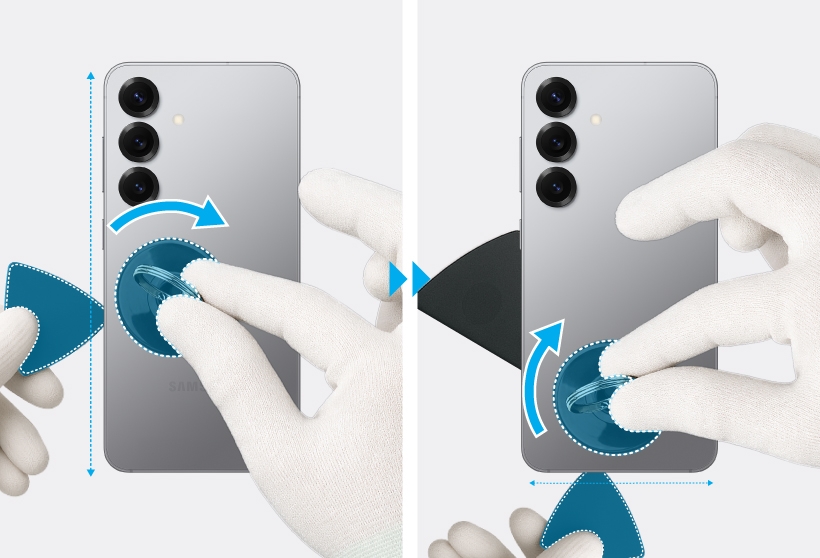
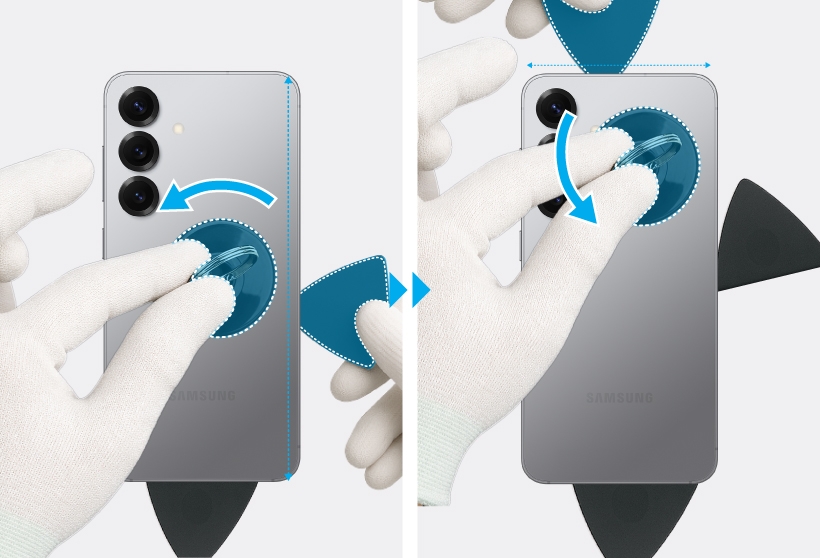
Gloved hands using a suction cup and plastic pick to separate the Galaxy S25 back glass along the edges.

Gloved hands sliding multiple plastic picks under the Galaxy S25 back glass to loosen the adhesive.

Gloved hands lifting and removing the Galaxy S25 back glass, showing the exposed internal components.

Caution
  • As the back cover can be damaged by excessive force, be careful not to damage the back cover.
  • As the internal circuitry can be damaged, do not insert the opening pick more than 3 mm.
  • Be careful not to put your fingertips or any foreign objects on the rear cameras.
Note
  • Make sure to leave the opening pick inserted in the edges to prevent the adhesive from resealing. It is recommended that a large area of the opening pick be inserted.
  • If you have trouble creating a gap, heat the microwaveable heating bag additionally, and apply it on the back cover to further soften the adhesive. When reheating, it should be heated no longer than 30 seconds.
Read less

Galaxy S25 Back Cover Reassembly

Galaxy S25 Back Cover Reassembly
Warning
Leaving screws inside the device may damage internal components, such as the battery. When assembling, be extra careful not to leave any unassembled screws inside the device.
Caution
Before attaching the back cover, ensure that there are no screws, miscellaneous parts, or other foreign objects inside the device (near the battery, PBA, etc.).
1

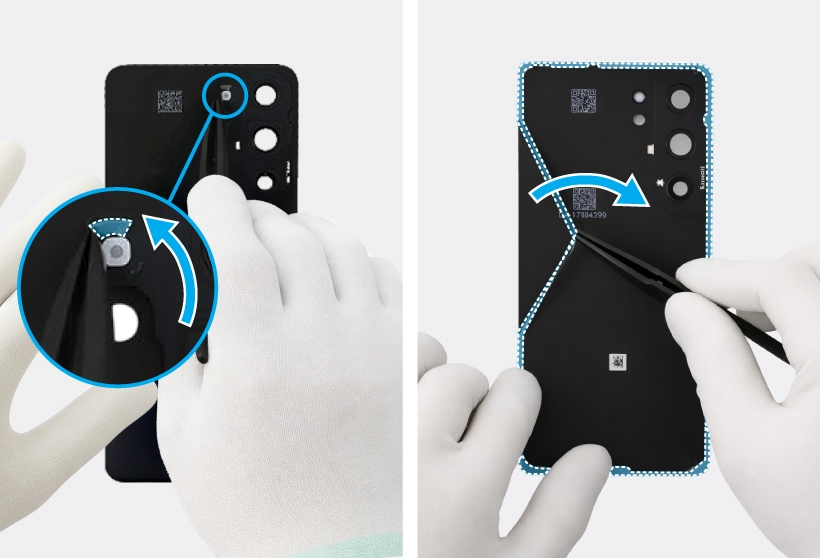
Remove all adhesive tapes on the separated back cover if you use the existing back cover as it is. Also, remove the double-sided adhesive tape around the microphone hole using the tweezers and your fingers.
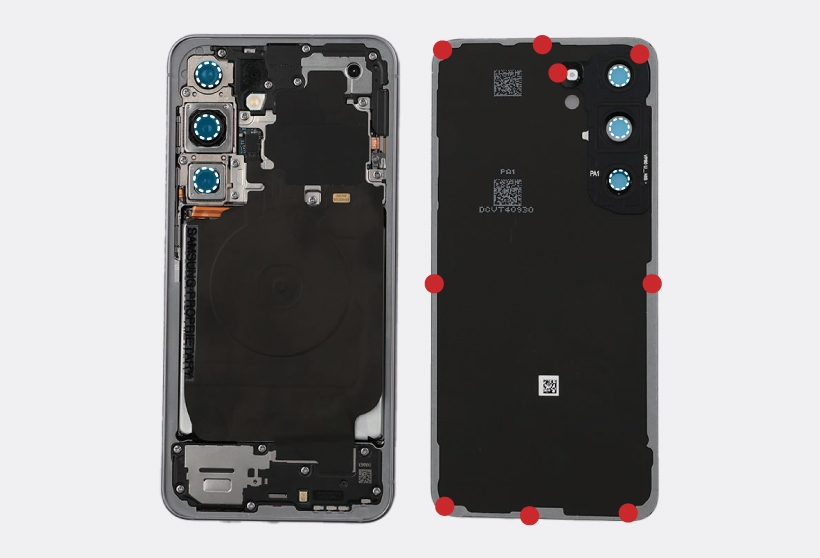
Inside view of the Galaxy S25 showing screw positions on the back cover.

Inside view of the Galaxy S25 showing screw positions on the back cover and a gloved hand prying off the camera frame adhesive.

Caution
  • Be careful not to put your fingertips or any foreign objects on the rear cameras or back cover lens.
  • Make sure to remove any residual tapes attached to the inside of the back cover before reassembling the device.
Notes
  • Apply additional heat with a microwaveable heating bag if you are having trouble separating the adhesive.
  • As the adhesive tape for the microphone hole can be either on the microphone hole of the back cover or the device, please check both locations.
2

Remove the transparent film from the new back cover adhesive tape. Align it precisely with the metal frame and attach it.
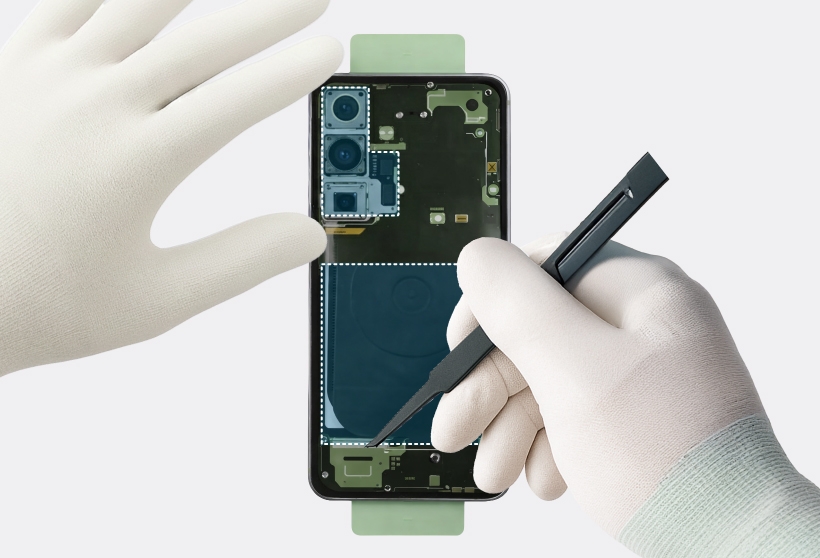
Gloved hands lifting the internal camera frame and wireless charging coil assembly from the Galaxy S25.

3

Using the tweezers and your fingers, gently press around the edges to ensure a secure fit.
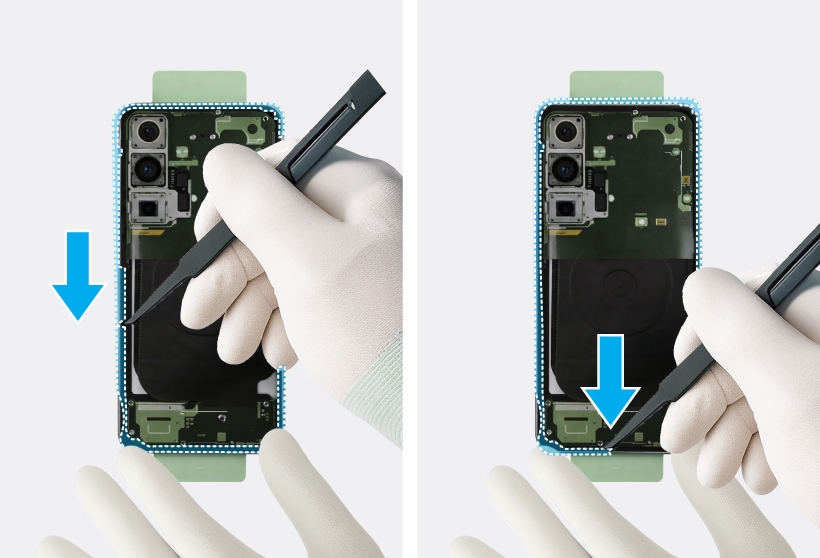
Gloved hands removing adhesive film near the camera and battery areas inside the Galaxy S25.

4

Remove the release film under the new microphone hole adhesive tape. Using the tweezers and your fingers, attach the tape around the microphone hole inside of the back cover.
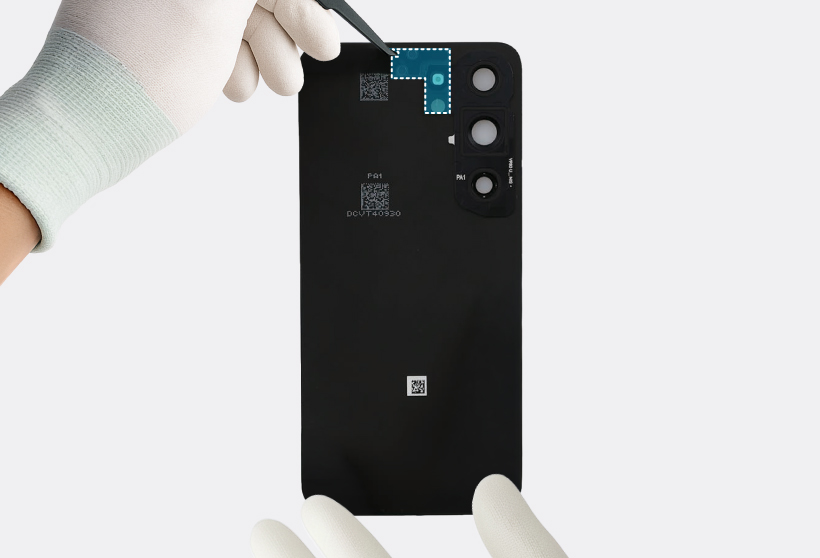
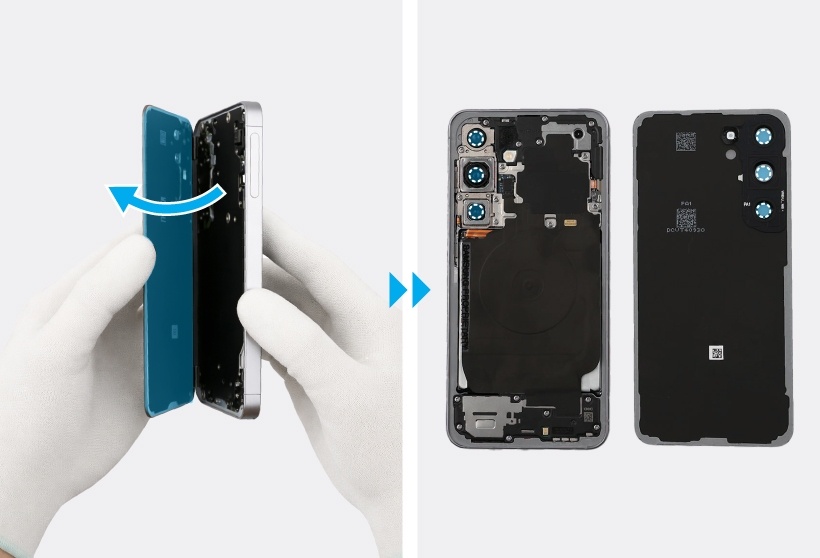
Gloved hands removing the release film inside the Galaxy S25 using a tweezer.

5

Using the tweezers or your fingers, remove all release films on both the back cover and the device.
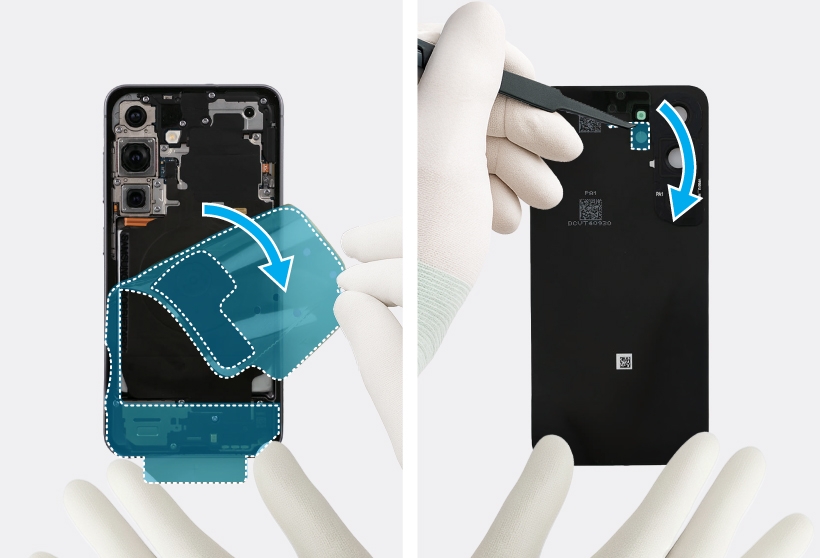
Gloved hand removing the release films on the back cover of the Galaxy S25.

6

Attach the back cover and press down on the edges of the back cover. Check the gap between the back cover and the metal frame.
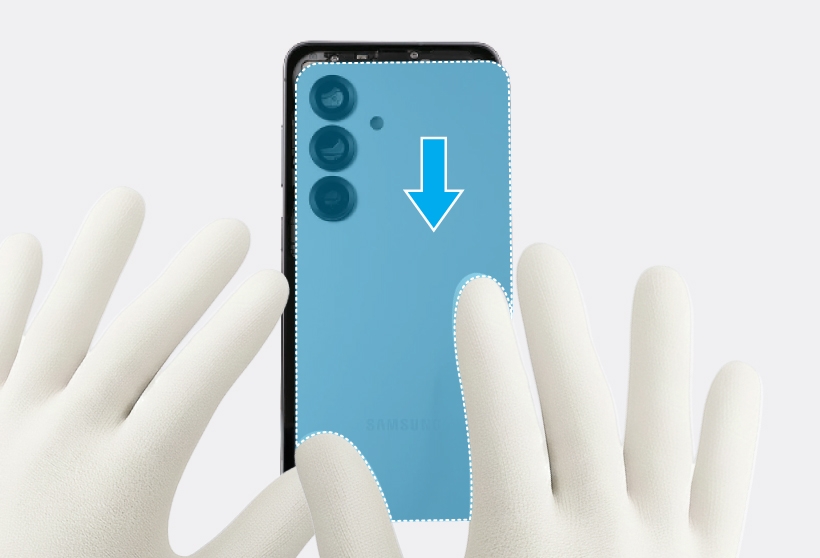
Gloved hands pressing down on the edges of the back cover of the Galaxy S25.

Note
If you feel some gap, remove the back cover and attach it again. Some foreign materials can be inside the device.
7

Press down the edges of the back cover evenly in order to attach the back cover perfectly. Ensure that there are no abnormalities.
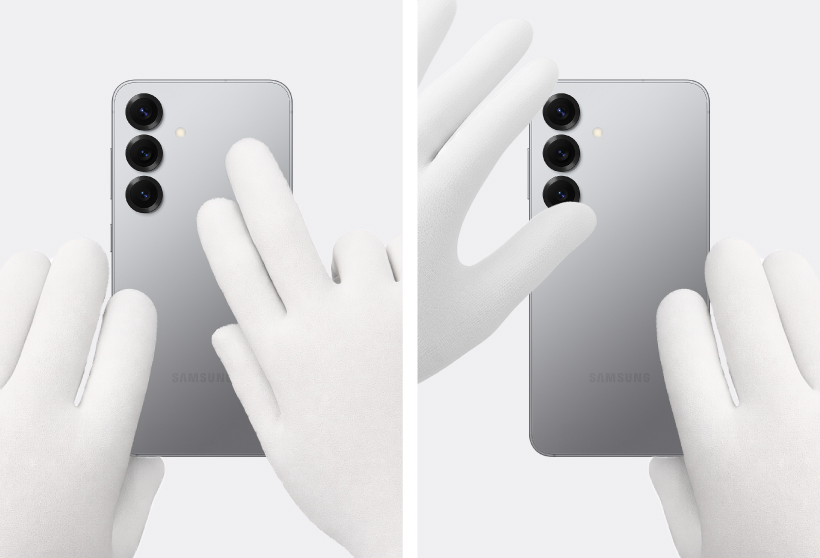

Gloved hands pressing down the deges of the back cover of the Galaxy S25.

Read less
Was this content helpful?
Table of contents
We're here for you

Contact Samsung Support

Contact us online through chat and get support from an expert on your computer, mobile device, or tablet. Support is also available on your mobile device through the Samsung Members App.
Fast, easy checkout with Shop Samsung App
Easy sign-in, Samsung Pay, notifications, and more!
Or continue shopping on Samsung.com
×
The Shop Samsung app
Free standard shipping, exclusive offers and financing options.
GET
×
The Shop Samsung app
Free standard shipping, exclusive offers and financing options.
GET
×

You Are About To Be Redirected To Investor Relations Information for U.S.

Thank you for visiting Samsung U.S. Investor Relations. You will be redirected via a new browser window to the Samsung Global website for U.S. investor relations information.
CANCEL
CONTINUE
×

Redirect Notification

As of Nov. 1, 2017, the Samsung Electronics Co., Ltd. printer business and its related affiliates were transferred to HP Inc.

For more information, please visit HP's website: http://www.hp.com/go/samsung


Select CONTINUE to visit HP's website.

CANCEL
CONTINUE