Galaxy S25+ Back Cover
Galaxy S25+ Back Cover
Galaxy S25+ Back Cover Disassembly
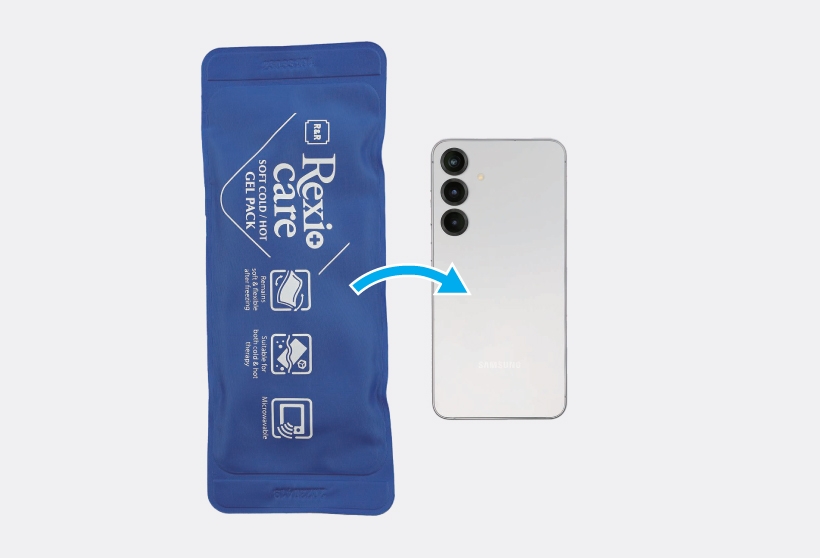
- It is possible for the device or battery to be damaged by heat.
- Do not heat the device in a microwave. Doing so could cause an explosion.
- If your device’s glass breaks, the debris can cause injury to your hands or other body parts. For your safety, attach an acrylic protective cover before disassembling the device.
- Follow the heating bag’s instructions for heating. The recommended time for heating the bag is 50 seconds in a 1000 W microwave and 70 seconds in a 700 W microwave. (Correct temperature for use: 131-149 °F / 55-65 ℃.)
- Be careful not to damage the device through excessive heat. (It is recommended to disassemble the device in an area with a temperature gauge.)
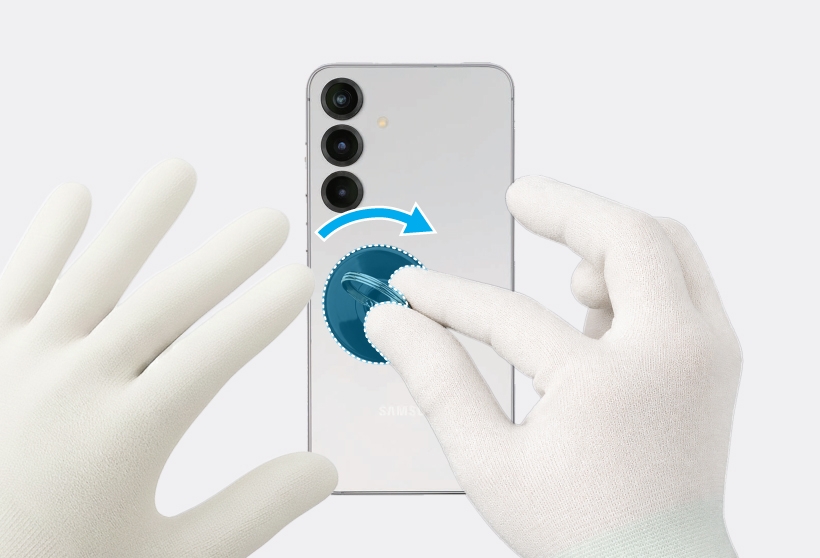

- As the back cover can be damaged by excessive force, be careful not to damage the back cover.
- Be careful that the suction cup does not adhere to the area where the tape or sticker is attached.
While pulling up the suction cup with strong, steady force to create the gap between the back cover and the screen module, place the opening pick in the gap between the back cover and the screen module and slide the opening pick back and forth along the edge to slice through the adhesive. Repeat this on all sides of the back cover and slice through the adhesive. Lift up the back cover slowly and remove it gently from the device.
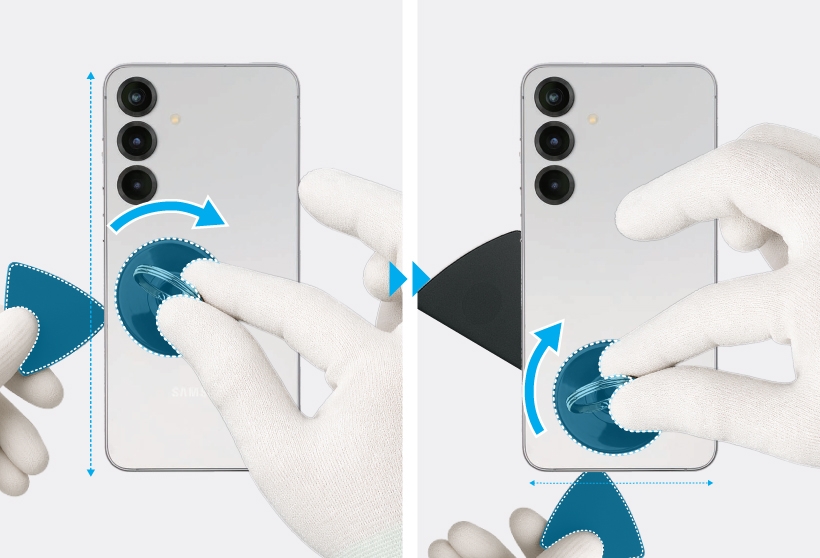
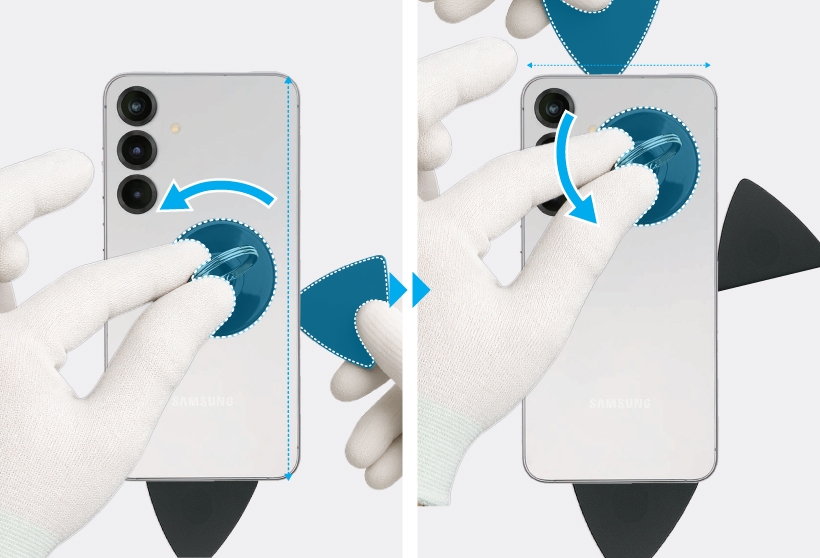
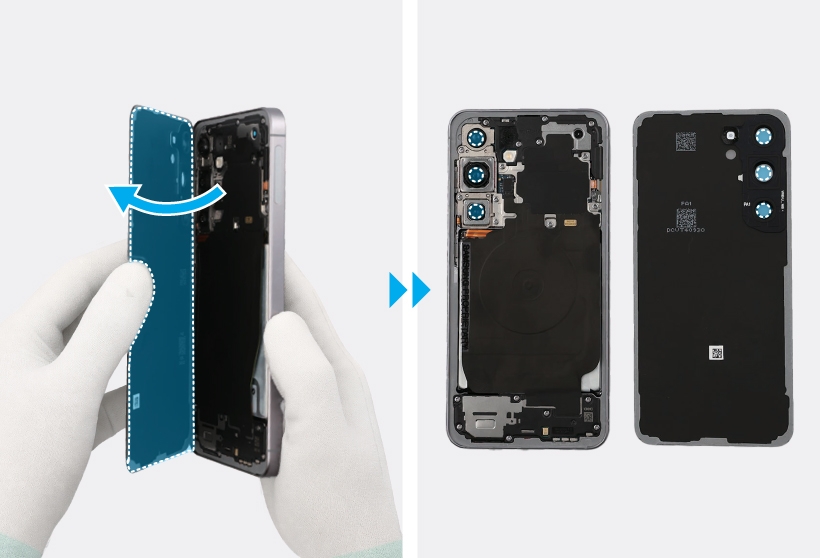
- As the back cover can be damaged by excessive force, be careful not to damage the back cover.
- As the internal circuitry can be damaged, do not insert the opening pick more than 3 mm.
- Be careful not to put your fingertips or any foreign objects on the rear cameras
- Make sure to leave the opening pick inserted in the edges to prevent the adhesive from resealing. It is recommended that a large area of the opening pick be inserted.
- If you have trouble creating a gap, heat the microwaveable heating bag additionally, and apply it on the back cover to further soften the adhesive. When reheating, it should be heated no longer than 30 seconds.
Galaxy S25+ Back Cover Reassembly
Remove all adhesive tapes on the separated back cover (🔴) if you use the existing back cover as it is.
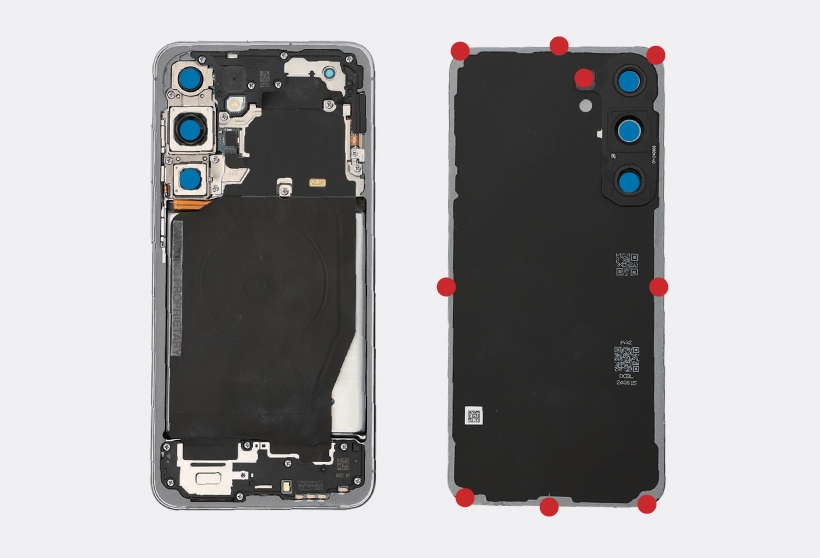
- Be careful not to put your fingertips or any foreign objects on the rear cameras or back cover lens (🔵).
- Make sure to remove any residual tapes (🔴) attached to the inside of the back cover before reassembling the device.
Also, remove the double-sided adhesive tape around the microphone hole using the tweezers and your fingers.
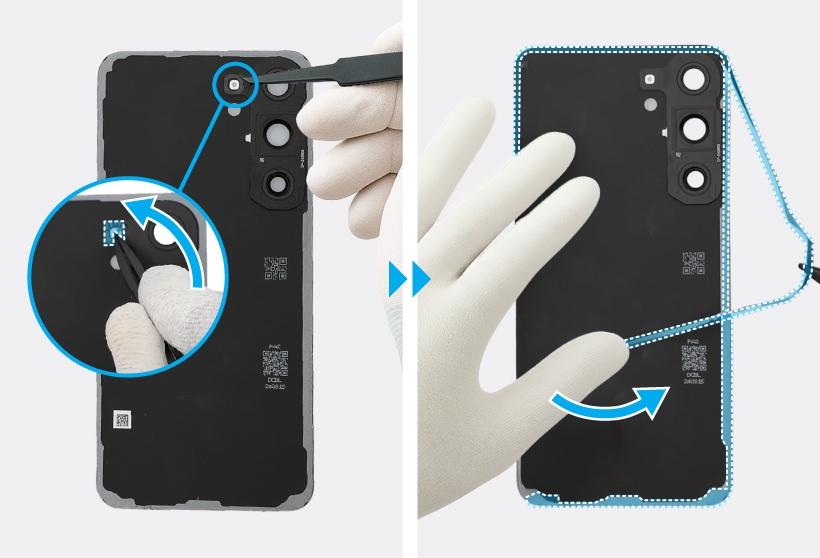
Remove the transparent film of the new back cover adhesive tape. Align the adhesive tape precisely on the metal frame and attach it.
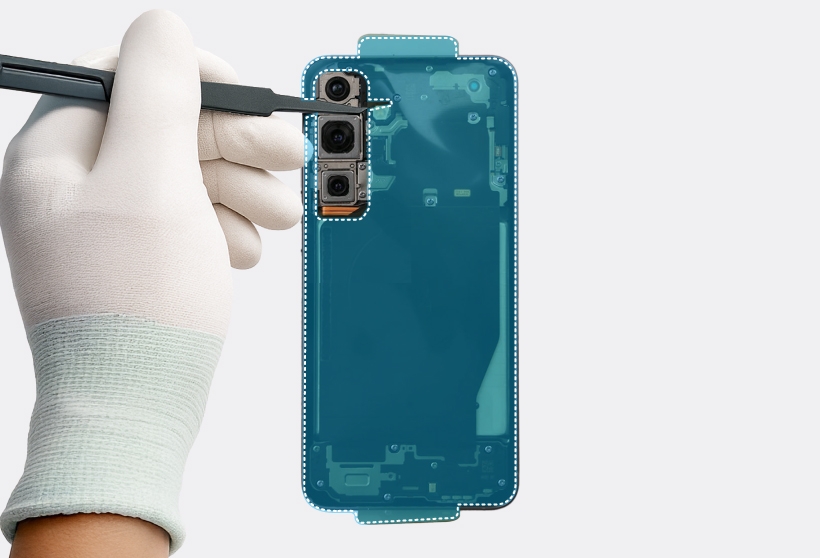
Using the tweezers and your fingers, gently press around the edges to ensure a secure fit.
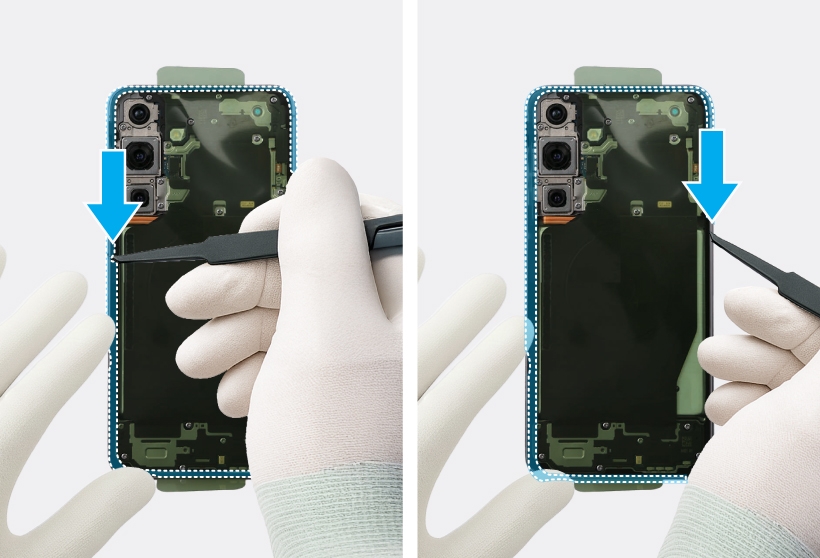
Remove the release film under the new microphone hole adhesive tape. Using the tweezers and your fingers, attach the tape around the microphone hole inside of the back cover.
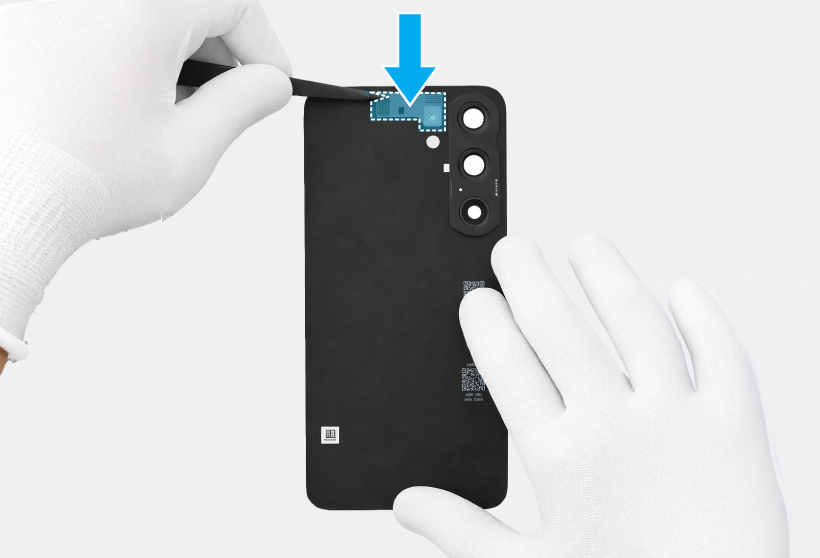
Using the tweezers or your fingers, remove all release films on both the back cover and the device.
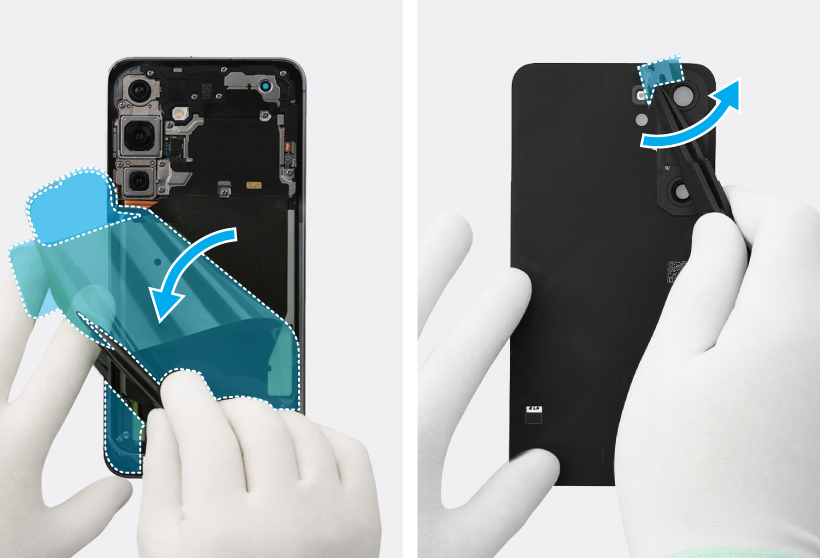
Attach the back cover and press down on the edges of the back cover. Check the gap between the back cover and the metal frame.

Press down the edges of the back cover evenly in order to attach the back cover perfectly. Ensure that there are no abnormalities.
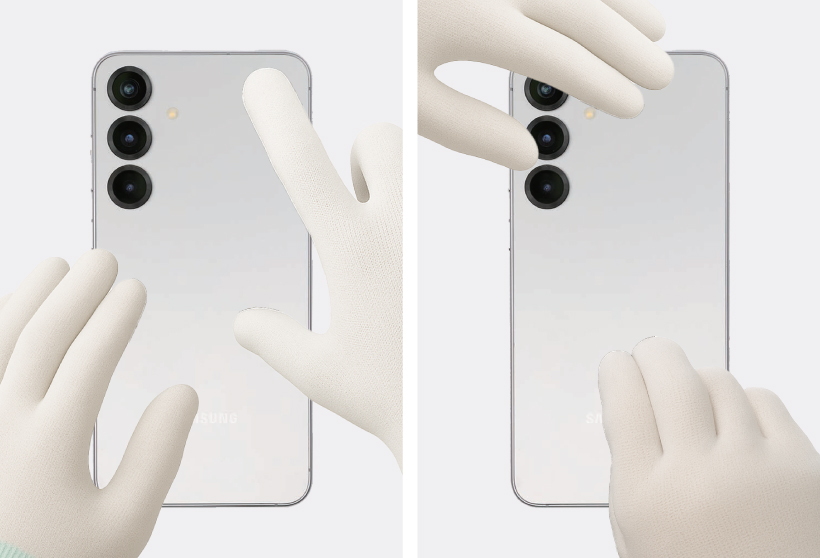
Now you can press the fully assembled back cover using the press fixture. Remove the press fixture body and its handle from the rental tool kit packaging.
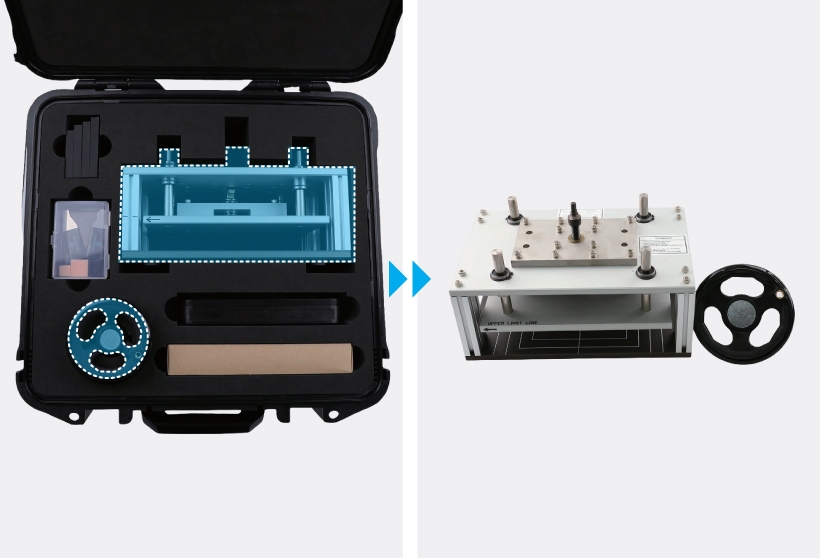
- This tool is only available to use by the rental of tool kit that contains a complete set of the tools for self repair service.
- Availability of rental service may vary depending on the country and is currently available only in limited countries.
- A rented tool kit packaging may have different packaging than shown.
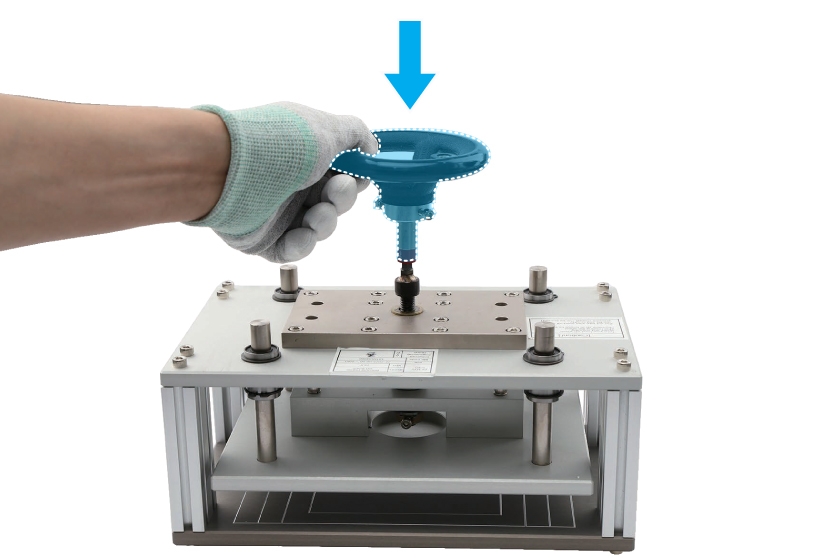
Carefully position the torque limit handle horizontally at the top of the press fixture.
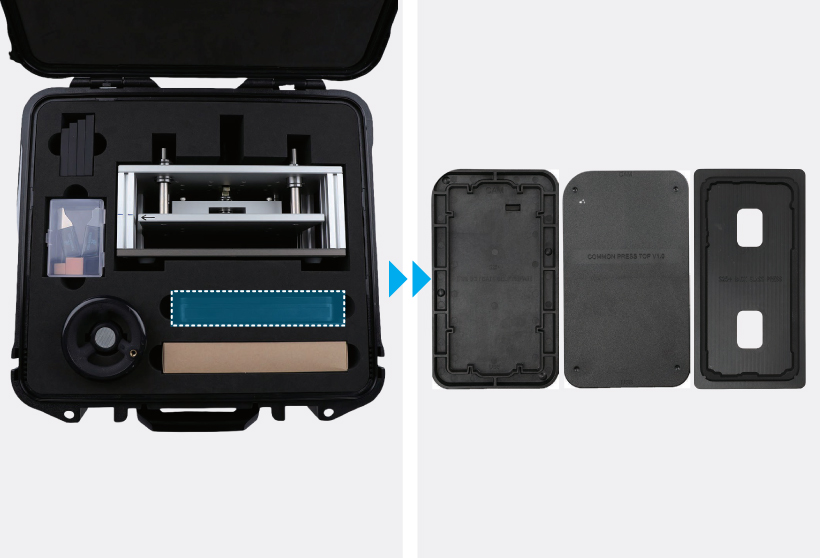
Remove the bottom press tray, top press tray, and top rubber pad for the back cover from the rental tool kit packaging.
Leave the bottom press tray so that the side for the back cover is visible. Then, place the device into the tray facing down.
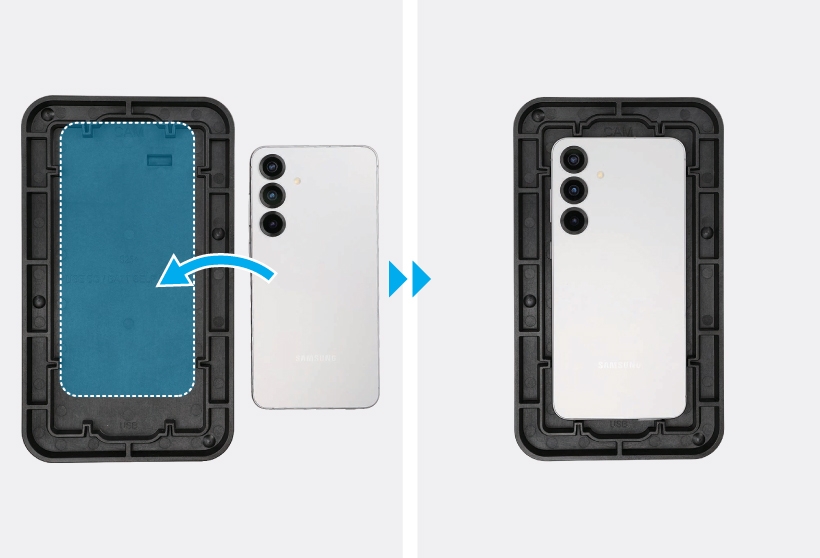
- You can choose the one side of the bottom press tray depending on the back cover, screen, or battery.
- The bottom press tray may vary depending on the device.
Insert the top rubber pad for the back cover into the top press tray.
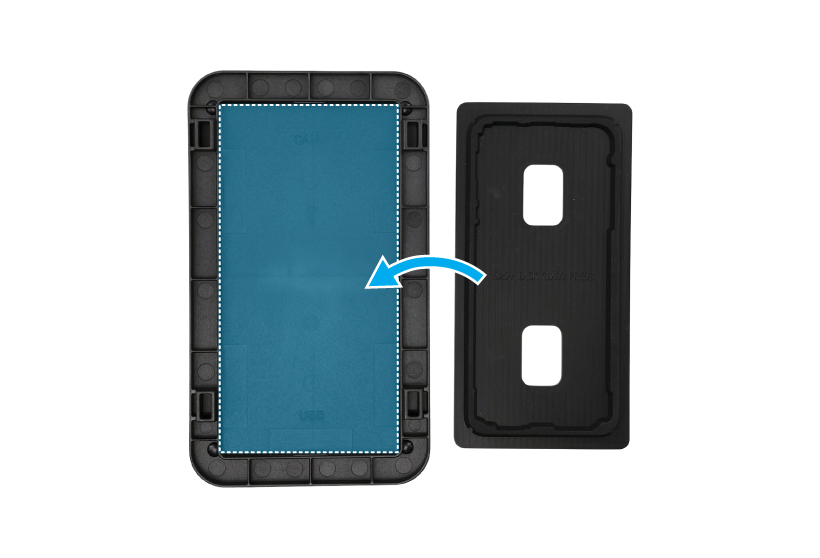
- The rubber pads for the back cover and screen are different from each other.
- The rubber pad may vary depending on the device.
Press down the edges of the rubber pad entirely using your fingers and make sure that the pad is pressed in completely.
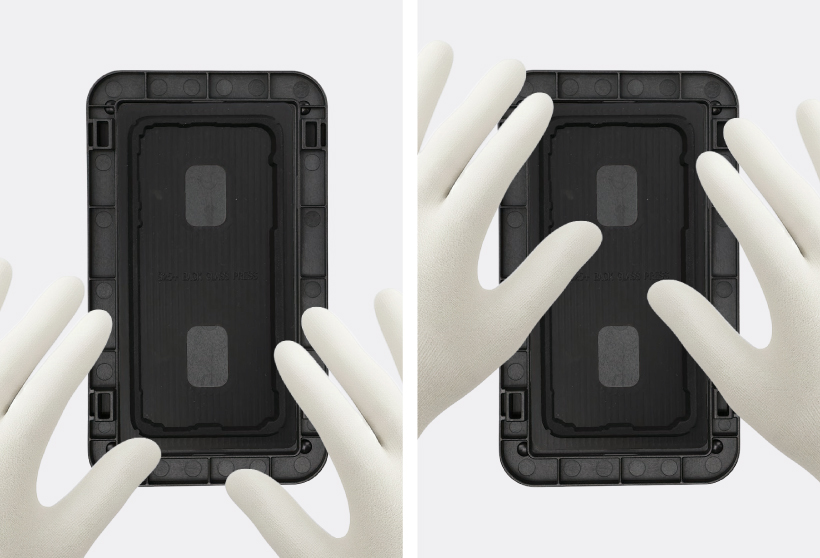
Carefully place the top press tray over the bottom press tray.
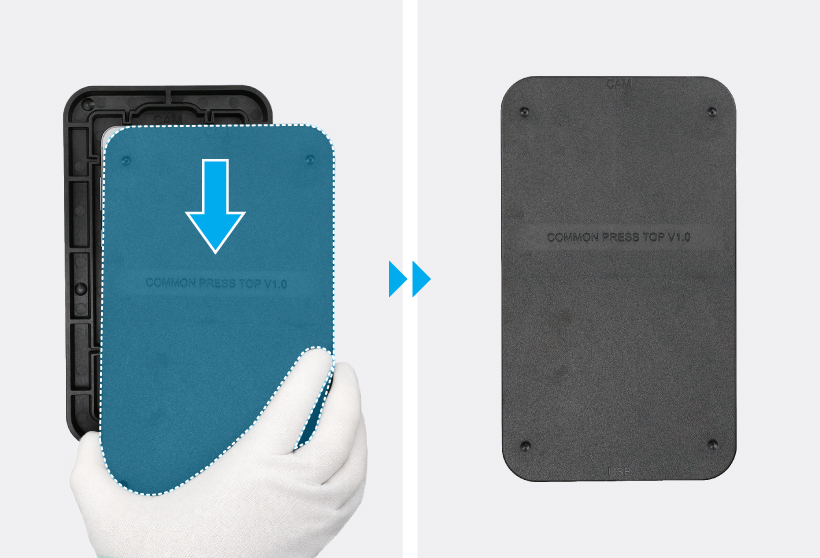
Position the entire back cover press tray with the device horizontally in the center of the press fixture.
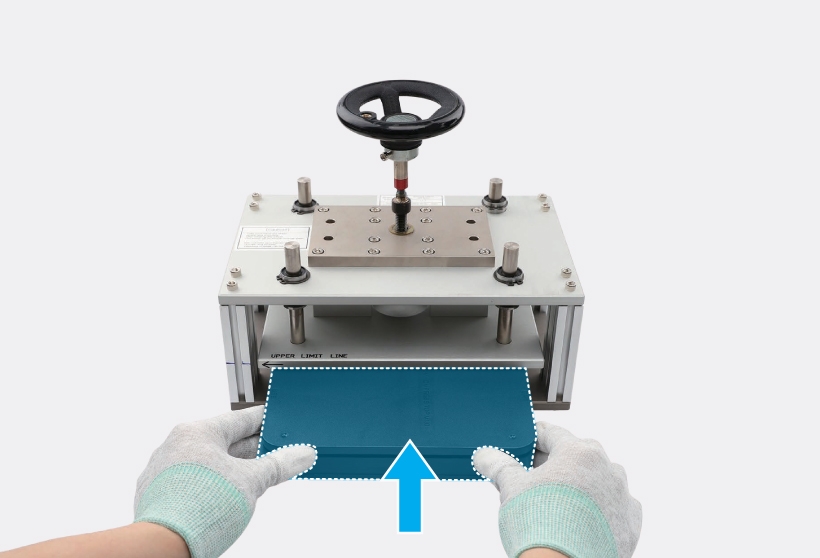
Rotate the torque limit handle to the clockwise until it makes a sound. In that press state, stay the tray for 1 minute.
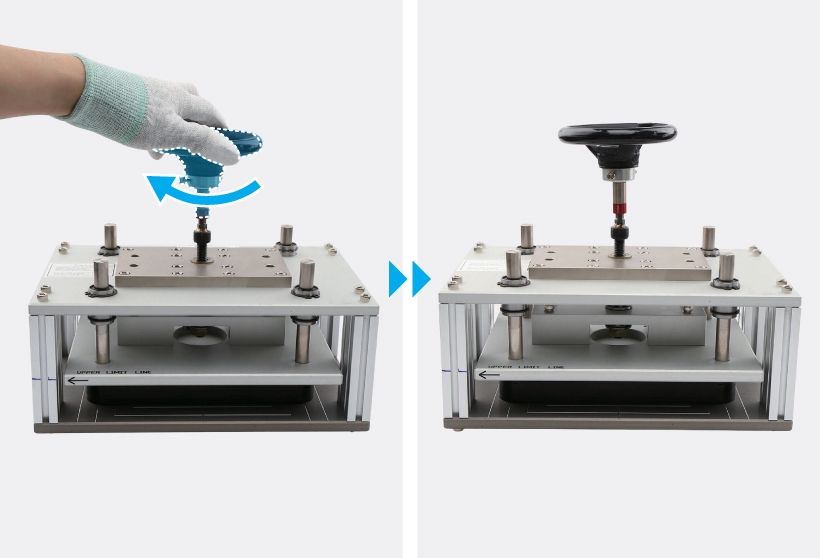
When the press is completed after 1 minute, rotate the torque limit handle to the anticlockwise and remove the tray from the press fixture.
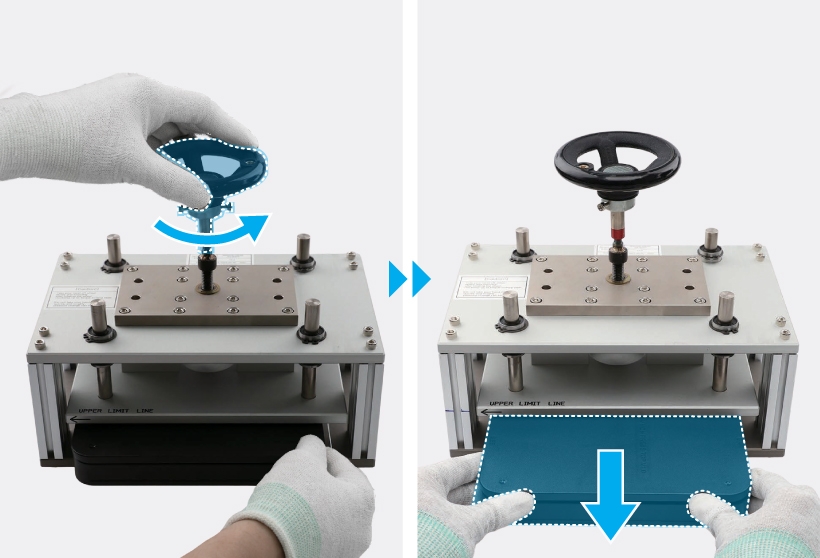
Remove the device carefully from the tray.
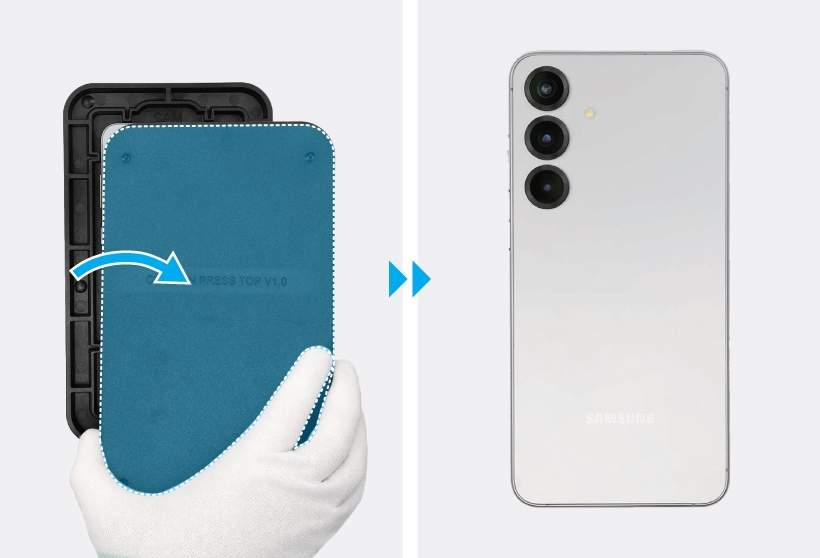
If only a single back cover has been repaired, the press roller and stamp can be bundled with the ordered parts and you can also further press the fully assembled back cover using the bundle tool. With the roller’s spring pressed, using the press roller, rub the edge of the back cover 5 times from bottom to top. Repeat this 5 times on all edges of the back cover except for the camera part so that the back cover is pressed well. Next, press the outer edges of the camera with the press stamp for 5 seconds while pressing the spring of the stamp.


- Availability of the bundle tool may vary depending on the country and the device, and is currently available only in limited countries.
- Be sure to swipe while the spring of the roller and stamp is pressed.
- Be careful not to damage the camera part by the roller and stamp.
- As the back cover can be damaged by excessive force, be careful not to damage the back cover.
- Ensure that the device is fixed on a soft and flat surface.
- Be careful to place the surface of the roller and stamp horizontally on the back cover.