Galaxy Z Fold6 Back Cover Replacement
Galaxy Z Fold6 Back Cover Replacement
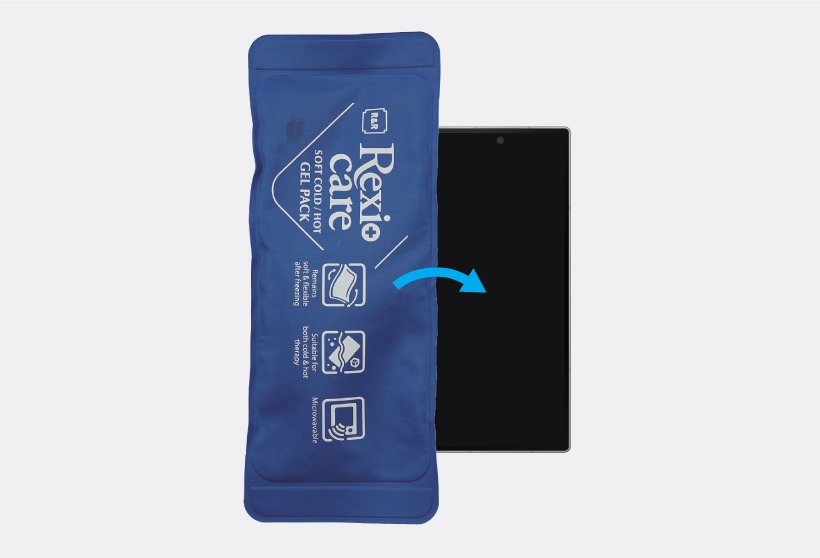
Heat the microwaveable heating bag and apply it on the back cover for 3 minutes to soften the adhesive.
- It is possible for the device or battery to be damaged by heat.
- Do not heat the device in a microwave. Doing so could cause an explosion.
- If your device’s glass breaks, debris can cause injury to your hands or other body parts. For your safety, attach an acrylic protective cover before disassembling the device.
- Follow the heating bag’s instructions. The recommended time is 50 seconds in a 1000 W microwave and 70 seconds in a 700 W microwave. (Recommended temperature: 131-149 °F / 55-65 ℃.)
- Be careful not to damage the device through excessive heat. (It is recommended to disassemble the device in an area with a temperature gauge.)
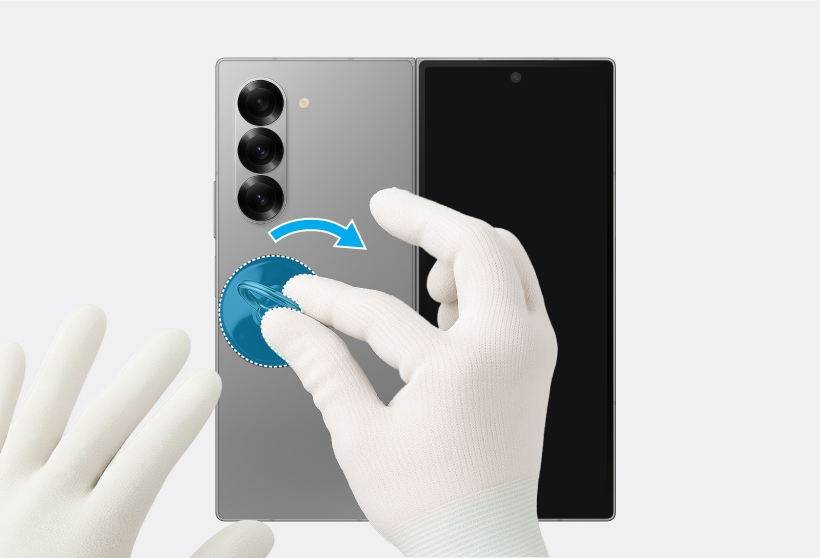
Place the suction cup on the center of the left edge of the back cover, and lift it upward carefully.
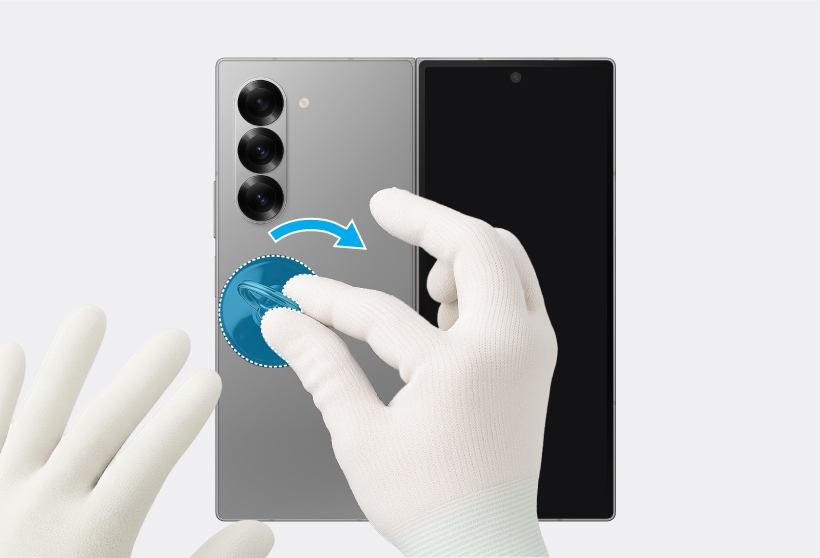
For separable handle suction cups, be careful not to injure yourself as the handle can be parted during use.

- As the back cover can be damaged by excessive force, be careful not to damage the back cover.
- Be careful that the suction cup does not adhere to the area where the tape or sticker is attached.
While pulling up the suction cup with strong, steady force to create the gap between the back cover and the metal frame, place the opening pick in the gap between the back cover and the metal frame, and slide the opening pick back and forth along the edge to slice through the adhesive. Repeat this on all sides and slice through the adhesive.
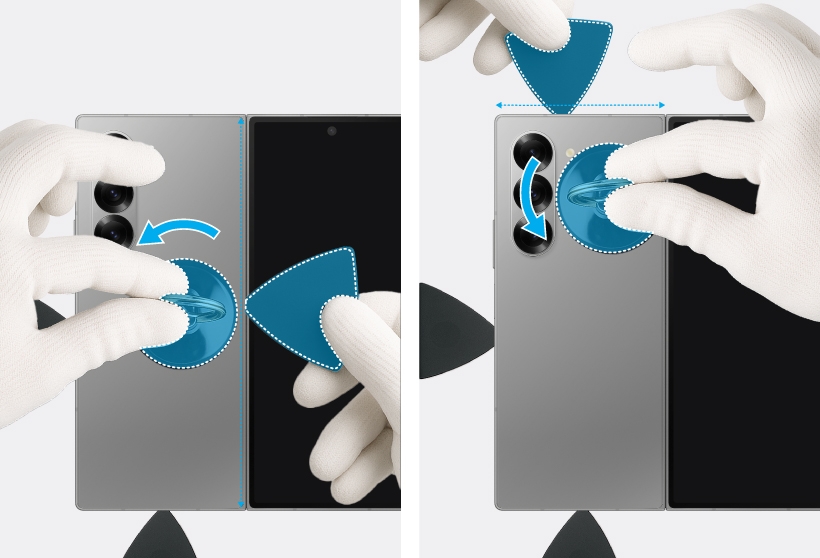
- As the back cover can be damaged by excessive force, be careful not to damage the back cover.
- As the internal circuitry can be damaged, do not insert the opening pick more than 3 mm.
- Be careful not to put your fingertips or any foreign objects on the rear cameras or back cover lens.
- Make sure to leave the opening pick inserted in the edges to prevent the adhesive from resealing.
- If you have trouble creating a gap, heat the microwaveable heating bag again for no more than 30 seconds, and apply it on the back cover to further soften the adhesive. When reheating, it should never be heated for longer than 30 seconds.
Lift up the back cover slowly and remove it gently from the device.
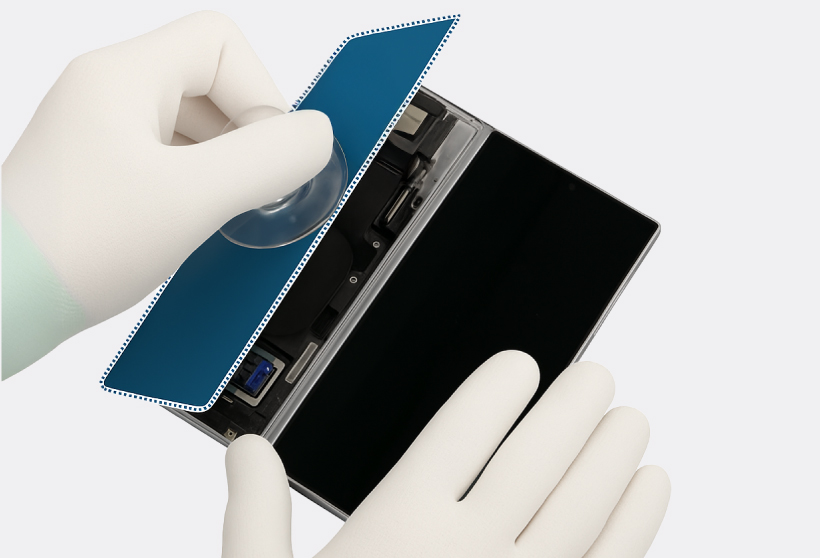
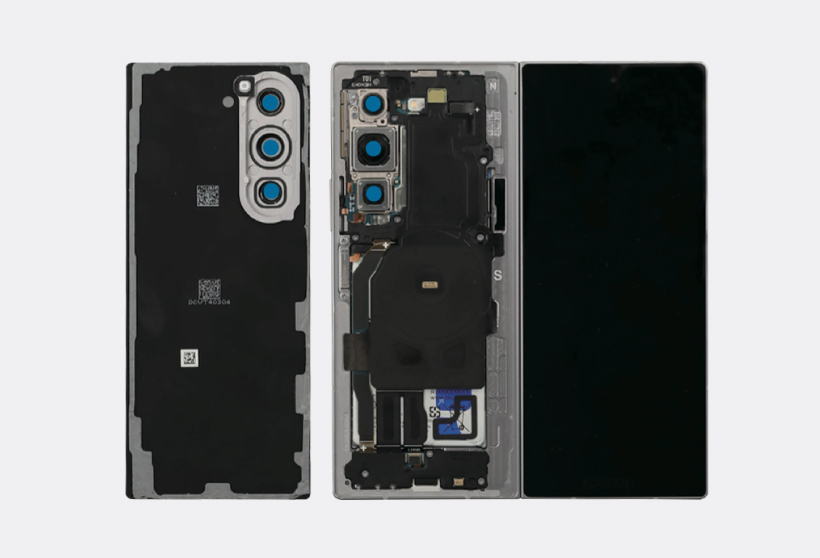
Remove all adhesive tapes on the separated back cover (🔴) if you use the existing back cover as it is.
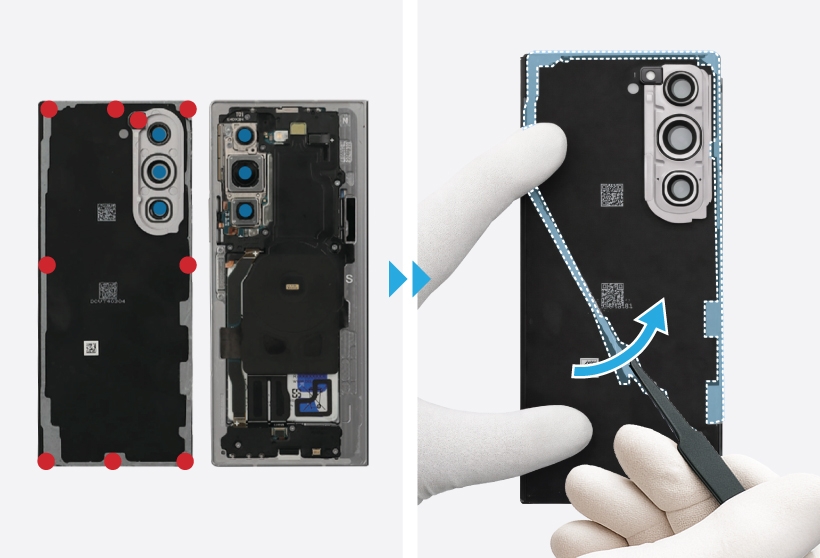
- Be careful not to put your fingertips or any foreign objects on the rear cameras or back cover lens(🔵).
- Make sure to remove any residual tapes (🔴) attached to the inside of the back cover before reassembling the device.
- Be careful not to damage nearby components.
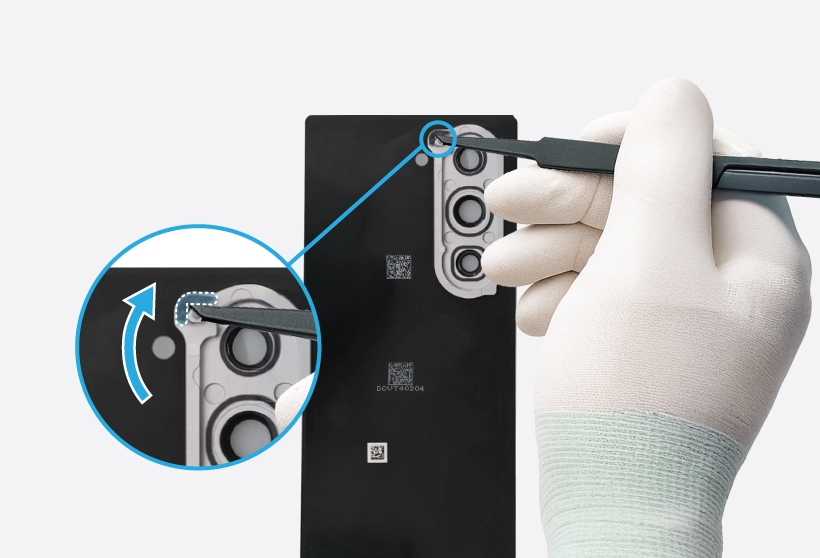
Using the tweezers or your fingers, remove the double-sided adhesive tape around the microphone hole.
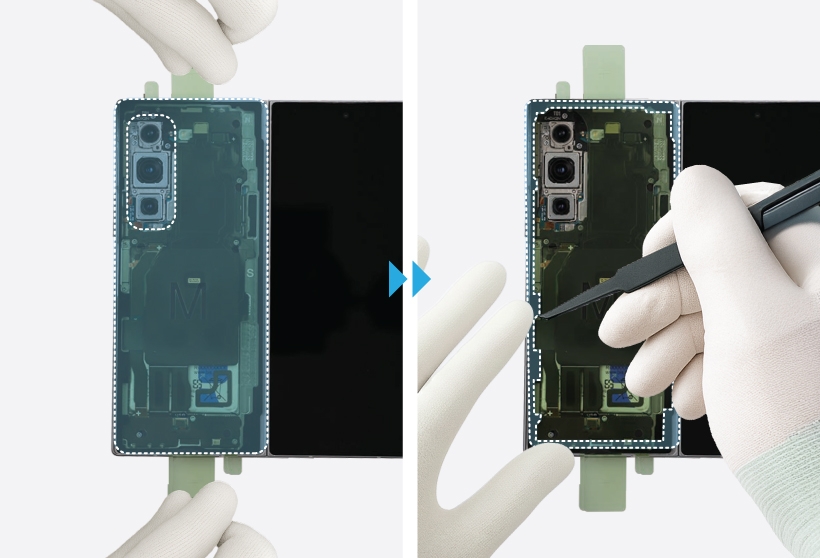
Remove the release film of the new back cover adhesive tape. Align the adhesive tape precisely on the metal frame and attach it. Then, using the tweezers and your fingers, gently press around the edges several times to ensure a secure fit.
Remove the bottom release film underneath the black adhesive of the new microphone hole tape. Using the tweezers or your fingers, align the outside shape of the tape with the position of the microphone hole and attach it accurately on the back cover. Gently press down on the adhesive tape.
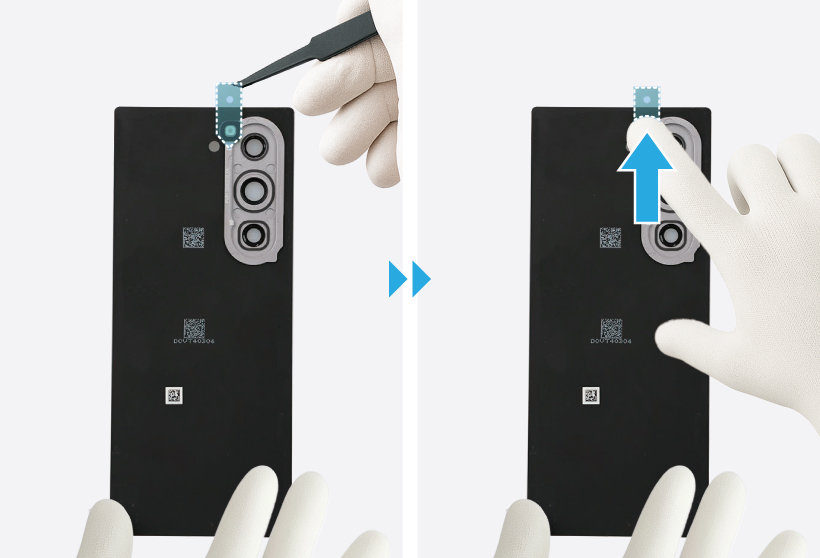
Using the tweezers or your fingers, remove all the remaining release film on both the back cover and the device.
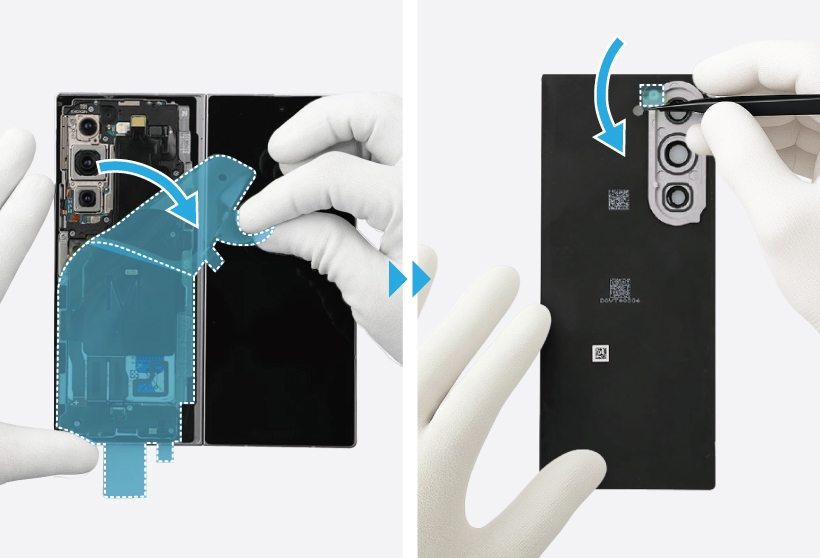
Attach the back cover and press down on the edges of the back cover. Check the gap between the back cover and metal frame.
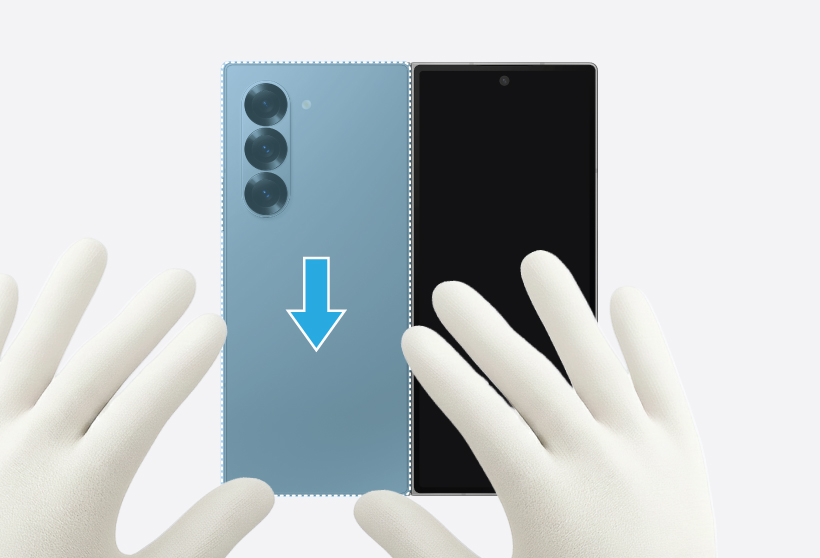
Press down the edges of the back cover evenly in order to attach the back cover perfectly. Ensure that there are no abnormalities.