Use SmartThings Find with the SmartThings app
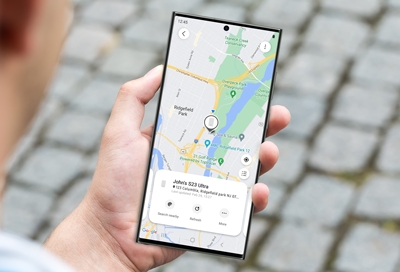
With all the devices we own these days, it’s easy to accidentally misplace one or two. Luckily, SmartThings Find in the SmartThings app will help you locate your precious devices, like your phone, tablet, earbuds, and watch. SmartThings Find will scan for your devices and even show you a map with detailed information, including addresses and timestamps. You can also share device information with other Galaxy users so a friend can locate a device for you, or turn on the Offline finding feature. If you need additional tracking options, you can use the Samsung SmartTag as well.
Note: You must sign into your Samsung account to use SmartThings Find.
Install SmartThings Find
Note: You may be prompted to allow location permissions when opening the SmartThings app.
If you’ve lost track of a device, just open the SmartThings app to use SmartThings Find. Your devices will appear on a map so you can easily keep an eye on their locations.
Navigate to and open the SmartThings app. Tap the Life tab, and then tap the Find card. If prompted, tap Download to download the necessary add-ons. If needed, tap Agree.
Next, select the devices you’d like to see on the location map, and then tap Done.
You'll see a map containing the devices you selected. Swipe left or right on the bottom of the screen to view detailed information about your devices, such as their approximate locations.
Select a specific device by tapping it on the map, or by tapping its name.
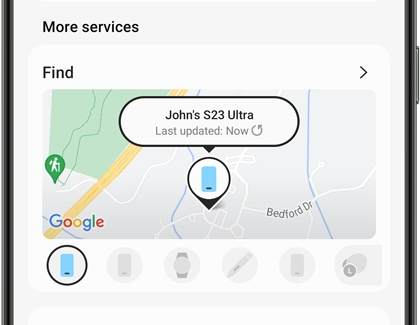
If you ever need to remove the SmartThings Find card from SmartThings, tap the Life tab, then tap More options (the three vertical dots), and then tap Delete. Tap the minus sign next to Find, and then tap Done. You can add it back at any time by selecting it again. Keep in mind that removing the card from the SmartThings app will not uninstall the SmartThings Find feature.
Use the SmartThings Find card
You can narrow down locations and view navigation directions for your misplaced devices using the SmartThings Find card. Or, if you know a device is nearby, you can make it ring loudly so you can find it fast.
Navigate to and open the SmartThings app, then tap the Life tab, and then swipe to the Find card.
The Find card will display your currently added devices along the bottom panel; tap each one to view its name and location on the map. Tap the Refresh icon under your device's name to reload the location tracking.
Tap the map to open SmartThings Find and see more options.
Tap the Menu icon (it has three dots with three lines) on the map to view your devices. Tap a device to view it on the map, and then zoom in on the map by pinching the screen with your fingers.
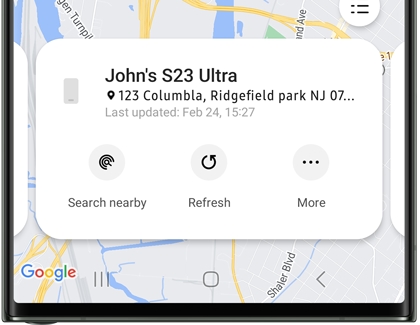
If you need to search your surrounding area for a device or want your device to make a sound, you can use the options at the bottom of the screen:
Search nearby: Begin scanning the immediate area for your device. You’ll receive a notification when the device is detected. You can quit scanning at any time by tapping Stop.
Navigate: Open Google Maps Navigation to generate the fastest route to your device. This option may not be available if the device cannot be located. You may need to tap More, and then tap Navigate.
Ring: Make your device ring at its maximum volume for one minute. Your device will ring even if it’s set to mute or vibrate.
Caution: If you believe your device has been stolen, do not go to the location on the map. Contact the authorities instead.
Additional options
SmartThings Find includes extra options to make it easier to find your devices. For instance, you can add or remove devices that SmartThings will be able to locate, and also share location information with other Galaxy users.
To begin, navigate to and open the SmartThings app, and then tap the Life tab. Tap the Find card, and then tap More options (the three vertical dots) to use the following options:
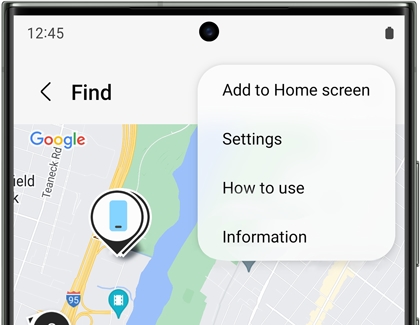
Add to Home screen: Add a SmartThings Find shortcut to your Home screen. You can tap the shortcut on your Home screen to go directly to the location map.
Settings: Select from additional settings to help you locate your devices. These include Allow devices to be found to choose which devices can be found, Allow children's devices to be found to include devices owned by your Family Group members, Offline finding devices to update the location of offline devices, and Encrypt offline location to ensure your device's location is encrypted (see the Offline finding section for more information). Unknown tag detection will let you know if an unknown smart tag is moving with you, and Allow use of location information will let you grant or deny access to your location.
How to use: View a tutorial that outlines the basic steps for using SmartThings Find.
Information: View the software version and other information about SmartThings Find.
You can also select or deselect devices that appear on the map. On the map, tap the Menu icon (it has three dots with three lines), and then tap More options (the three vertical dots). Tap Remove devices. Tap All at the top to choose all of your devices, or select a few by tapping individual devices. Then, tap Remove.
Note: Up to ten devices can be selected at a time.
Use the Samsung SmartTag
If you have the Samsung SmartTag, you can attach it to your keys, your purse, your backpack, or anything that you can’t afford to misplace. Once the SmartTag has been connected with the SmartThings app on your device, you can use it to track and find your items whenever you need to. You won’t need to pay for the basic tracking service, either!

Use Offline finding
The Offline finding feature in SmartThings Find can help you locate a missing device, even when it's turned off or not online. Once your device has been offline for 30 minutes, it will produce a signal that can be received by other devices. A nearby Galaxy device user can then assist you with finding your lost device by sending that information to Samsung’s server. On the other hand, the feature also allows you to encrypt your device's offline location so only you can access it.
However, you'll first need to turn on the Offline finding feature in order for the service or offline encryption to work.
Navigate to and open the SmartThings app, and then tap the Life tab. Tap the Find card.
Tap More options (the three vertical dots), and then tap Settings.
Tap Allow devices to be found, and then tap the switch next to Offline finding.
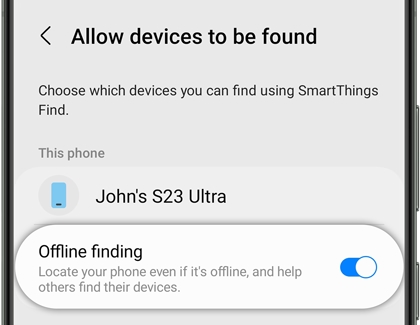
If you have compatible paired devices, such as a Samsung smart watch, you can turn on Offline finding for them as well by tapping their switches.
Tap Back, and then tap Encrypt offline location.
Tap the switch next to your device’s name. This will encrypt your device’s location so only you will be able to find your device.
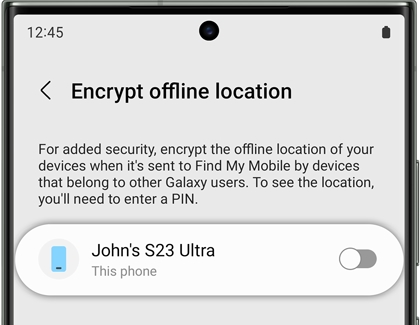
Next, enter a six digit PIN. This PIN will be used to decrypt your device's offline location. Tap Continue, and then enter the PIN again to confirm. Tap OK.
To encrypt additional devices after setting your PIN, tap the switches next to your preferred devices that appear.
If you ever need to change your PIN, tap Reset PIN, and follow the on-screen instructions.
Note: You can also turn on the Offline finding feature through your phone's or tablet's regular settings. Navigate to and open Settings, and then tap Security and privacy. Tap Find My Mobile, then tap Offline finding, and then tap the switch at the top to turn it on.
Other answers that might help
-
Mobile 8 AM - 12 AM EST 7 days a week
-
Home Electronics & Appliance 8 AM - 12 AM EST 7 days a week
-
IT/Computing 8 AM - 9 PM EST 7 days a week
-
Text Support 24 hours a day 7 Days a Week
Contact Samsung Support
