Mode options explained for the Samsung kimchi refrigerator
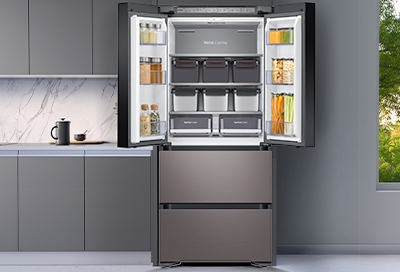
Are you a kimchi fanatic who’s always wanted to make their own kimchi? Well, with the new Smart Kimchi & Specialty fridge, you can make and preserve your very own kimchi! It has three separate compartments that can be used for fermenting. Is kimchi not your thing? Don't worry, the compartments come with different settings, such as a regular fridge mode and freezer mode, along with other options. The possibilities are endless, whether you’re always craving kimchi or just want a convenient way to store your favorite foods.
Note: These modes are only available on the Smart Kimchi & Specialty 4-Door French Door Refrigerator.
Make kimchi with Ferment mode
The secret to kimchi is fermentation! Your kimchi fridge has the optimal settings for fermenting kimchi from scratch. There are four different settings in Ferment mode, and each one will give you a distinctive flavor. Ferment mode is available on all three compartments of the fridge.
Before using Ferment mode, move items such as vegetables, fruits, or meat to another compartment to prevent them from going bad.
Place the kimchi you wish to ferment in your desired compartment. The Top and Middle compartment have the Slow and Normal fermenting options while the Bottom has Radish Kimchi and Watery Kimchi options.
Note: When using Ferment mode, store a single type of kimchi in each compartment. If you ferment different kinds of kimchi together, you won’t be able to experience each taste properly.
The panel automatically locks after 1 minute, so before you can adjust any settings, press and hold Lock for 3 seconds to unlock the main panel. The blue LED indicator will turn off when the panel is unlocked.
Note: If your desired compartment is off, you must turn on that compartment first. Press Ferment on the corresponding compartment (Top, Middle, Bottom) to turn it on.
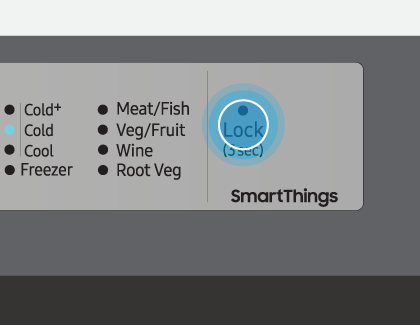
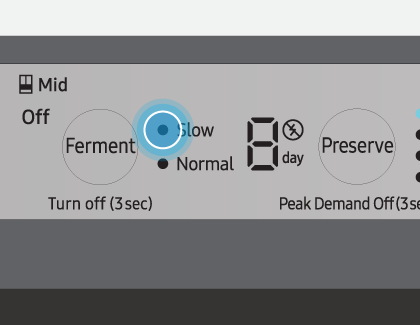
Press Ferment on the desired compartment until you’ve selected your desired fermenting setting. Some of the compartments have different settings available:
Top and Middle compartments: Select Slow or Normal. Use Slow mode to ferment kimchi at a low temperature while enriching the flavor. Normal mode ferments kimchi properly without overfermentation.
Bottom compartment: Select Radish Kimchi or Watery Kimchi depending on what kind of kimchi you’d like to make.
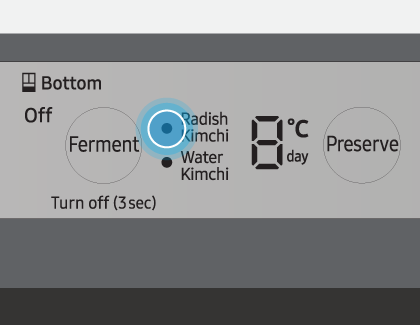
The kimchi will take a couple of days to ferment. The number of remaining days (based on the fermenting setting you chose) will be shown on the fridge’s progress indicator. Here are the number of days for each mode:
Slow: 6 days
Normal: 3 days
Watery Kimchi: 8 days
Radish Kimchi: 5 days
Once the fermenting process has finished and the set number of days has passed, the refrigerator will enter Regular-Cold mode. You can now enjoy your freshly made kimchi!
Have kimchi last longer with Preserve mode
Do you have some delicious kimchi you’d like to enjoy for as long as possible? Turn on Preserve mode on your Smart Kimchi & Specialty fridge. It’s especially designed to maintain kimchi, so it will retain its flavor and won’t go bad. Preserve mode is available on all three compartments.
Note: To preserve the kimchi longer, activate the desired Preserve mode for the desired compartment 2-3 hours in advance. Make sure the compartment is well-chilled before storing your kimchi.
Remove any food that you do not want to keep in the compartment while it’s in Preserve mode.
Place the kimchi you wish to preserve in your desired compartment. All three fridge compartments can use Preserve mode; however, each compartment has different temperature settings.
The panel automatically locks after 1 minute, so before you can adjust any settings, press and hold Lock for 3 seconds to unlock the main panel. The blue LED indicator will turn off when the panel is unlocked.
Note: If your desired compartment is off, you must turn on that compartment first. Press Ferment on the corresponding compartment to turn it on.
Press Preserve on your desired compartment (Top, Middle, Bottom) until you’ve reached your desired temperature setting. Each mode has different temperature settings that vary depending on what compartment you are using. Please refer to your user manual for more specific information about each setting.
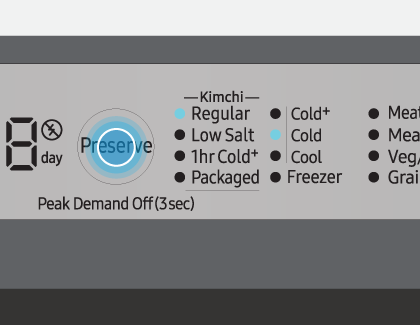
The following settings are available:
Regular-Cold
Regular-Cold+
Regular-Cool
1hr Cold+
Low Salt-Cold
Low Salt-Cold+
Low Salt-Cool
Packaged
Keep the fridge in this mode for as long as you need to preserve your kimchi. Please see the next section to learn more about preserving and storing kimchi so it lasts longer.
Storing kimchi long term
Push down on the kimchi in the container to ensure that no air is trapped inside. Make sure the kimchi is completely submerged in the kimchi juice. Exposing the kimchi to air can cause yeast to form and an unpleasant odor to develop. It is also advisable to cover the kimchi using outer cabbage leaves or plastic sheets to protect it from air exposure.
Do not put kimchi above the maximum line inside the container or the handle locking tabs. Overfilling the kimchi container will result in gas filling the container and causing the juices to spill over. If kimchi juices spill over, outside air can enter the container and spoil the kimchi.
Refrain from frequently opening the kimchi refrigerator’s door. This will cause temperature changes that can affect the kimchi’s flavor and cause the kimchi to go sour quickly.
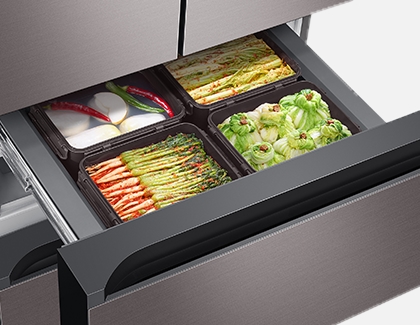
When storing kimchi, check on the containers after the first 2 or 3 days to ensure the juices are not spilling over. There must be no juice spilling to store the kimchi for an extended period.
Make delectable meat cuts with Meat Aging mode
Note: Meat Aging mode is only available on the Middle compartment.
The Smart Kimchi & Specialty fridge doesn’t just age kimchi – it can age meat as well! If you want to make your very own mouthwatering aged steaks or chops, use Meat Aging mode on the Middle compartment. This mode quickly ages meat at 37°F (3°C) while also periodically lowering the temperature to 28°F (-2°C). This tenderizes the meat and improves its flavor while protecting the meat from being contaminated by microbes. After 3 days, it will switch to Meat/Fish mode.
Place your desired items in your desired compartment and remove anything that cannot be stored in Meat Aging mode.
The panel automatically locks after 1 minute, so before you can adjust any settings, press and hold Lock for 3 seconds to unlock the main panel. The blue LED indicator will turn off when the panel is unlocked.
Note: If your desired compartment is off, you must turn on that compartment first. Press Ferment on the corresponding compartment to turn it on.
Press Preserve on the Middle compartment and select Meat Aging.
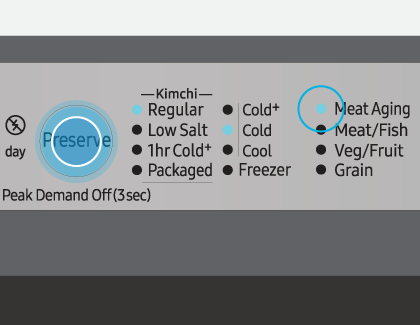
The set time for aging meat is 3 days. The amount of remaining time will show on the fridge’s progress indicator.
Once the aging process has finished, the refrigerator will enter Meat/Fish mode. Take out your aged meat products and enjoy!
Use Fresh mode for grains, root vegetables, and wine
Usually you store grains like rice and certain foods (such as bananas and potatoes) at room temperature, not in a fridge. But the Smart Kimchi & Specialty fridge has a mode that is designed to store these very things, and can keep them fresh even longer than leaving them at room temperature! So, if your cabinets or countertops are full, just enable the Fresh modes on the Middle or Bottom compartment to make more room. There’s also a Fresh mode that is perfect for storing wine!
Place the items you want to store in your desired compartment and remove anything that cannot be stored with the Fresh mode. The Middle compartment can only use the Grain option, while the Bottom compartment can use Wine and Root Veg.
The panel automatically locks after 1 minute, so before you can adjust any settings, press and hold Lock for 3 seconds to unlock the main panel. The blue LED indicator will turn off when the panel is unlocked.
Note: If your desired compartment is off, you must turn on that compartment first. Press Ferment on the corresponding compartment to turn it on.
Press Preserve on the desired compartment until you reach your preferred Fresh mode. The two compartments have different settings available:
Middle compartment: Press Preserve on the Middle compartment and select Grain.
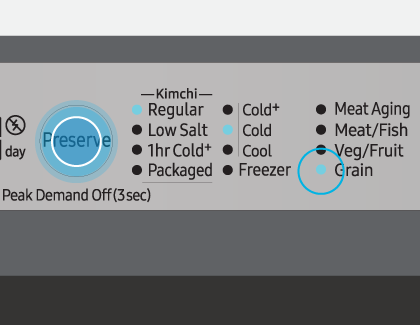
Bottom compartment: Press Preserve on the Bottom compartment and select from Wine or Root Veg.
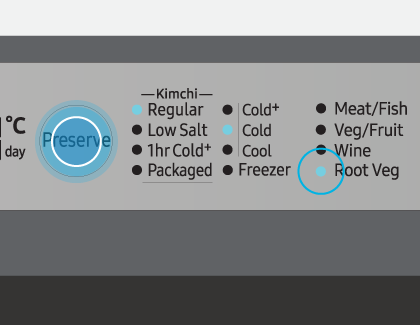
Now you’ll be able store grains, root vegetables, or wine in those compartments! And you can change it back to a kimchi mode or another mode later if needed.
Here are some tips for storing various food items using the different Fresh modes:
Store rice or grains in a kimchi container, an airtight container, or a container with a lid.
Store potatoes and bananas in a container with the lid open.
Do not open or close the bottom compartment door too hard if you have wine stored in that compartment.
Root Veg and Veg/Fruit modes have different temperature settings. Storing vegetables or fruits in the Root Veg mode may shorten the storage duration.
The Root Veg mode makes it possible to keep food items fresh for longer than you would at room temperature or when using the Fridge mode. (Approximately 3 weeks for bananas and about a month for potatoes and sweet potatoes.)
Separate the bananas and store them with the tip of their stem cut off to keep them fresh for longer and make them easier to eat.
Storing potatoes at a temperature of 39°F or below triggers the formation of an endocrine disruptor called acrylamide. Also, potatoes produce a toxin called solanine when exposed to light. Use the Root Veg mode and free yourself from worrying about the temperature or sunlight exposure. (Acrylamide - A carcinogen that forms when cooking food at a high temperature.)
The cork is a reliable measure to determine the condition of the wine. If you spot any bad signs from the cork, there is a chance that the wine may have gone bad.
Wine will turn sour over time once you uncork it. Make sure to reinsert the cork securely before storing uncorked wine and consume it within 2-3 days.
Store other food with Fridge and Freezer modes
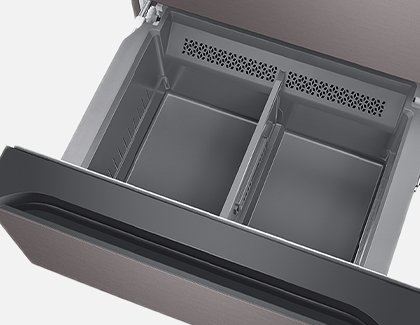
Maybe you love kimchi but don’t plan on using the entire fridge just to make or store it. In this case, you can change the Top compartment to Fridge mode, which, as the name suggests, will make it run like a regular fridge. Similarly, you can also change the Middle and Bottom compartments to Freezer mode.
Remove anything that should not be stored in a regular fridge from the desired department.
The panel automatically locks after 1 minute, so before you can adjust any settings, press and hold Lock for 3 seconds to unlock the main panel. The blue LED indicator will turn off when the panel is unlocked.
Note: If your desired compartment is off, you must turn on that compartment first. Press Ferment on the corresponding compartment to turn it on.
Press Preserve on the desired compartment until you have reached your preferred mode. The settings are different depending on which compartment you’re planning to use.
Top compartment:
Fridge-Cold, Fridge-Cold+, or Fridge-Cool.
Middle or Bottom compartments:
Freezer-Cold, Freezer-Cold+, Freezer-Cool, or Meat/Fish.
Now you’ll be able to store food other than kimchi in your fridge! And you can change it back to a kimchi mode or another mode later if needed.
Note: When storing fruits or vegetables inside the container, do not close the lid tightly. When storing fruits or vegetables directly on the fridge shelves, place a kitchen towel underneath to keep them fresh longer.
Tips for fermenting your kimchi
Creating your own kimchi is both a science and an art. To make sure you get the best kimchi possible, follow these guidelines and tips below.
Fermenting kimchi inside a kimchi refrigerator
Use Ferment mode. Once the fermenting process has finished, the refrigerator will automatically enter Regular-Cold Preserve mode.
The fermenting time is pre-programmed for each Ferment mode and cannot be changed.
The number on the progress indicator represents the remaining days until the end of fermenting.
Fermenting kimchi outdoors
Once the kimchi juice level rises and the juice starts to bubble, store the kimchi inside the kimchi refrigerator.
Allowing the kimchi to ferment a little and then storing it at a low temperature will give you tasty kimchi that is rich in probiotics.
If you ferment kimchi outdoors during the typical kimchi-making season (winter), you will know the kimchi is ripe when you see the signs listed below. Once you start seeing these signs, store the kimchi inside the kimchi refrigerator.
The kimchi juice level rises, and the juice begins to bubble.
The kimchi loses its raw vegetable scent and develops a sour taste.
The juice tastes ripe, but the cabbage does not taste fully ripe.
The kimchi can be fermented at room temperature. Please be mindful that, when fermenting kimchi at room temperature, the fermenting time varies depending on the type of kimchi, the salinity, and the temperature.
Be careful not to exceed 3 days when fermenting kimchi at room temperature.
About fermenting temperature
The fermentation period for kimchi varies depending on the amount of salt and the types of ingredients (seasoning).
The salt concentration is the most important factor in fermenting kimchi. It takes a shorter time to ripen kimchi if the salt concentration level is low and a longer time if the salt concentration level is high.
The fermenting period is also affected by the types and amount of seasonings used to add flavor to the kimchi, your locale, and your dietary pattern. Using large amounts of ingredients, such as garlic, seafood (oysters, raw shrimp, croaker, hairtail, etc.), onions, dried red pepper powder, cucumbers, and green onions, speeds up the fermenting process. However, adding ingredients, such as chives, mustard leaves, and ginseng, slows the fermenting process.
Activating Ferment mode initiates the fermenting process for the entire compartment. Before activating Ferment mode in the desired compartment, remove any other items and only store fresh kimchi that needs fermenting.
The degree of fermenting may vary depending on the type of kimchi, salinity (amount of salt), and time of the year. Taste your kimchi periodically during the fermenting process and if the kimchi is ripe, you can start the Preserve mode.
Kimchi may not feel cold during the fermenting process. However, when the refrigerator enters the Regular-Cold Preserve mode at the end of the fermenting process, the kimchi will be chilled.
If you prefer raw kimchi, you may skip the fermenting process and use Preserve mode right away.
Contact Samsung Support


