Use the camera app on your Galaxy A37 5G

Use the camera app on your Galaxy A37 5G
Explore camera features, modes, and tools
Galaxy A37 5G Camera specs

The Galaxy A37 5G features a versatile camera system designed to capture clear, detailed photos and videos in a variety of shooting conditions.
- 50MP Main camera lens
- 8MP Ultra-Wide camera lens
- 5MP Macro camera lens
- UHD 4K | @30fps video recording
- Quad Pixel, Digital Zoom up to 10x
- 12MP Selfie lens
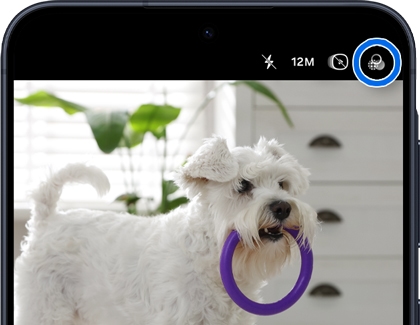
Launch the camera

You can quickly access the Camera app on your Galaxy A series using several convenient methods, whether your device is locked or unlocked.
- From the Home screen: You can directly open the Camera app by tapping the Camera icon located on the Home screen.
- From the Lock screen: While the phone is locked, you can swipe up from the Camera shortcut icon on the Lock screen to immediately launch the Camera app without unlocking the phone.
- From the Apps screen: You can navigate to the Apps screen, then locate and tap the Camera icon to launch the Camera app.
- Double press the Side button: You can launch the Camera app by double-pressing the Side button.
Note: This feature must be enabled first. Go to Settings > Advanced features > Side button > Double press, turn the switch on, then select Camera and choose Open Camera.
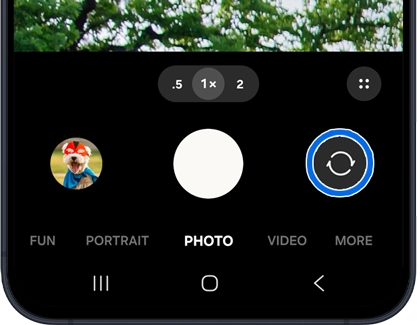
Change camera mode
Open the Camera app, and then look for the available options at the bottom of the screen. Swipe left or right to browse through the shooting modes, and then tap a mode to select it.

- Fun: Access and use Snapchat filters on your photos.
- Portrait: Add and adjust background effects for photos.
- Photo: Take photos and allow the camera to determine the ideal settings for pictures.
- Video: Record videos and allow the camera to determine the ideal settings for videos.
More: Choose other available shooting modes. Tap Edit to drag the modes into or out of the shooting modes tray at the bottom of the Camera screen.
- Pro: Manually adjust the ISO sensitivity, exposure value, white balance, and color tone while taking pictures.
- Panorama: Create a linear image by taking pictures in either a horizontal or vertical direction.
- Pro video: Manually adjust video settings for professional-quality recordings.
- Food: Take pictures that emphasize the vivid colors of food.
- Night: Use this to take photos in low-light conditions without using the flash.
- Macro: Use this for close-up photography.
- Slow Motion: Record videos at a high frame rate for viewing in slow motion.
- Super Slow-Mo: Capture videos at a higher frame rate than in Slow Motion mode.
- Hyperlapse: Create a time lapse video by recording at various frame rates. The frame rate is adjusted depending on the scene being recorded and the movement of the device.
- Single Take: Automatically captures multiple photos and videos in one shot for versatile editing options.
The selected shooting mode will be highlighted to indicate that it is currently active. You can now start taking photos or recording videos using the chosen shooting mode.
Switch between the rear and front camera
Open the Camera app, and then tap the switch camera icon (two arrows) or swipe up or down on the viewfinder.

To disable the switch camera option, open the Camera app, and then tap the Quick control icon (the circle with 4 dots). Tap the Settings icon, then tap Swipe preview up/down to switch cameras, and then tap Off.

Take a selfie
Use the front camera
- Open the Camera app.
- Tap the switch camera icon to switch to selfie mode.
- Adjust your position and frame your shot.
- Tap the Capture button to take your photo.

Use Portrait mode
- Open the Camera app.
- Swipe to Portrait mode.
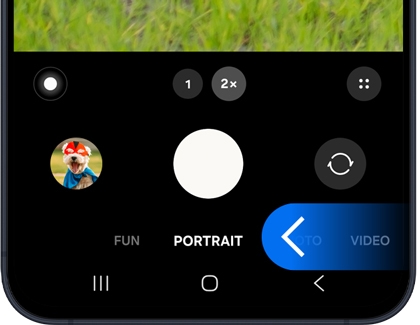
- Adjust the background blur if needed.
- Tap the Capture button to take a portrait photo.

Zoom in or out

Zoom in
Place your finger on the screen and pinch toward the center of the image to zoom in up to 10x. Release your finger when you reach the desired zoom level.
Zoom out
Place your finger on the screen and pinch away from the center of the image to zoom out. Release your finger when you reach the desired zoom level.
AI editing tools
- Galaxy AI photo editing requires a Samsung account login and an internet connection. Editing with Generative Edit results in a resized photo up to 12MP, depending on the model.
- Galaxy AI basic features provided by Samsung are free. Any Samsung enhanced AI features and all third party AI features are subject to different terms and may be subject to fees. (Galaxy AI basic features are listed under "Advanced intelligence" in Samsung Services Terms and Conditions.)
Object Eraser
Object Eraser lets you remove unwanted objects or distractions from your photos, automatically filling in the background for a clean and natural result.
- Open the Gallery app, and then select a photo.
- Tap the Intelligence features icon (the three stars).
- Tap Object eraser.
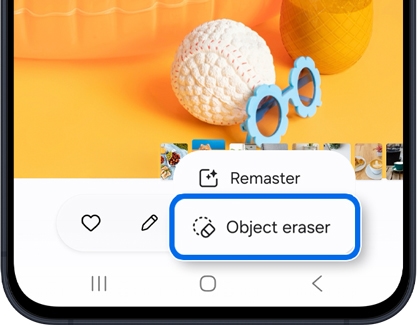
- Tap or draw around the object to remove, then tap Erase.
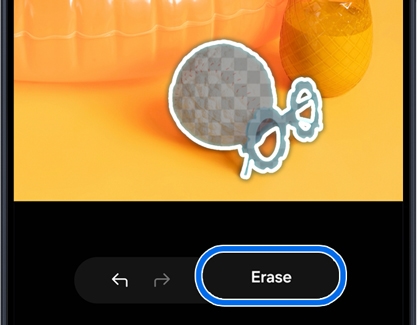
- Galaxy AI will remove the unwanted detail and fill in the photo’s missing parts.
- Tap Save or Save copy to save your changes.


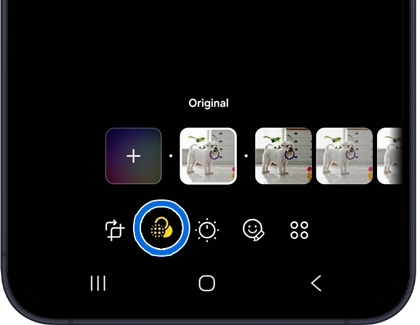
Filters
Filters allow you to enhance your photos by applying different styles and tones, helping you create a consistent and personalized look.
- Open the Camera app
- In the PHOTO mode, tap the Filters icon.
- In the viewfinder, frame your subject and swipe to select a filter.
Note: You can tap the '+' icon to create a new filter. - To compare, select View original.
- When you’re ready, tap the Capture button.
- To adjust or change the filter on an existing photo, open it in the Gallery app. Tap the Edit icon (a pencil), then the Filters icon (three circles) to modify the filter's intensity or select a different one. For deleting or reordering filters, touch and hold the desired filter and select the appropriate action. Tap Save to save your changes.


Edit Suggestions
Edit Suggestions analyzes your photos and provides recommended adjustments to improve lighting, clarity, and overall quality with just a few taps.
- Navigate to and open the Gallery app, and then select a picture you'd like to edit.
- Swipe up on the image and then tap the available edit suggestions. For instance, you may see options for Remaster, Erase shadows, or Erase reflections.
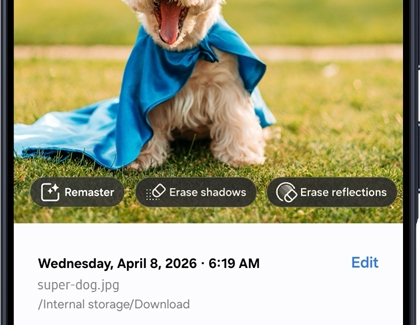
Note: You may need to tap the details icon (“i”) to view the edit suggestions. - Select your desired suggestion and then follow the instructions to apply the changes. You may need to tap or draw around objects or adjust a slider bar.

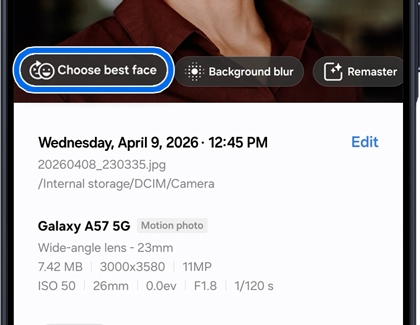
Best face (A57 only)
Best face helps you capture and choose the most flattering photos by analyzing multiple shots taken in Motion Photo mode and selecting the best one based on focus, lighting, and facial expressions.
- Open the Gallery app, and then select the group Motion photo you want to edit.
- Tap More options (the three vertical dots) or swipe up on the photo instead to access additional settings. Then, tap Details.
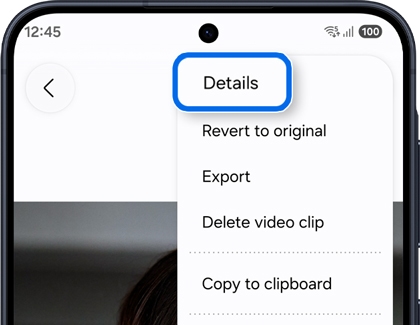
- Tap Choose best face on the photo.
- At the bottom of the screen, you’ll see various facial expressions to choose from. Select the one you prefer for your photo.
If you need more options, tap View more to explore additional facial expressions. Select your desired option to apply it.
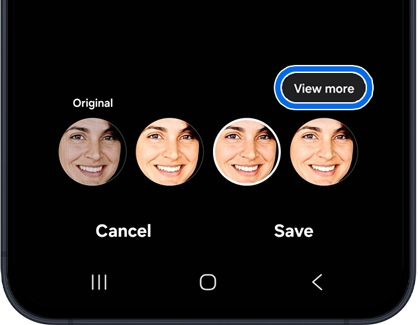
To return to the original option, tap Previous. - When you’re finished selecting the best facial expression, tap Save. You can choose to Save or Save copy to keep the edited pho


Auto trim (A57 only)
Auto trim quickly edits video by removing pauses or blank parts to save time and make your videos look polished and professional in just a few taps.
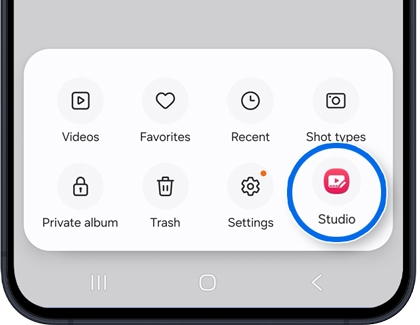
- Open the Gallery app, and then select Menu (three horizontal lines) from the bottom of the screen.
- Tap Studio or Go to Studio, then tap Start a new project.
- Tap on the desired video(s) to edit, and then tap Done. Or, tap Search, swipe to the Shot types section, and then tap Video to choose your video(s).
- When the editing screen appears, tap the Auto trim icon (the scissors) at the bottom left.
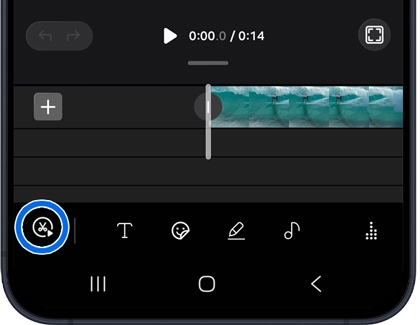
- In the editing menu, select Auto trim.
- The Auto Trim will automatically analyze your video and suggest a trimmed version that removes unnecessary parts, such as pauses or blanks.
- Tap the Play icon to view the Auto version.
- Tap the Custom length icon, and then drag the slider to manually adjust the length.
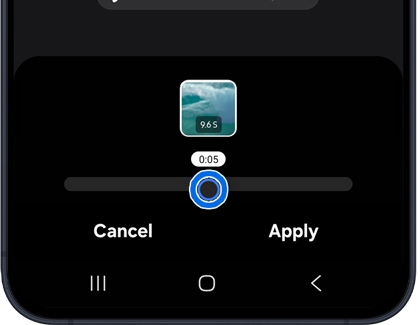
- Tap Apply to finish.
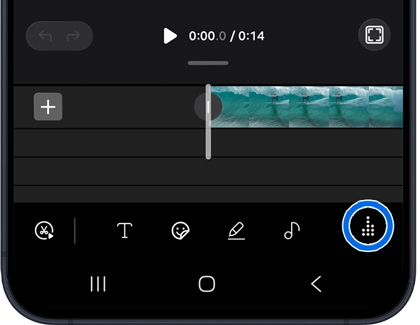
- To enhance your video, touch and hold a clip, and then drag and drop the clip to reorder the sequence.
- To add fun elements, tap the Text, Stickers, Draw, or Audio icons. Then tap Apply to save the changes.
- To spice up your video with a license-free soundtrack, tap the Soundtrack icon.
- To check the final results, tap the Play icon, and then tap Done to save the changes.
- Tap Edit to add a title to your video.
- Tap Save movie to save your video. Or, tap Delete to delete the video.


Use Gemini Live
Use screen or camera sharing to allow Gemini to see what’s on your device and provide instant, contextual support.
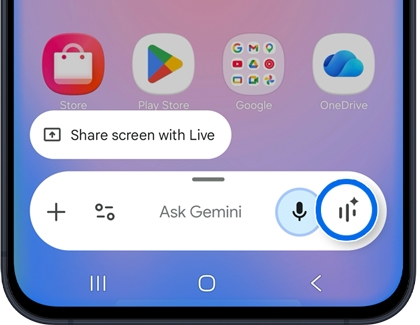
- Press and hold the Side button to activate Gemini, and then tap the Live icon (the three vertical lines with a star).
- Next, review the Go Live with Gemini information. Swipe to and tap OK.
- Begin conversing with Gemini about a topic of your choice on the Live with Gemini screen. Gemini will answer you with information, resources, and tips.

The following options are available on the Live with Gemini screen:
Video: Turn on your device’s camera and ask questions in real time while showing what you see.
Share screen: Display your current screen and receive assistance based on what is shown.
Microphone: Mute or unmute your conversation.
Keyboard: Use the on-screen keyboard for typing.
Close: Exit Gemini Live.
- Gemini will still be available even if you navigate away from the Go Live with Gemini screen. Tap Listening… in the left corner of the screen to open a “Live with Gemini” bar on the Home screen. Tap the Live icon to continue chatting.
- To exit Live with Gemini, tap the Close icon on the bar.


