Transfer content from an iOS device with Samsung Smart Switch

Congrats on your new phone! You'll be happy to learn that the Smart Switch app lets you seamlessly transfer all your content from your previous iOS phone to a Samsung Galaxy phone. You can also create a backup of your iOS device and sync data using Smart Switch for a Mac or PC.
Note: Security and privacy are the utmost concern at Samsung. Samsung does NOT store your Apple account information on the phone or anywhere else. The Apple ID and password you enter are immediately used to log in to the iCloud backup server and never stored on the phone or anywhere else. Smart Switch allows you to transfer content to a Galaxy device. It cannot transfer data to an iOS device. Get Smart Switch for your phone, Mac, or PC.
Sync your iOS device to iCloud
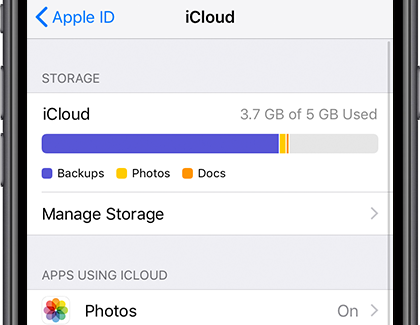
To make sure all of your latest content is ready for transferring, first you'll need to sync your iOS phone to iCloud.
On your iOS phone, navigate to Settings, and then tap your Apple ID. Tap iCloud, then tap Show All, and then select the data to sync by tapping the switch(es). The sync will occur automatically.
Note: If you are not familiar with using iCloud, visit the iCloud setup site.
Transfer content wirelessly on your iOS phone
When you're ready, transferring all your content from your iCloud to your new phone is simple. Remember, you need to sync your iOS device's data to iCloud first before transferring.
Launch Smart Switch on the new Galaxy phone.
If this is your first time using Smart Switch, you will need to tap Agree and then tap Allow to accept the terms of service.
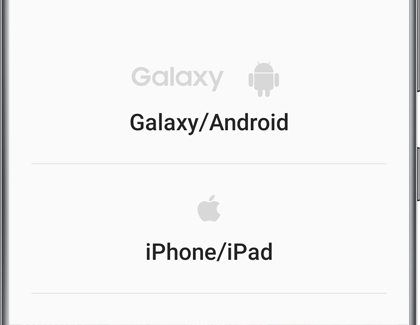
Then, tap Receive data. Tap iPhone/iPad, and then tap Get data from iCloud instead at the bottom of the screen.
Enter your Apple ID and password, and then tap Sign in to iCloud. You'll get a prompt on your iPhone, tap Allow to see the verification code.
Enter the verfication code on your Samsung device, and then tap Connect. Tap Ok on the iPhone to clear the code popup.
Select the data you want to transfer, and tap Transfer.
The following data can be transferred from iCloud:
Personal content: Contacts, Schedule, Calendar, Notes, Call history, and Bookmarks.
Note: Your personal content is safe with Smart Switch. All information transferred from iCloud backup servers to your phone is encrypted and never exposed to any other Samsung or third party devices.
App data: Photos, Live Photos, Videos (DRM free content only), Documents, Recommended apps, and Voice Memos.
Settings, etc: Wi-Fi and Alarms.
Note: iTunes music and videos cannot be transferred from iCloud. Unencrypted iTunes music can be transferred to your phone by simply copying the M4A files from a PC with your iTunes library. You can also transfer your music files directly from a PC.
Transfer content via USB cable
Note: The USB-OTG adapter is provided in-box with the Galaxy S10+, S10, S10e, Note10+, Note10+ 5G, and Z Flip. If you are transferring a large amount of data, we recommend using Wi-Fi so that both phones can be plugged into chargers during the transfer.
You can also use a USB cable to transfer content between your iOS phone and your new Galaxy phone. However, you will need both the iOS cable that came with your iOS phone and a MicroUSB to USB adapter (OTG cable). Also, make sure both phones are charged beforehand since you can't charge them during the transfer.
Launch Smart Switch on the new Galaxy phone, and then tap Receive data.
Tap iPhone/iPad. Connect the two phones using the iOS phone's lightning cable and a USB-OTG adapter.
If you're adding a new trusted device, you'll have to tap Trust, then you may have to enter your phone's unlock code to confirm the trust. Tap Next on the Galaxy phone.
Select the content you want to transfer, and then tap Transfer.
When finished, tap Done on the new phone, and tap Close on the old phone.
The following data can be transferred with a USB cable:
Personal content: Contacts, Schedule, Calendar, Messages, Notes, Call history, and Bookmarks.
Note: Your personal content is safe with Smart Switch. All information transferred from iCloud backup servers to your phone is encrypted and never exposed to any other Samsung or third party devices.
App data: Photos, Music (DRM free content only), Videos (DRM free content only), Documents, Recommended apps, and Voice Memos.
Settings, etc: Wi-Fi and Alarms.
Create a backup on a computer
You should also consider backing up the content from your old phone to a PC or Mac. That way, you'll still have your data even if iCloud isn't available or if you can't remember your Apple ID.
Connect your old phone to your computer with a USB cable, and tap Allow on your phone.
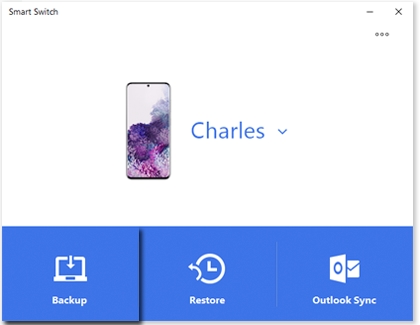
Navigate to and open Smart Switch on your computer, and then select Backup.
Select the types of files you want to transfer, and then select Backup. Your computer will begin backing up your data.
When it’s finished, a notification will appear to let you know it’s done, click OK.
Default save location on a computer
When using a PC or Mac to back up your data, the files will be stored in a default location. You can also choose a specific location instead if you wish. To help you find your stored data, here are the default locations:
Windows 8, Windows 7, Windows Vista: C:\Users\[username]\AppData\Roaming\Samsung\Smart Switch PC
Windows 10: C:\Users\[username]\Documents\Samsung\SmartSwitch
Mac OS X: /Users/[username]/Documents/Samsung/SmartSwitch/backup
Sync your data with a computer
You can also sync your phone’s data to your PC or Mac. This ensures you will have the same content on your computer and phone.
On a PC
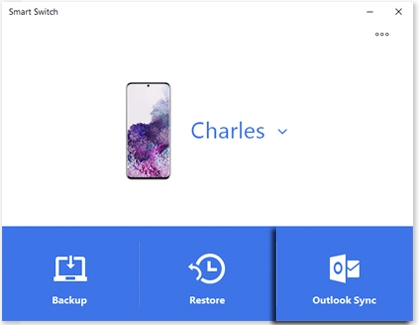
On your PC, open Smart Switch, and select Outlook Sync.
If needed, sign in with your Microsoft Outlook credentials. Then, select Sync Preferences for Outlook.
Choose what you want to sync, and then select OK.
Select Sync Now, and then select Confirm when you are finished.
On a Mac
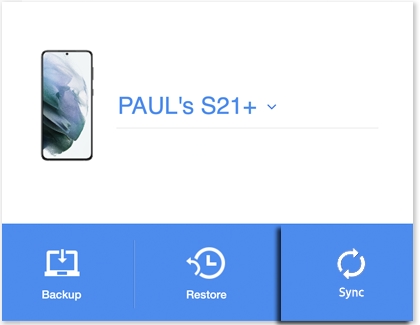
Choose the content to sync from your computer, and then select Sync Now.
On your Mac, open Smart Switch, and select Sync.
When the syncing is complete, select Confirm.
Other answers that might help
-
Mobile 8 AM - 12 AM EST 7 days a week
-
Home Electronics & Appliance 8 AM - 12 AM EST 7 days a week
-
IT/Computing 8 AM - 9 PM EST 7 days a week
-
Text Support 24 hours a day 7 Days a Week
Contact Samsung Support
