Welcome to the
! Please enjoy our special offers for you

Galaxy S25+ Rear Camera

If the rear cameras on your Galaxy S25+ are damaged or malfunctioning, they can be replaced by separating the main board and disconnecting the individual camera modules. This guide provides step-by-step instructions for safely removing the cameras and reassembling the device to ensure all components are securely connected.
Close-up view of the rear camera array on the Galaxy S25 Plus.

Galaxy S25+ Rear Camera

Note
Remove the Back Cover first before you begin.

Galaxy S25+ Rear Camera Disassembly

Galaxy S25+ Rear Camera Disassembly
Note
Remove the Back Cover first before you begin.
1

Check for the disassembly steps of the Front Camera and completely separate the main board with the rear cameras.

Lift the main board and attached rear cameras straight out of the frame recess and place it aside. 

2

Disconnect the rear camera connectors from the main board using the tweezers, and remove the rear cameras carefully from the main board. Leave the camera lens facing up.

Disconnecting the rear camera connectors with tweezers and detaching the three rear camera modules from the main board. 

Caution
Be careful not to damage the main board. 
Note
Separate and replace only the problematic camera.
Read less

Galaxy S25+ Rear Camera Reassembly

Galaxy S25+ Rear Camera Reassembly
Warning
Leaving screws inside the device may damage internal components, such as the battery. When assembling, be extra careful not to leave any unassembled screws inside the device.
1

Using your fingers, connect the rear camera connectors on the main board. Leave the camera lens facing up.

Three step diagram showing the rear camera modules being aligned and connected to the main board. 

Caution
  • Be careful not to drop the camera while connecting the connector.
  • Be careful not to damage the camera lens and near components.
  • Be careful not to damage the main board.
2

Check for the reassembly steps of the Front Camera and completely reassemble the wireless charging module and speaker module.
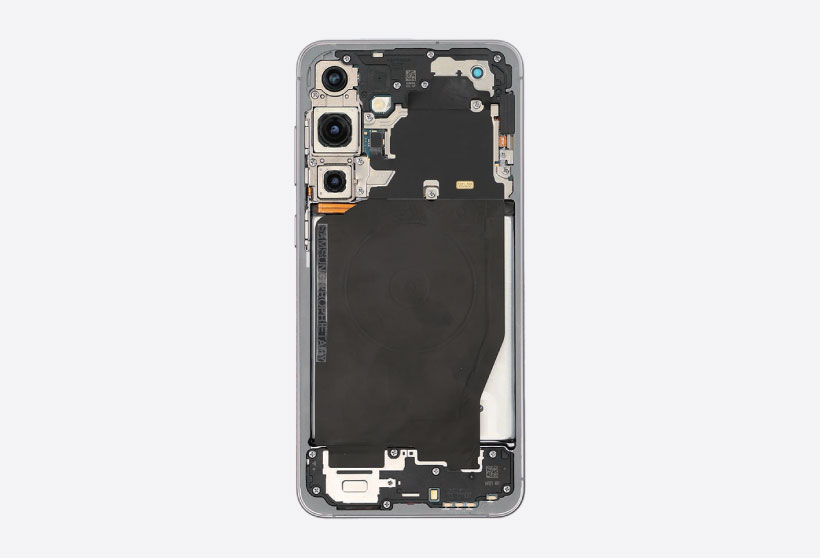
Internal view of Galaxy S25 Plus with the rear cameras and wireless charging module reassembled.

3

Check carefully with your fingers to see if there are any screws or other foreign substances inside the device (battery, PBA, cable, etc.). Shake the device lightly with the back of the device facing down to remove any remaining screws.
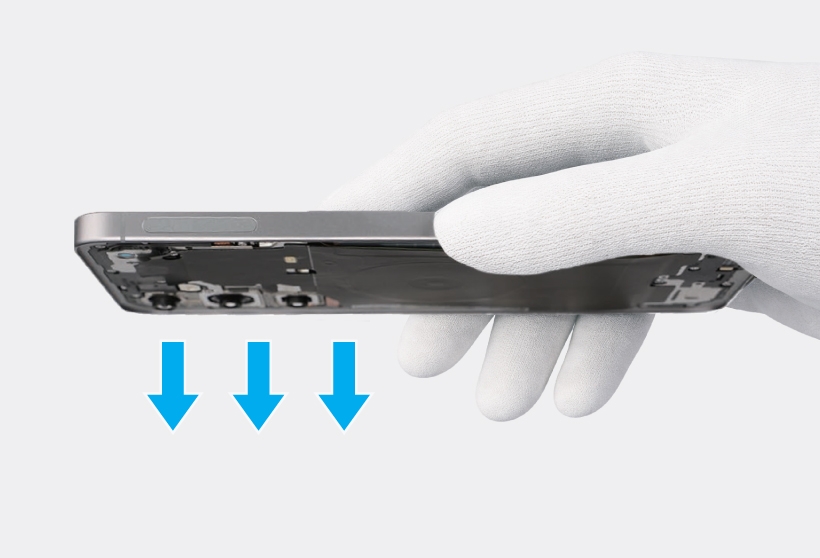

Side view of a silver Galaxy S25 Plus with three blue arrows pointing down below.

Note
Reassemble the Back Cover to complete assembly.
Read less
Was this content helpful?
Table of contents
We're here for you

Contact Samsung Support

Contact us online through chat and get support from an expert on your computer, mobile device, or tablet. Support is also available on your mobile device through the Samsung Members App.
Fast, easy checkout with Shop Samsung App
Easy sign-in, Samsung Pay, notifications, and more!
Or continue shopping on Samsung.com
×
The Shop Samsung app
Free standard shipping, exclusive offers and financing options.
GET
×
The Shop Samsung app
Free standard shipping, exclusive offers and financing options.
GET
×

You Are About To Be Redirected To Investor Relations Information for U.S.

Thank you for visiting Samsung U.S. Investor Relations. You will be redirected via a new browser window to the Samsung Global website for U.S. investor relations information.
CANCEL
CONTINUE
×

Redirect Notification

As of Nov. 1, 2017, the Samsung Electronics Co., Ltd. printer business and its related affiliates were transferred to HP Inc.

For more information, please visit HP's website: http://www.hp.com/go/samsung


Select CONTINUE to visit HP's website.

CANCEL
CONTINUE