Welcome to the
! Please enjoy our special offers for you

Samsung Galaxy Chromebook will not connect to a wireless network

Many times, your Samsung Galaxy Chromebook may not connect to a wireless network because the laptop's wireless adapter was accidentally shut off. If the network you're trying to connect to has MAC filtering set up, the Chromebook's MAC address must be added to the network first. You may also need to reset your Chromebook if it is still unable to connect to a wireless network.
Illustration of multiple Wi-Fi symbols interconnected on a digital grid, indicating wireless network connectivity

Samsung Galaxy Chromebook will not connect to a wireless network

Note
If your Chromebook is being used at work or school, contact your network administrator for support.

Checkpoint

Make sure the wireless network is working
Note
  • If your Chromebook only connects to Wi-Fi in Guest Mode, please refer to our other guide.


  • Depending on the wireless network, you may need to speak with the network administrator.

Make sure you are able to connect another device, like a phone or another computer, to the wireless network.

  • If you are unable to connect a different device to the network, make sure the router and modem are working.
  • It may be necessary to unplug the router and modem for 15 seconds, and then plug them back in again. (Make sure the ethernet cable is firmly connected to both devices.)

Make sure Wi-Fi is turned on.

  1. From the desktop, select the Taskbar icon in the lower right corner. The wireless network status will be displayed.
  2. If "Not connected" is displayed below the Wi-Fi icon, select the Wi-Fi icon to turn on the wireless adapter.

    Not connected highlighted in the taskbar

Did this resolve your issue?
If this didn’t resolve your issue, please click on “No” for more help.
Yes No
We’re happy to hear that your problem has been resolved.
Restart your Chromebook
Note
If you're using any accessories, unplug them from your Chromebook, and then plug them back in after the restart.

  1. Close any apps you have running.
  2. Next, select the Taskbar icon in the bottom right corner, and then select the Power icon.

    Power icon highlighted in the taskbar
  3. When the system powers off, wait 30 seconds, and then press the Power button to turn your Chromebook back on.

Did this resolve your issue?
If this didn’t resolve your issue, please click on “No” for more help.
Yes No
We’re happy to hear that your problem has been resolved.
Connect your Chromebook to a wireless network

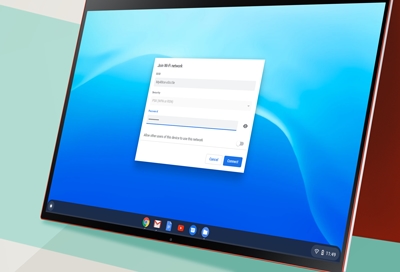
Join Wi-Fi network prompt displaying SSID, Security, Password, and Connect options


Once the wireless adapter has been turned on, your Chromebook will search for available Wi-Fi networks. Select a network, enter the network password if applicable, and then select Connect. If you are still unable to connect to a wireless network, try another network.


Keep in mind only certain Wi-Fi networks will work with your Chromebook:

  • Open networks that do not require a password to connect.
  • Secured (password protected) networks that use WEP, Dynamic WEP, WPA-PSK, WPA-Enterprise, or WPA2-Enterprise settings. WPA2 or WPA3 are recommended, since they are more secure than WEP or WPA.
  • Wi-Fi Standards: 802.11 a/b/g/n and 802.11ac for AC-equipped Chromebooks.

Find your MAC address.

Depending on the network, you may need to give your Chromebook's MAC address to the network administrator before you can connect to the wireless network.


To find the MAC address:

  • From the desktop, select the Taskbar icon in the lower right corner, and then select the text that appears under the Wi-Fi icon.
  • Select the Information (i) icon at the top of the box. The MAC address will be labeled "Wi-Fi."

    i icon highlighted in the Network settings of the taskbar


If you are still unable to connect to a wireless network, visit Google Chrome Help or the Google Chromebook support page for additional assistance.

Did this resolve your issue?
If this didn’t resolve your issue, please click on “No” for more help.
Yes No
We’re happy to hear that your problem has been resolved.
Factory reset your Chromebook
Note
If the Chromebook is being used at work or school, it cannot be reset. Contact your administrator for support.

Use the Advanced Settings menu:

  1. Select the Taskbar in the lower right, and then select Settings.
  2. Select Advanced at the bottom.
  3. Scroll to the Reset settings section, then select Powerwash, and then select Reset.

    Reset button highlighted next to Powerwash in Reset settings
  4. After the restart, select Powerwash when prompted, and then select Continue.

Use the shortcut keys:

  1. Select the Taskbar in the lower right, then select the Power icon, and then select Sign out.

    Sign out highlighted in the taskbar
  2. Press and hold CTRL + ALT + SHIFT + R on the keyboard, and then select Restart.
  3. When prompted, select Powerwash, and then select Continue.

Sign into your Google account

Follow the on-screen prompts and sign into your Google account to set up the Chromebook. The account you sign in with after you reset your Chromebook will be the new owner account.  If you are unable to sign into your Google account, please refer to the Google Account Help center. You can also use your Chromebook without adding a Google account. Select Browse as Guest to proceed.

Test your Chromebook to see if the issue has been resolved. 


Did this resolve your issue?
If this didn’t resolve your issue, please click on “No” for more help.
Yes No
We’re happy to hear that your problem has been resolved.
Request service for your Chromebook

If you've performed a system recovery and the problem continues, service is required. Please visit our Support Center to request service.

Did this resolve your issue?
If this didn’t resolve your issue, please click on “No” for more help.
Yes No
We’re happy to hear that your problem has been resolved.
Was this content helpful?
We're here for you

Contact Samsung Support

Contact us online through chat and get support from an expert on your computer, mobile device or tablet. Support is also available on your mobile device through the Samsung Members App.
auto-contact_us-pc-2x auto-contact_us-pc-2x
Fast, easy checkout with Shop Samsung App
Easy sign-in, Samsung Pay, notifications, and more!
Or continue shopping on Samsung.com
×
The Shop Samsung app
Free standard shipping, exclusive offers and financing options.
GET
×
The Shop Samsung app
Free standard shipping, exclusive offers and financing options.
GET
×

You Are About To Be Redirected To Investor Relations Information for U.S.

Thank you for visiting Samsung U.S. Investor Relations. You will be redirected via a new browser window to the Samsung Global website for U.S. investor relations information.
CANCEL
CONTINUE
×

Redirect Notification

As of Nov. 1, 2017, the Samsung Electronics Co., Ltd. printer business and its related affiliates were transferred to HP Inc.

For more information, please visit HP's website: http://www.hp.com/go/samsung


Select CONTINUE to visit HP's website.

CANCEL
CONTINUE