Start using The Freestyle
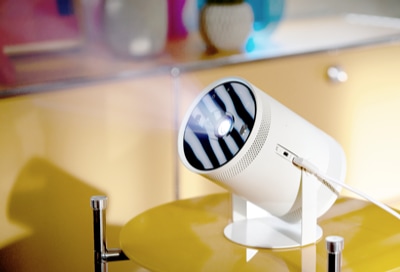
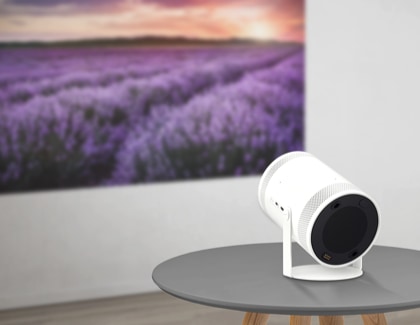
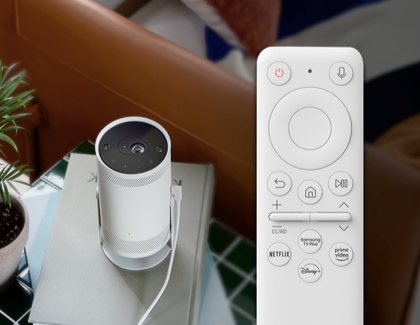
Samsung’s new portable projector, The Freestyle, is here to change how you view and enjoy your favorite content, whether it’s movies, games, or TV shows! The Freestyle can be set up to project onto various surfaces with an impressive 180° view, allowing you to watch the screen from your sofa, bed, floor – anywhere! You can connect it to your phone or tablet via Bluetooth to stream content from apps like YouTube or Disney+, or browse content from its built-in Samsung Smart TV features. You can even set up mood lighting when it is time to relax and wind down, or use Ambient Mode to create a colorful and inviting scene. Plus, The Freestyle can be controlled using the SmartThings app or the included remote for simple navigation.
Note: The information provided applies to The Freestyle projectors sold in Canada. Available screens and settings may vary for projectors sold in other countries. The Freestyle remote must be used within 6 meters (20 feet) of the projector.
There are a ton of things you can do with The Freestyle to control its functions and personalize your experience. The Freestyle has a micro HDMI port to connect external devices like game consoles and Blu-ray players, and a USB-C port for power. The MIC switch lets you access Voice Assistant options, such as Bixby and Amazon Alexa.
On the top of the projector, you will find the lens, distance sensor, remote control sensor, LED indicator, and Power button. Tap the plus and minus buttons to increase or decrease the volume, and tap the Mobile button to use the remote control options in the SmartThings app. After tapping the Mobile icon, you will see a notification on your phone; tap it to open SmartThings.
Freestyle Placement
When you rotate The Freestyle, the projector will automatically adjust based on the new surface. So, if you transition from a wooden tabletop to a painted wall, The Freestyle will recalibrate according to the new surface and its colors. Just place The Freestyle on a stable surface and you will always see a clear and crisp image at any angle.
Screen sizes by distance from the surface
- 100-inch screen - 2.6 meters (8.7 feet)
- 90-inch screen - 2.3 meters (7.8 feet)
- 80-inch screen - 2.1 meters (7.0 feet)
- 70-inch screen - 1.9 meters (6.1 feet)
- 60-inch screen - 1.6 meters (5.2 feet)
- 50-inch screen - 1.3 meters (4.4 feet)
- 40-inch screen - 1.1 meters (3.5 feet)
- 30-inch screen - 0.8 meters (2.6 feet)
Note: Screen size may vary depending on the environment.
If you’re old school and prefer using a physical remote to get things done, you will be happy to know that you can set up The Freestyle with its included remote.
- Before you set up the remote, make sure The Freestyle is pointed at a wall so you will be able to see its screen clearly.
- Connect the included USB-C adapter to the charging cable, and then plug one end into a power source. Plug the other end into The Freestyle, and then tap the Power button on The Freestyle to turn it on.
- Once The Freestyle is turned on, wait a moment for the image to begin projecting. Select your preferred language, and then select the Remote Control option.
Note: You can also select Smartphone to set up The Freestyle. Please see the next section for more details.
- Select your preferred Wi-Fi network to connect to. Enter the password or security credentials for the network using the remote, and then select Go.
- Agree to the Terms and Conditions by selecting I Agree to all, and then selecting OK. The projector will then search for any available updates and download them if needed.
- You will be asked to sign in to a Samsung account. Select Use Existing Account if you already have one.
Note: If you do not have an account, you can select Create New Account, and follow the on-screen instructions.
- Follow the on-screen instructions to log in to an existing account. You can scan the QR code or go to the URL displayed on the screen. If you are having trouble, you can select Sign in another way, and enter your Samsung account credentials using your remote.
- A message will appear on the screen once you are signed in; select Got It. Choose whether or not you want the projector registered to the current Samsung account being used.
- On the next page, adjust the available settings. For example, you can back up the projector’s general information if desired. When you are done, select Got It to continue.
- Choose whether or not you want to set up your voice assistant now or later. For this example, select Bixby. Choose your desired streaming services if preferred.
- Now you can enjoy your new Freestyle projector!
If you already love to remotely control your smart devices, why not set up The Freestyle using the SmartThings app?
- Before you add The Freestyle to the SmartThings app, make sure it is pointed at a wall or desk so you can clearly see its screen.
- Connect the included USB-C adapter to the charging cable, and then plug one end into a power source. Plug the other end into The Freestyle, and then tap the Power button on The Freestyle to turn it on.
- Once The Freestyle is turned on, wait a moment for the image to begin projecting. Select your preferred language, and then select the Smartphone option.
- Next, navigate to and open the SmartThings app on your phone, and then tap the Devices tab. Tap the Add icon (the plus sign), and then tap Add device.

- Under Scan QR code, tap Scan, and then use your phone's camera to scan the code.
- If the QR code is not working, there is another way to add the projector. Under Scan for nearby devices, tap Scan.
- Tap Add next to Samsung Projector, and then select a Location and Room for it. Tap Next.
Note: You will need to add the PIN that is shown on the projector’s screen to the SmartThings app.
- Follow the on-screen instructions to finish adding The Freestyle to SmartThings.
Now that your projector has been added to the SmartThings app, you can start controlling it right from your phone. Open the SmartThings app and then navigate to and select your projector to bring up its remote control home screen. Under Remote, you can use the slider to adjust the volume and also tap the Mute icon to mute the sound.
Tap Remote to access these additional options:
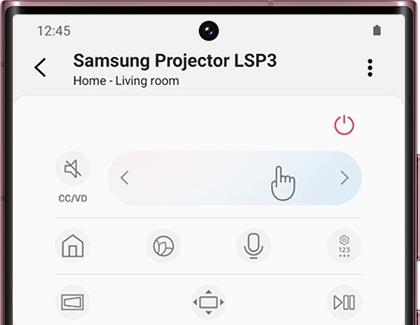
- Power icon: Turn The Freestyle off and on.
- Home icon: Access the Samsung Smart TV Home screen.
- Ambient Mode icon: Open Ambient Mode if you would like to display an image or scene on your wall.
Note: You can also access Ambient Mode from The Freestyle’s remote control home screen.
- Microphone icon: Allows you to use a Voice Assistant with The Freestyle. You will be able to turn on and control The Freestyle with a simple voice command!
Note: You can also turn on the MIC switch on the side of The Freestyle.
- Settings icon: Access the Settings menu.
- Orientation icon: Adjust the screen vertically and horizontally.
- Screen scale icon: Adjust the screen to fit your wall, ceiling, desk, or other surface by swiping left or right.
- Play/Pause icon: Allows you to play or pause the content when using apps such as Netflix or YouTube.
- Back icon: Return to the previous screen.
- 4D-pad: Open the touchpad for easy navigation.
- CH: Open the channel selection. You can tap Pre-CH to return to the previous channel, and tap GUIDE to open the channel guide.
- 123: Open the number pad if you would like to search for a channel.
From The Freestyle’s remote control home screen, tap Sources & Apps to access The Freestyle’s included apps, such as Netflix, Prime Video, Disney+, YouTube, and Samsung Health. You can also tap Universal Guide to quickly jump to a channel or program.

Thank you for your feedback!
Please answer all questions.
RC01_Static Content : Hide call number function