Tracker features and settings
A lot can happen in the blink of an eye, like someone making a wrong turn and getting lost. Don’t fear the unexpected because the SmartThings tracker is here to help. It can help you monitor everyone in your family with location requests, periodic reports, live tracking, and Geofencing.
Note: This article is referring to the SmartThings Tracker. It does NOT cover the Smart Tag or the Smart Tag+.
Benefits of the SmartThings Tracker
When you purchase a SmartThings tracker, you don’t have to be concerned about your teenager arriving at their friend's house safely. If a loved one has the tracker with them, you can track their exact location, so you'll always know if they're safe.
You won’t have to worry about the tracker’s battery dying, either. It has an extended battery life and you only need to charge it once or twice a week. It also has a Power Saving mode.
In order for the tracker to work, it needs to be connected to a SmartThings hub. Here are the compatible hubs:
SmartThings V2 hubs
SmartThings V3 hubs
SmartThings Wi-Fi hubs
The ADT smart security panel
Connect Home hubs
On-demand location request
If you’re concerned about a family member or relative, you can request their location anytime using the tracker's On-Demand feature. It will tell you their estimated location at the moment.
Navigate to and open the SmartThings app. Tap the Devices tab, then tap the Home icon, and then select the location with your tracker.
Select your tracker, and then tap the Request icon in the lower right corner.
The map will update and display the current location.
Periodic location reports
You can also set up periodic location reports if you are too busy to check your phone. You will receive automatic updates about the tracker’s location at different time intervals.
Navigate to and open the SmartThings app. Tap the Devices tab, tap the Home icon, and then select the location with your tracker.
Select your tracker, and then tap More options (the three vertical dots), and then tap Settings.
Tap Location updates, and then choose your desired setting. You can set automatic measurements to run every 10 minutes, 30 minutes, 1 hour, 3 hours, or 5 hours.
Note: Frequent measurements may affect battery consumption.
Send your location to SmartThings
If needed, the person carrying the tracker can send their location to a connected SmartThings account. Maybe they just arrived at their destination, or maybe they need some assistance.
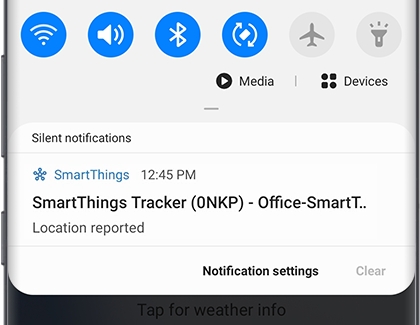
All they need to do is press the Power button on the tracker twice. A notification will be sent to all connected phones and SmartThings accounts. Just tap the notification to open SmartThings and see their current location.

Real Time Tracking
With the SmartThings tracker, you can keep a close eye on everybody, whether it’s a family member or your pet. The Real Time Tracking feature will share the tracker’s real-time location every minute for 10 minutes.
Navigate to and open the SmartThings app. Tap the Devices tab, then tap the Home icon, and then select the location with your tracker.
Select your tracker, and then tap the Live Tracking icon in the lower right corner; it’s right above the Request icon.
Swipe up to check the Live Tracking details.
Add or edit Geofence zones
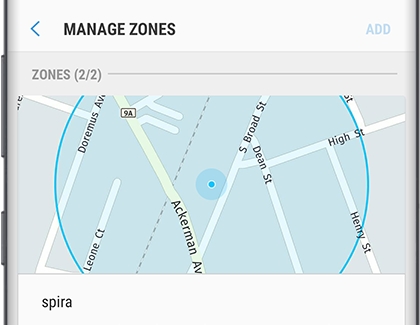
If your children walk to school every day, don’t stress - just use your SmartThings tracker’s Geofence feature. It will send you a notification to your phone when your child enters or leaves a specified area or “zone.”
Note: There can only be two Zones set up for each Tracker.
Navigate to and open the SmartThings app. Tap the Devices tab, then tap the Home icon, and then select the location with your tracker.
Select your tracker, and then tap More options (the three vertical dots).
Tap Settings, and then tap Manage Zones.

Tap ADD, and then drag the circle to your desired location. You can also use the search bar to find a specific place.
Tap Enter zone name, and then name the zone.
Tap Edit/leave notifications, and then choose your desired option.
Tap Save and the location will be set as a safe zone. You can edit a zone’s details or delete one by tapping DELETE or EDIT in the Manage Zones section.
Other answers that might help
-
Mobile 8 AM - 12 AM EST 7 days a week
-
Home Electronics & Appliance 8 AM - 12 AM EST 7 days a week
-
IT/Computing 8 AM - 9 PM EST 7 days a week
-
Text Support 24 hours a day 7 Days a Week
Contact Samsung Support


