Personalize your phone
Customize the Side key
Note: The Note10, Note20, S20, S21, Z Fold series, Z Flip series, A50, A51, A71, and A52 5G have a Side key. The Side key can be customized to open Bixby or perform other actions.
Keep opening Bixby by accident when you press the Side key? You can remap the Side key to open any app of your choice. Navigate to and open Settings, tap Advanced features, and then tap Side key. From here, you can select your desired settings.

For Double press, you can choose between:
Quick launch camera
Open app (Tap the Settings icon to select an app.)
For Press and hold, you can choose between:
Wake Bixby
Power off menu (You can also use the Quick settings panel or Bixby to turn off your phone.)
For additional details about setting up and using Bixby, please check out our Bixby guide.
Customize the Navigation bar
Button order
You can also adjust the order of the buttons on the Navigation bar.
From Settings, tap Display, and then tap Navigation bar. Make sure Buttons is selected, and then you can choose your desired button setup at the bottom of the screen.
Note: This option will also affect the location you swipe when using Swipe gestures.

Use Swipe gestures
You can use gestures instead of buttons to navigate your device if that’s simpler, or if you just want to remove the buttons from your screen for a less cluttered appearance.
From Settings, tap Display.
Tap Navigation bar, and then choose Swipe gestures.
Turn on Gesture hint for help on where to swipe, and turn on Show button to hide keyboard to enable the buttons when using Portrait mode. Additionally, you can block gestures with the S Pen so you don't accidentally activate a command when drawing or writing.
Tap More options to edit the direction you need to swipe.

Here are the functions for each gesture:
Far left: When you swipe here, your recently opened apps will appear.
Middle: Swipe up in the center to be taken to the Home screen.
Far right: Swipe here to go back to the previous screen.
Note: To completely hide the Swipe gestures lines, make sure to turn off Gesture hint by tapping the switch. The three lines on the bottom of the screen will disappear.
Manage your Digital Wellbeing
Set a Screen time
The Your goals option allows you to use the Screen time setting to manage your usage and set your preferred amount of daily screen time.
Navigate to and open Settings, and then tap Digital Wellbeing and parental controls. Tap Digital Wellbeing.
Tap Screen time under Your goals, and then tap Set goal. Choose your desired amount of the hours and minutes for your screen time goal. Tap Done.
Note: On some devices, you may need to choose your desired time first, and then tap Set.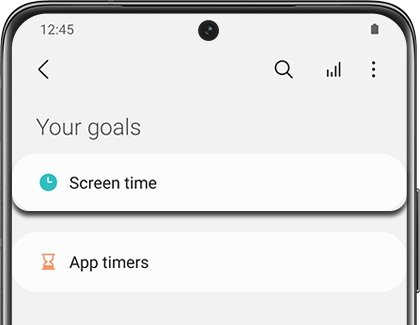
After the schedule is created, you can tap a day of the week to view your current usage. You’ll see the hours and minutes you’ve spent on your device that day.
To change or delete the goal, tap Screen time, tap More options (the three vertical dots), and then choose your desired option.
Set and use app timers
Think of the Digital Wellbeing feature as a budget, but for digital habits instead of spending habits. You can view your overall usage, the amount of time you've spent on your apps every day, the number of notifications you've received, and the number of times you've unlocked your phone or tablet. You can even set a timer for each app to help you keep track of how long you're using them.
Navigate to and open Settings, and then tap Digital Wellbeing and parental controls. Tap Digital Wellbeing.
Tap App timers under Your goals. Then, tap the hourglass icon next to your desired app.
Then, select your desired amount of time, and tap Done.
Use Bedtime mode
Note: On some devices and software versions, Bedtime mode will be called Wind Down.
Looking at a screen before going to bed can actually affect how well you sleep. To prevent this, turn on Bedtime mode to change the screen to grayscale. This will help remind your brain that it's almost time for bed.
Navigate to and open Settings, and then tap Digital Wellbeing and parental controls. Tap Digital Wellbeing.
Tap Bedtime mode or Wind Down. If prompted, tap Start. Make sure the switch next to "Turn on as scheduled" is enabled.
Select your desired days to use Bedtime mode (i.e. Monday - Friday).
Next, tap Set schedule, and then choose your desired time. Tap Done or OK to finish.

Use Focus mode
When you need to concentrate on studying or just want some alone time, you can use Focus mode.
Navigate to and open Settings, and then tap Digital Wellbeing and parental controls. Tap Digital Wellbeing. Under Focus mode, pick from one of the three options:
Work time: Set up this mode to block apps that you don't want to receive alerts from while working. Tap Edit to add your desired apps. Once your apps have been selected, tap Done, and then tap Start to activate Focus mode. Tap End Focus mode when you're finished.

Me time: Set up this mode to block apps that you don't want to receive alerts from when you're relaxing. Tap Edit to add apps, select your desired ones, and then tap Done. Tap Start to begin, and then tap End Focus mode when you're finished.
Add: This lets you create your own Focus mode. First, name your mode and tap Save. Tap Edit to add apps, select your desired ones, and then tap Done. Tap Start to begin, and then tap End Focus mode when you're finished. Your unique mode will be saved for future use. To rename your mode or to delete your custom mode, tap on it from the Digital Wellbeing Home screen, and then tap More options (the three vertical dots). From there, select your desired option.
Note: You must end your current Focus mode before adding a new mode.
Use Volume monitor
If you love turning up the volume when using your Galaxy Buds or other headphones, let Volume monitor make sure you’re keeping your ears safe.
Navigate to and open Settings, and then tap Digital Wellbeing and parental controls. Tap Digital Wellbeing.
Tap Volume monitor under Comfort care.
Tap Start if prompted, and then tap More options (the three vertical dots).
Tap Use volume monitor, and then tap the switch at the top to turn it on. You can also tap the switch next to Ear safety alerts to receive warnings when you’ve been listening at high volumes for long periods of time.

Next, tap Back to view your Daily and Weekly audio data. The next time you’re listening to some music, you can check your audio data by going back to this screen.
Use Driving monitor
Driving monitor helps you focus on driving when your device is connected to your car via Bluetooth. You’ll be able to check which apps you tend to use the most while driving.
Navigate to and open Settings, and then tap Digital Wellbeing and parental controls. Tap Digital Wellbeing.
Tap Driving monitor under Comfort care.
Tap Start if prompted, and then tap Add to choose your excluded apps.

Select the app(s) you’d like to exclude from Driving monitor, such as navigation apps that you may want to use while driving. Then, tap Done. Now, Driving monitor will only monitor the apps you did not exclude.
When you’re ready to get on the road, tap Start to begin using Driving monitor. As long as your device is connected to your car using Bluetooth, Driving monitor will keep track of your device usage.
Your Driving time and Screen time while driving will be calculated at the bottom of the screen. You can also tap Daily or Weekly at the top to view your device usage over time.
Set up Parental controls
If you are concerned about your kids spending too much time on their devices or coming across something inappropriate on the internet, you can set up parental controls.
With this feature, you can set limits on their usage time and also add content restrictions. That way, you'll have one less thing to worry about.

Parental controls
Set up Parental controls
You can restrict your child’s app usage by setting up Parental controls through Google’s Family Link app. Once you do, you'll be able to prevent them from accessing certain apps and also keep an eye on how long they use their phone or tablet.
Navigate to and open Settings, and then tap Digital Wellbeing and parental controls.
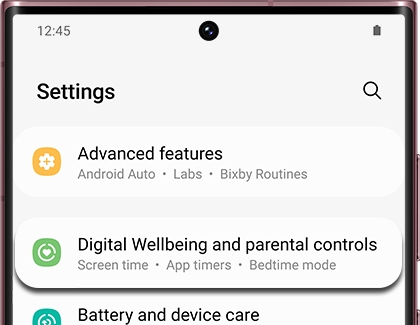
Tap Parental controls, and then tap Get started.
Select Child or teen, or Parent, depending on the device’s user. In this case, tap Parent.
Next, tap Get Family Link and install Google Family Link.
If needed, install the app. When it's done downloading, tap Open, review the information, and then tap Get started.
If you have more than one Google account added to your device, select your desired one.
Next, you will need to choose who will be using the device: Parent or Child or teen. For this example, tap Parent.
Make sure the device you want to supervise is nearby, and then tap Next. Read the information, and then tap I'm ready.
Select Yes or No depending if your child has a Google account. For this example, tap Yes.
Review the instructions to set up your child’s device, then tap Done, and then tap OK.
Using your child’s device, download Google Family Link for children & teens, and then enter the provided Family Link setup code.

Use the on-screen instructions on both devices to finish connecting the two devices.
Once it's all set up, you can use the Family Link app to keep an eye on everything. Tap Need help? at the bottom for additional instructions on how to use the supervision features on Android or Chrome OS devices.
If you ever want to add another child to supervise, open the app, and then tap Add (the plus sign) in the upper right-hand corner. From there, you can repeat the same process to add your child's Google account.
If you'd like to learn more about Google’s Family Link app, please visit Google's help center.
Stop supervising an account
Keep in mind you cannot stop supervising your child's account until they are at least 13 years old. Google may still limit access to age restricted content on their services.
On the parent device, open the Google Family Link app.
Tap the child's account that you will no longer supervise.
Tap Manage under Settings, and then tap Account info.
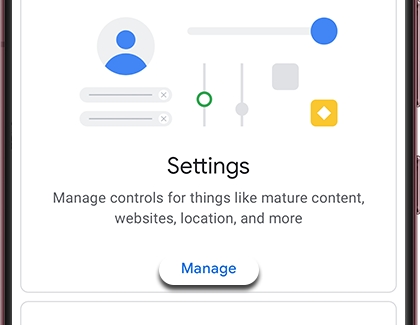
Tap Stop supervision and follow the on-screen instructions to confirm your understanding about how stopping supervision will affect your child's access.
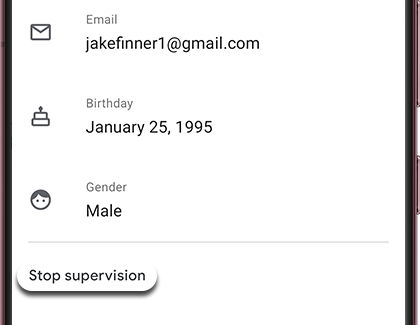
Tap the checkbox and then tap Stop supervision. Follow the displayed instructions.
Always On Display
Turn Always On Display on or off
Always On Display is very handy, but maybe you want to save some battery power. No worries, you can turn your AOD on or off whenever you want.
From Settings, search for and select Always On Display.
Tap Always On Display, and then tap the switch to turn it on or off.
From this screen, you can also adjust the AOD's settings. Please see the next section for more details.

Note: Always On Display is not available on the Cover screen for the Galaxy Z Flip or Galaxy Z Flip 5G.
Adjust your AOD's display options and settings
As you probably already know, Always On Display shows important information on your Galaxy device's screen when it's turned off. However, there are a couple settings and display mode options that you can adjust.
From Settings, search for and select Always On Display, and then tap Always On Display. From this screen, you can adjust AOD's new features.
Tap to show: This is the default setting. When it's activated, you must tap the screen to make your AOD appear for 10 seconds. This setting will help conserve battery.
Show always: This setting will display AOD continuously whenever your phone screen is off. Use this setting if you don't want to tap anything to see your AOD. Keep in mind that this setting will use more battery power.

Show as scheduled: This setting shows your AOD based on a set schedule. Use this setting if you want AOD to display at certain times. For example, you can set your AOD to only display during your work day and turn off while you're asleep. This setting will reduce AOD's battery consumption.
Show for new notifications: This setting will show AOD when you recieve a new notification.
Clock style: You can customize the clock type and color.
Show music information: Use this setting to show music information on your screen when it's off. This is useful because you'll see the artist and track information of a song without having to unlock your phone.
Screen orientation: Choose between Portrait mode and Landscape mode.
Auto brightness: This setting is on by default and automatically adjusts the brightness level of your AOD. To manually control the brightness level, tap the switch next to Auto brightness. Then, adjust the slider to set your desired brightness level. Alternatively, you can double tap the clock when your AOD displays, and then adjust the brightness level there.
Note: AOD is turned on by default, but if it has been disabled, you will need to turn it on to access its settings. AOD is not available when a Power saving mode is turned on.
Customize your AOD's Clock style
Whether it's digital or analog, everyone has a preferred way to tell the time. With AOD, you can choose the clock style that appears on your Galaxy device.
From Settings, search for and select Always On Display. Tap Always On Display again, and then tap Clock style. From here, you can choose your desired clock style. You can also change the clock’s color. When you are finished, tap Done.

Download new Clock styles for your AOD
Pick a theme that matches your interests—Whales, hummingbirds, or Minions, anyone?
From a Home screen, touch and hold an empty area, and then tap Themes.
Tap AODs, select an AOD theme you like, and then tap Download or tap the price (i.e., $0.99).
If needed, choose either Select payment method or Use discounts, and then enter the necessary information.
Once it’s downloaded, tap Apply, choose your desired preferences, and then tap Done.
Your new design will now display on your device's screen when the AOD is active.

Manage Home screens
Manage Home screens
When you open your device, you want to get right to the good stuff, and that starts with the Home screen. You can customize your Home screens any way you want. Add, remove, or change your main Home screen, so everything is just how you like.
From any Home screen, touch and hold an empty space.
The screen will enter Edit mode, displaying multiple screens. From here, use the following options to manage your screens:

Add a screen: Swipe left until you see an empty Home screen, and then tap Add (it looks like a plus sign).
Remove a screen: Swipe to a Home screen you want to remove, and then tap the Delete icon (it looks like a trash can) at the top.
Set a screen as the main Home screen: Swipe to the Home screen you want to make your main screen. Tap the Home icon (it looks like a house) at the top to make it your go-to screen. The bolded Home icon indicates which one is the main Home screen.
Change the order of screens: Touch and hold the screen you want to move, and then drag it to the desired position.
Turn Samsung Free or Google Discover on or off: If you'd like to enable or disable Samsung Free or Google Discover, swipe all the way to the right until you reach the Samsung Free and Google Discover screen. Tap the switch at the top to turn it on or off.
Edit the Home screen settings: Tap Settings at the bottom of the screen to be taken to even more options for the Home screen, such as adjusting the Home screen's layout.
Create or delete folders
Your device comes with preloaded folders, like the Samsung folder, so all your related apps can be together in one place. But you can also create and edit your own folders to help you organize your other apps.
From the Home screen, touch and hold an app. You can also swipe up to access the Apps screen, and then choose an app.
Drag the app on top of another app, and then release. The two apps will both be added to the same folder.
Tap Folder name and enter an appropriate name for the folder. Tap Done.

To select a color for the folder, tap the Palette icon in the upper right-hand corner.
You can add more apps to the folder by tapping Add (the plus sign) or by dragging other apps into the folder.
To exit the folder, tap anywhere outside the folder.
If the folder is on your Home screen, you can move it to a different spot. Touch and hold the folder, and drag it to your desired location.
If your folder is on the Apps screen, you can also move it by touching and dragging it. Or, you can touch and hold the folder, and then tap Add to Home. A shortcut for the folder will appear on the Home screen and a copy of the folder will remain on the Apps screen.
To delete a folder, touch and hold the desired folder, and then tap Remove. The folder will be removed and the apps will return to the Apps screen.
If you have multiple copies of the same folder (i.e. one on the Home screen and one in Apps), they will have to be deleted separately.
Add or remove widgets
Widgets are like mini versions of apps. They appear on your Home screen and when you tap them, they will activate or use an app's feature. These shortcuts will help you access your favorite apps faster.
To add a widget, swipe to a Home screen. Then, touch and hold an empty spot.
Tap Widgets, select your desired widget, and then tap Add.
To remove a widget, just touch and hold the widget on the Home screen, and then tap Remove.

There are a few options available after you’ve placed your widget. Keep in mind the options may vary depending on the widget.
Resize: Widgets that can be resized will have a blue line along its edges. You can resize it by touching and dragging the lines.
Color: Set your widget to a different color. You can access this by touching and holding the widget and then tapping Settings.
Transparency: Increase or decrease the widget’s transparency so you can easily see it. You can access this by touching and holding the widget and then tapping Settings.
Replace apps in your favorite apps section
The bottom row on your Home screen is reserved for your favorite app shortcuts. You can remove these shortcuts and add new ones if you’d like to change up your Home screen.
From a Home screen, touch and hold the app shortcut you’d like to remove or replace.
Next, drag it to another part of the screen. Or, tap Remove to remove the shortcut from the Home screen. You’ll still be able to access the app from the Apps screen.

To add a new favorite app shortcut, swipe up from the bottom of the screen to open the Apps screen. Touch and hold your desired app, and then drag it to an empty spot next to the rest of your favorites.
You can repeat this process for all of your current favorites.
Adjust your Display settings
Customize your font size and style
The new blog you're reading is spellbinding, but looking at the screen is straining your vision. Adjust the font and give your eyes a rest.
From Settings, tap Display. To change the font size and style, tap Font size and style, and then adjust the options as desired.

Adjust color settings
Note: Depending on the device model, the screen modes may vary or be unavailable.
Does that image seem a bit off? You can use Screen mode and color settings to adjust how the display looks.
From Settings, tap Display, and then tap Screen mode. Next, choose your desired screen mode. Keep in mind that some screen modes may not be available unless the Blue light filter is turned off.

Adjust your screen brightness
It's so sunny out, you can barely see the screen. No worries, you can adjust the brightness yourself or have your device do it for you.
From Settings, tap Display. Adjust the slider until you reach your desired brightness.
You can also turn Adaptive brightness on or off - this feature will automatically adjust your phone's brightness depending on if you're in a bright or dark environment. Tap the switch next to Adaptive brightness to turn it on or off.
Note: You can also control screen brightness from the Quick settings panel. With two fingers, swipe down from the top of the screen, and then adjust the slider at the bottom of the panel.

Additional display settings
Your device has a few other features and settings to make things even smoother. For instance, you can organize your Home screen’s apps and items if it’s looking a little cluttered.
Do your eyes get strained after looking at the screen for a long time? You can use Dark mode or Night mode so the screen is easier to see, or adjust the screen refresh rate.

Dark Mode
Manually turn on Dark mode or Night mode
Note: Dark mode may not work if you're using a downloaded theme, a high contrast font, or certain third-party apps.
When you use Dark mode, all your device's menus, settings, and preloaded Samsung apps will use a darker theme. Most third-party apps will stay the same, however.
First, swipe down from the top of the screen with two fingers to open the Quick settings panel.
Then, swipe to and tap the Dark mode or Night mode icon. The icon will glow when the mode is enabled.
To turn the mode off, tap the icon again.
On devices with Android 10 or later, you can also access Dark mode from the top of the Display settings screen.
Set a schedule for Dark mode or Night mode
If you forget to enable Dark mode or Night mode sometimes, just make it automatically turn on or off at a set time.
First, swipe down from the top of the screen with two fingers to open the Quick settings panel. Then, touch and hold the Dark mode or Night mode icon to open its settings page.
Tap the switch next to Turn on as scheduled. Choose Sunset to sunrise to make Dark mode automatically turn on in the evening and turn off in the morning.

You can also choose Custom schedule to set your own schedule for Dark mode. Tap Set schedule, and then select your desired Start time. Next, tap End, select an End time, and then tap Done.
Note: Even if you set a scheduled time for Dark mode, you can still turn it on or off manually whenever you want.
Contact Samsung Support
