Essentials Apps

Calculator
The Calculator app features both basic and scientific math functions, as well as a unit converter. You can use the Calculator app the same way you'd use a physical calculator. To access the Calculator, swipe up on a Home screen to open the Apps screen, and then navigate to and tap Calculator. Along with its basic functions, you can also use the following options:
History: Tap the History icon (it looks like a clock) to view past calculations you’ve made.
Unit converter: Tap the Unit converter icon (it looks like a ruler) to convert different measurements.
Scientific mode: Tap the Scientific mode icon (it looks like a box with numeric symbols) to display additional function keys.

If you have uninstalled the Samsung Calculator, you can reinstall it from the Galaxy Store. If you need quick access to Calculator, you can add it to your Home screen.
Calendar
The Calendar app can be connected to your various online accounts (like Google or Outlook) to consolidate all your calendars in one place. To find the Calendar app, swipe up on a Home screen to access the Apps screen, and then navigate to and tap Calendar.
Add calendars to sync
Open the Calendar app, and then tap Menu (the three horizontal lines).
Tap Manage calendars.
Tap Add (the plus sign), and then select your desired type of account.
Enter your account information and follow the prompts.
Note: Accounts may also support email, contacts, and other features.
Once the account has been added, you can see it in the menu. Tap the account to see the types of calendars you can display. Some accounts, like a Google account, can display your contact's birthdays, or U.S. holidays.

Calendar alert style
When a Calendar event is happening soon, the app will send an alert on your phone. Alerts can be set to different styles to suit your needs.
Open the Calendar app, and then tap Menu (the three horizontal lines).
Tap the Settings icon.
Swipe to and tap Alert style to select from the following options:

Light: Receive a notification and hear a short sound.
Medium: Get a full screen alert and hear a short sound.
Strong: Get a full screen alert and ring sound that persists until dismissed.
Short sound: Choose the alert sound for Light or Medium alert styles.
Long sound: Choose the alert sound for the Strong alert style.
Open the Calendar app, and then tap Add event (the plus sign) to create an event.
Enter details for the event, and then tap Save.
To remove the event, navigate back to the Calendar app and then tap the desired event.
Tap the event again in the pop-up window, tap Delete, and then tap Move to move it to the Trash.
Depending on the alert style selected above, the following sound options will be available:
Create or delete an event
Your Calendar can be used to create events. If needed, you can delete the events later on.

If you have uninstalled the Samsung Calendar, you can reinstall it from the Galaxy Store. If you need quick access to Calendar, you can add it to your Home screen.
Clock
The Clock app offers features for keeping track of time and setting alarms. To find the Clock app, swipe up on a Home screen to access the Apps screen, and then navigate to and tap Clock.
Add or delete an alarm
Use the Alarm tab to set one-time or recurring alarms and choose options for how to be notified. You can also delete alarms.
From the Clock app, tap the Alarm tab, and then tap Add alarm (the plus sign).
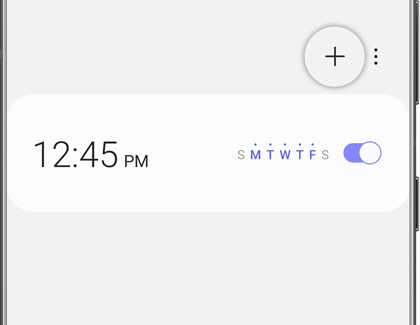
Tap the following items to customize an alarm:
Time: Set a time for the alarm.
Day: Choose the days for this alarm.
Alarm name: Enter a name for the alarm.
Alarm sound: Choose a sound to play for the alarm and drag the slider to set the volume of the alarm.
Vibration: Choose whether the alarm uses vibration alert.
Snooze: Allow snoozing. Set interval and repeat values for the alarm while snoozing.
Tap Save to save the alarm. The alarm will go off at the designated time you chose.
To delete an alarm, touch and hold your desired alarm, and then tap Delete. You can also tap All and then tap Delete all if you wish to remove every alarm you've set.
Alert settings
You can set the device to vibrate for alarms and timers whether the Sound mode is set to Mute or Vibrate.
Open the Clock app, tap More options (the three vertical dots), and then tap Settings.
Tap Vibrate for alarms and timers to enable the feature.

World clock
The World clock lets you keep track of the current time in multiple cities around the globe.
Open the Clock app, tap World clock, and then tap Add city (the plus sign).
Touch and hold the globe to spin it, and then tap the city you want. Or, you can use the Search function to locate a specific city.
When you find your desired city, tap Add.
To remove a city, touch and hold it, and tap Delete.

Time zone converter
Set a time in a city on your World clock list to see what the local times would be in the other listed cities.
From the Clock app, tap the World clock tab.
Tap More options (the three vertical dots), and then tap Time zone converter.
Tap the drop-down menu to choose a different city. Or, to register a new city to the list, tap Add city (the plus sign).
Swipe the hours, minutes, and period (AM or PM) on the clock to set a time. Local times for the other cities listed are automatically updated.
To return the clock to the current time, tap Reset.

Weather settings
Show weather information on your World clock.
From the Clock app, tap the World clock tab.
Tap More options (the three vertical dots), and then tap Settings. Tap the switch next to Show weather to enable or disable weather information.
Tap Temperature to change the temperature from Fahrenheit to Celsius.

Stopwatch
The Stopwatch lets you time events down to a hundredth of a second.
From the Clock app, tap the Stopwatch tab.
Tap Start to begin timing.
To keep track of lap times, tap Lap.
Tap Stop to pause timing.
To continue timing after pausing the clock, tap Resume.
To reset the Stopwatch to zero, tap Reset.

Timer
The countdown timer can be set to 99 hours, 59 minutes, and 59 seconds.
Open the Clock app, and then tap the Timer tab.
Use the keypad to select the hours, minutes, and seconds to set the timer.

Tap Start to begin the timer.
To temporarily stop the timer, tap Pause. To continue, tap Resume.
To stop and reset the timer, tap Cancel.
Preset timer
You can also name and save preset timers.
Open the Clock app, tap the Timer tab, and then tap Add preset timer (the plus sign).
Configure the countdown time and timer name.
Tap Add to save the timer.
To use a preset timer you created, simply tap its name while in the the Timer tab, and then tap Start.
To edit a saved preset timer, tap More options (the three vertical dots), and then tap Edit preset timers.

Timer options and general settings
You can customize the Timer and Clock settings to suit your preference.
Open the Clock app, and then tap the Timer tab.
Tap More options (the three vertical dots), and then tap Settings.

You can select from the following options under Timer:Sound: Choose a preloaded timer sound or add your own.
Vibration: Enable or disable vibration for the timer.
Show mini timer: A small timer will appear on your Home screen. You can pause or stop the mini timer as well.
You can select from the following options under General:
Customization Service: Sign in to your Samsung account to customize personal content in supported apps.
About Clock: View the current software version and check for updates.
If you have uninstalled the Samsung Clock, you can reinstall it from the Galaxy Store. If you need quick access to Clock, you can add it to your Home screen.
Contacts
Add a new contact
If you meet someone new and get their contact information, it's easy to add them to your phone or tablet.
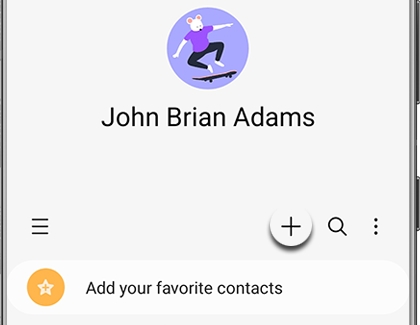
Open the Contacts app, and then tap Add (the plus sign).
Tap the drop-down menu in the upper right corner to choose where you want to save the contact, such as Phone or Google.
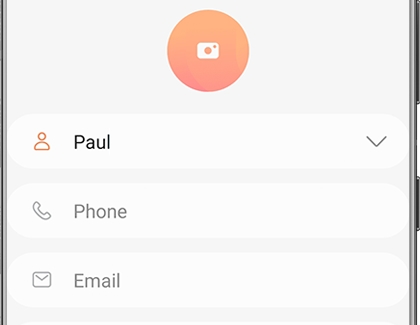
Next, fill out their contact information and personal details. You can add multiple numbers and addresses in the Phone and Email fields by tapping + Add.
When you're done, tap Save to add them as a Contact.
Edit a contact
Did your friend just get a new job and a new work number? Just follow these steps to edit their contact information.
Open the Contacts app, and then tap the contact you want to adjust. Tap Edit. You can change your contact’s information by tapping the desired field.
To add additional numbers or email addresses, tap on your desired field and then tap + Add.
To delete something, tap Remove (the minus icon) next to it.
Tap View more to edit additional options like address, notes, relationship, etc.
When you’re done editing, tap Save.
Share contacts
You can import and export your contacts right from the Contacts app! Your contacts will also sync between your devices if they are signed into the same Samsung Account.
Open the Contacts app, and then tap a contact you want to share. Tap Share at the bottom.
Select how you’d like to share the contact. You can choose from Share as file or Share as text.
Note: On some devices, these options may be worded differently.
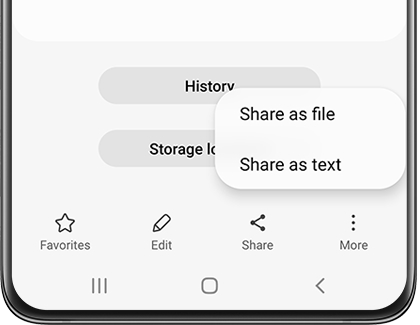
Next, choose your preferred sharing method, such as Quick Share or email, and then follow the necessary prompts. Depending on your sharing method, you may need to select Import on the other device.
To share multiple contacts, navigate to the Contacts screen, and then tap More options (the three vertical dots). Tap Share contacts.
Select your desired contacts, or tap All at the top. Then, tap Share at the bottom. Follow the prompts on the other device to import the contacts.
You can also share a contact with another device using a QR code. Tap a contact, then tap More (the three vertical dots) at the bottom, and then tap QR code.
Then, using the other device, open the Contacts app. Tap More options (the three vertical dots), and then tap Scan QR code. Position the device to scan the code.
Note: You can also use a QR app to scan the code.
If you’re having trouble syncing your contacts, you can review our syncing guide for assistance. You can also use Smart Switch to transfer all of your contacts from another device.
Set your favorite contacts
If you’re always calling or texting someone, like your best friend, you can set them as a favorite contact.
Navigate to Contacts, and then tap Add your favorite contacts at the top.
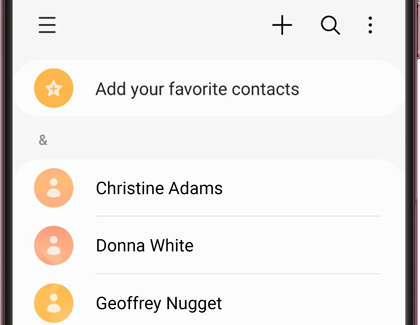
You can search for a contact’s name or swipe through the list to find someone. Select your desired contact(s), and then tap Done.
Your selected contact(s) will then appear at the top, under Favorites. However, they will still appear in your general contacts list below.
Note: To add additional favorite contacts, select a contact, and then tap Favorites (the star icon) at the bottom. The icon will turn yellow.
You can also reorder your favorite contacts. From the Contacts screen, tap More options (the three vertical dots), then tap Reorder Favorites, and then use the arrows to drag and drop your contacts into your desired position. You must have at least two favorite contacts to reorder them.
If you need to remove a contact from your favorites, just select the desired contact, and then tap Favorites. The icon will turn white.
Messages
Message customization
When it comes to giving your device some style, Samsung has you covered. To customize the way your Messages app appears, try changing the theme on your device.
If you want to change your font for Messages, adjust your font settings.
You can also set a custom wallpaper or background color for individual message threads. From the conversation you'd like to customize, tap More options (the three vertical dots), and then tap Customize wallpaper or Customize chat room. Tap the Gallery icon to choose an image, or you can tap a color to just change the background color. On some devices, you can also change the bubble opacity and the text contrast.

Change the font size
You want to catch every word in your messages, but the font's a little small. Adjust the font size for individual messages without affecting the general font size setting for your device.
Open a message that you’d like to view from the Messages app, and then use two fingers to pinch in and out on the screen. The font will automatically become larger or smaller. Any changes you make will only affect texts displayed in the Messages app, and the last size you selected will be saved until you change it again.
Create and schedule a message
Messages has everything you need to craft that perfect greeting, including options to schedule a message in advance.
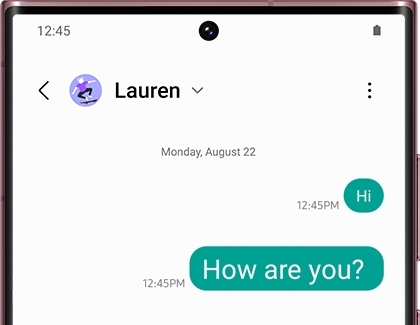
Open Messages on your device, and then tap Compose in the lower right-hand corner.
Select the desired recipient(s), and then tap Enter message. Write your text, and then tap Send.
To schedule a message, write the text, and then tap Add (the plus sign). If you don't see the plus sign, tap the arrow on the left side.
Then, tap Schedule message. Set the date and time you want your text message delivered. It can be up to a year from the current date.

Note: If you exit a message before you send it, the message will be automatically saved as a draft.
Mute or unmute a conversation
By default, you are alerted when you receive a message from a contact. But you can mute any conversation, especially if you’re in a meeting and don’t want to be disturbed.
From the Messages app, select a conversation, and tap More options (the three vertical dots). Depending on your carrier, the mute option layout may differ; you might have to tap Mute Conversation or the Bell icon. To unmute, tap Unmute Conversation or the Bell icon again.
Note: The Bell icon will appear blue when the conversation is unmuted and clear when the conversation is muted. You can still view messages when a conversation is muted; you just won't get notifications when texts arrive.
Use group messages
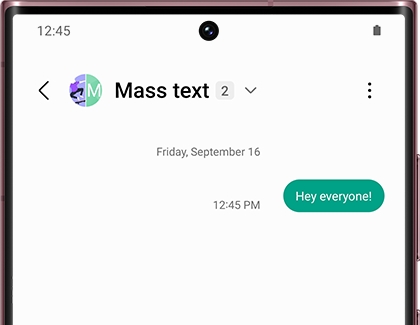
You can create group messages in the Samsung Messages app if you’d like to chat with several people. Images and videos can be sent in group messages as well, which makes it easier to share information with friends and family at the same time.
Messages app settings to know
Here are some useful tools and settings for the Messages app that you might not have known about. Use them to get the most out of your texts and messages.
Search: Use the Search icon to find a message thread you are looking for.
Delete: Touch and hold a message you want to delete, and then select the message(s) you want to remove. Tap Delete located at the bottom, and then tap Delete to confirm.
Star Messages: Tap and hold a chat bubble that you want to star or favorite, and then tap Star message. To view the starred messages, go the Conversations tab, tap More options (the three vertical dots), and then tap Starred messages.
Block messages: You can block and delete unwanted messages. When you get a sketchy text, select Block number at the top of the conversation. To view blocked numbers and messages, or to block a number, go to the Conversations tab, tap More options (the three vertical dots), and then tap Settings. Tap Block numbers and spam.
Pin a conversation: From a conversation, tap More options (the three vertical dots), and then tap the pin icon at the bottom of the menu. This conversation will now appear above all other unpinned messages.
Update the app: From the Conversations tab, tap More options (the three vertical dots), tap Settings, and then tap About Messages. If an update is available, tap Update.
My Files
Use My Files on your device
The My Files app stores every file you have on your phone or tablet. It's like the File Explorer on a PC or Finder on Mac, where you can easily view and move photos, videos, music, documents, and more. You can also remove files from the My Files app if you no longer need them. The Trash feature in My Files should be on by default, but you should make sure it's turned on just in case.
Note: Tablets do not have the Trash feature in My Files, so files can't be restored once they are deleted.
Navigate to and open the My Files app. It's usually in the Samsung folder.
Select your desired file category, such as Images, Videos, Audio files, Documents, Downloads, Installation files, Compressed, and Favorites.
If needed, select any additional folders that contain your desired files (i.e. Screenshots, etc.). Touch and hold the file(s) or folder(s) you want to move.
Tap Copy to create a copy of the files in a different storage area. Or, tap Move to completely remove the file and move it to a new location.
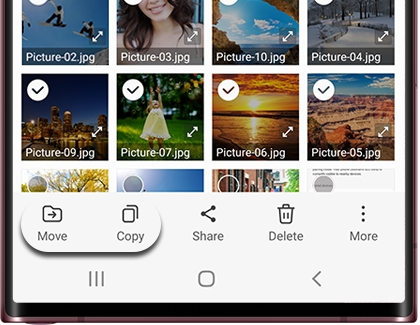
Next, navigate to and select your desired destination:
Internal storage: Move the file(s) or folder(s) to a different location within the same internal storage.
SD card: If you have a microSD card inserted, tap SD card, and then select the destination location. Please be aware that apps cannot be moved to the SD card using My Files. You will need to use another method.
Google Drive: If prompted, sign into your Google account to access your Google Drive. You can transfer files to and from the cloud.
OneDrive: Log into your Microsoft account and grant permissions for MyFiles to access the OneDrive cloud.
Network storage: Tap +Add network storage to add and use a server or other network storage location.
Once you've found where you want to put the file, tap Move here or tap Copy here.
Note: You can also create a new folder for your file. Tap More options (the three vertical dots), then tap Create folder, and then enter a name for the folder. Tap Create, and then tap that folder if you wish to move your file to it.
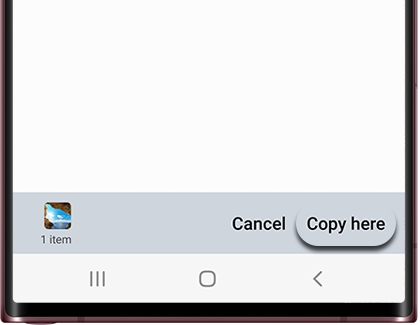
To remove a file, navigate back to My Files, and then tap More options (the three vertical dots). Tap Settings, and then make sure the switch next to Trash is turned on.
Tap Back, and then select your desired file category. If needed, select any additional folders that contain your desired files (i.e. Screenshots, etc.).
Touch and hold the file(s) or folder(s) you want to delete.
Tap Delete, and then tap Move to Trash to confirm. The file will stay in the Trash for 30 days before being permanently deleted.
Use a microSD card or OTG flash drive
Note: Not all phone or tablet models support microSD cards or external storage options that use excessive amounts of power to operate. Encrypted music or other purchases cannot be moved to external storage.
If you're looking to transfer all of your files, you can use a convenient microSD card or flash drive. You can also use the options in Device care to help clear space.
First, insert your microSD card or USB OTG flash drive. Navigate to the Samsung folder, and then open My Files.
Find the file you want to move, and then touch and hold the file.
To move additional files in the same folder, you will need to select All at the top of the screen. Or, you can select multiple files individually.
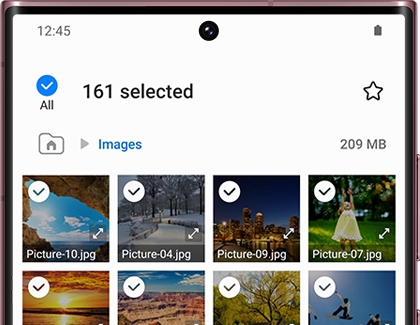
Next, tap Move or Copy at the bottom of the screen, and then navigate back to the My Files home page.
Tap SD card or USB Storage - this will only show up if you have a flash device inserted. Then, tap Move here.
Please note you can only move or copy files this way in the My Files app. You cannot move or copy files to other apps, such as Gallery.
MicroSD cards are not limited only to files. You can even move certain apps to the SD card!
Internet
Basic navigation
You can use the two toolbar options at the top and bottom of the page to navigate the app and websites. If the toolbar does not appear, just tap an empty space or swipe up on the screen.
The top toolbar
The following options are available on the top toolbar:
Bookmark: Add the current web page to your saved bookmarks.
Address bar: Show the current web page. Tap the bar to search for a different website.
Reload: Reload the current page.

The bottom toolbar
The following options are available on the bottom toolbar:
Back: Will take you back to the last page you visited.
Forward: After using the Back icon, this will take you to the page you were on previously.
Home: Navigate to your home page.
Bookmark list: View a list of all the pages that you've bookmarked.
Tabs: View all the tabs that are open.
Menu: Use additional options and settings.

Change your home page
Your home page is the website that loads when you first open Samsung Internet or when you open a new tab. You can set your preferred home page to any website you like.
Navigate to and open the Samsung Internet app, and then tap Menu (the three horizontal lines). Tap Settings, and then tap Homepage. You can use the following options:
Default: This will set the home page to Google.
Quick access: You can use the app’s suggested links by selecting Most visited pages, News feed, or None.
Current page: Set the page you are on as your home page.
Custom page: You can input your desired web address to use as your home page.

Use bookmarks
Saving a web page to your bookmarks will let you find and open it later. You can also organize your bookmarks if you have a lot of them.
Navigate to and open the Samsung Internet app, and then open a web page that you’d like to save to your bookmarks.
Tap the bookmark icon (the star in the top right), and then tap the bookmark list icon (the star in the bottom toolbar). You will see all of your bookmarks.

To rename a bookmark, tap More options (the three vertical dots), and then tap Edit.
Select your desired bookmark, tap Edit at the bottom, and then enter a new name for the bookmark. You can also edit the web address. Tap Save to confirm.
To create a folder for your bookmarks, tap More options (the three vertical dots), and then tap Create folder.
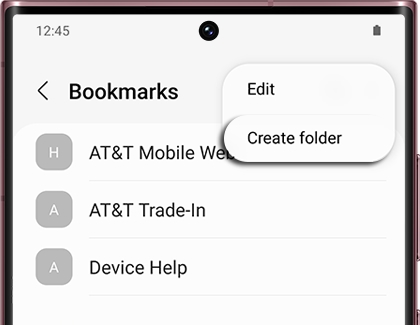
Enter a name for the folder, and then tap Create.
Next, tap More options (the three vertical dots) again, and then tap Edit.
Select the bookmark(s) you’d like to add to the new folder. You can also select All at the top. Tap Move, and then tap the new folder. Tap Select to move the bookmarks into the folder.
Manage your tabs
Tabs allow you to have multiple web pages open at once. This makes it easy to keep track of your favorite or most visited websites.
Navigate to and open the Samsung Internet app, and then tap the tabs icon in the bottom toolbar (it looks like a box with a number).
Tap New tab to select a new page you’d like to open; the page will open automatically.
To view all of your currently opened tabs, tap the tabs icon again.

To close a tab, tap the close icon (the x) in the top right corner of the tab. If you need to close all of your tabs, tap More options (the three vertical dots), and then tap Close all tabs.
To reopen a tab you just closed, tap More options (the three vertical dots) again, then tap Reopen closed tab, and then select the tab.
To change how the tabs are displayed, reopen all of your tabs, and then tap More options (the three vertical dots). Tap View as, and then choose either List, Stack, or Grid. Tap OK to confirm.
Contact Samsung Support
