Run diagnostics and troubleshoot issues on your Samsung Chromebook

Run diagnostics and troubleshoot issues on your Samsung Chromebook
Audio (Speaker and Headset)
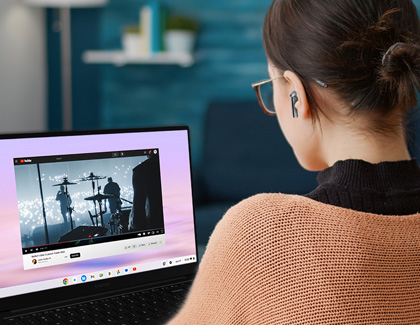
- To check the speaker, you can visit a streaming website such as YouTube, and then begin playing a video.
- Verify that you can hear audio from all speakers.
- If needed, connect a headset and select the headset output. Then, verify that you can hear audio from the headset.
- Additionally:
- Check if the audio has been muted.
- Navigate to Audio settings to verify the Output audio, Input audio, and Volume settings.
Keyboard

You can use the Diagnostics app to check the keyboard.
- Using the Search bar, search for and select Diagnostics.
- Select Keyboard to test the keyboard. Follow the on-screen instructions to check if the keyboard is functioning.
- Check if the keyboard’s feedback is accurate.
Battery
Verify that you can see the battery icon in the lower right corner of the screen. If you can see the battery icon, then troubleshooting is not required. However, if you cannot see the battery icon, you can use the Diagnostics app to check the battery.
- Using the Search bar, search for and select Diagnostics.
- Select System, then scroll to the Battery section, and then select Run Discharge test.

- Make sure the Chromebook’s charger is unplugged. The battery test will take a few minutes to complete.
- Next, select Run Charge test. The test will take a few minutes to complete.
- Additionally:
- If you are unable to run the Charge test, check the current battery level and charger connection.
- If the Charge test fails, check the charger and charger connection.
- If you are unable to run the Discharge test, check the charger connection.
Bluetooth
- Verify that you can see the Bluetooth icon in the screen’s status area, and that Bluetooth is turned on.
- To connect a Bluetooth device, select Pair new device. Allow the Chromebook to search for available devices, and then select the device when it appears.

Please refer to Google’s Chromebook Help page for more information about Bluetooth devices.
Wi-Fi
- Verify that you can see the Wi-Fi icon in the screen’s status area, and that Wi-Fi is turned on.
- Verify that you can see the Network list.

Please refer to Google’s Chromebook Help page for more information about connecting to Wi-Fi.
Touch screen and Stylus (supported models only)
- Navigate to https://rbyers.github.io/paint.html to perform a drawing test. The link will open a blank page, click around the page to test it out.
- Make sure your browser window is in full screen mode.
- Start drawing a line around the edges of the screen. This will determine if your Chromebook’s touch screen is functioning correctly.
Stylus eject (supported models only)
Touchpad

To check the touchpad, you can perform the following:
- Move your finger across the touchpad.
- Press or tap the lower half of the touchpad to select something.
- Press or tap the touchpad using two fingers to right-click.
- If the touchpad is not working, you can try restarting your Chromebook.
Please refer to Google’s Chromebook Help page for more information about using the Touchpad.
Fingerprint sensor (supported models only)
- Select the time in the bottom right corner of the screen, and then select Settings.
- Scroll to Security and Privacy, and then select Lock screen and sign-in.
- Enter your password, and then select Confirm.
- Scroll to Edit Fingerprints, and then select Set up.
- Select Add Fingerprint and scan your finger using the fingerprint sensor. Make sure the sides of your finger make contact with the sensor.
- Once your fingerprint has been added, you can add another fingerprint if desired.
- When you’re finished, select Done.
Please refer to Google’s Chromebook Help page for more information about using the fingerprint sensor.
Camera

- Navigate to and open the Camera app.
Note: If your Chromebook has multiple connected cameras, you can choose your desired camera by selecting its switch. This will enable the selected camera. - Select the Record icon to begin recording a video. You may need to select Video first.
- To end the recording, select the Stop icon.
- You can play back the recording if desired.
- Additionally:
- If the recording or the preview is unclear, check for dust in the camera lens.
- If the recorded sound is not loud enough, check the microphone volume.
- If there is no sound at all in the recording, ensure that you have not muted the microphone.
Please refer to Google's Chromebook Help page for more information about using the Camera app.
Display brightness
You can adjust the brightness of the display using the Brightness slider in the status area.

Display backlight
- Navigate to and open Settings, then select Device, and then select Power.
- Select the switch next to Sleep when lid is closed to disable the setting.

- Next, close the Chromebook’s lid and wait a few seconds.
Note: Before closing the lid, disconnect external monitors. - Open the lid, and check if the backlight has turned on.
Display pixels
- To check the pixels, navigate to Dead-pixel check and select Start test.

- Begin clicking on the screen using the touchpad or mouse to determine if there are missing pixels. The screen will change colors during the test.
- Press ESC to end the test.
Keyboard backlight and Ambient Light Sensor (supported models only)
- Place your hand on the ALS (Ambient Light Sensor) in the upper left corner of the keyboard, and then check the backlight when pressing the keys on the keyboard.
- If needed, restart your Chromebook to reset the brightness level.
Please refer to Chromebook’s Help page for more information about the backlight.
Type-C port
- Use a Type-C dongle to connect an external display, USB storage device, and charger.
- Connect the Type-C dongle to your Chromebook.
- Check if you can view the external display.
- Check if you can access the USB storage.
- Verify if the battery icon is fully charged or charging.
- Additionally:
- Try reconnecting the dongle and devices if the connections are not working.
- If there is a charging issue, please check the charger.
- If your Chromebook has multiple Type-C ports, please verify each port individually.
Accelerometer and Gyro Sensor (supported models only)
Buttons (supported models only)
- Try pressing the Volume button to change the volume level.
- Try pressing the Power button to check if a pop-up window appears. This window will include Shut Down, Sign out, Lock, and Feedback options.

Power LED
The LED will let you know the Chromebook’s status.
- Blue: Power is turned on.
- Green: The battery is fully charged.
- Red: The battery is charging.
- Blinking red: The battery has depleted or is starting to charge.
SIM card and Modem (supported models only)
- Before checking the SIM card, please turn off the Chromebook and make sure a SIM card has been inserted.
- Next, turn on the Chromebook. Navigate to and open Settings, then select Network, and then select Mobile data.
- Select the Show detail icon (the arrow).

- Check the ICCID and IMEI information.
- Additionally:
- If the SIM card details do not appear, please turn off the Chromebook and then turn it on again. Then, check the details again.
- If the ICCID details do not appear, please check the SIM card.
MicroSD card
- When the Chromebook recognizes an external storage device, it will appear in the File Manager app under My files.
- Before removing a microSD card, please eject it properly.

Please refer to Google’s Chromebook Help page for more information about microSD cards and external storage devices.
Type-A port (supported models only)
- When the Chromebook recognizes an external device, it will appear in the File Manager app under My files.
- You can connect external storage devices, keyboards, and mouse devices.
Please refer to Google’s Chromebook Help page for more information about external devices.
Ambient sensor for display (supported models only)
- To check the ambient sensor, place your hand on the sensor, which is located near the camera.
- Check if the brightness decreases when the sensor is covered.
- Enable your phone’s Flashlight app and point it at the sensor to check if the brightness increases.
- Verify that the sensor is free of dust.
Please refer to Chromebook’s Help page for more information about the ambient sensor.
Additional references
Contact Samsung Support

-
Mobile 8 AM - 12 AM EST 7 days a week
-
Home Electronics & Appliance 8 AM - 12 AM EST 7 days a week
-
IT/Computing 8 AM - 12 AM EST 7 days a week
-
Text Support 24 hours a day 7 days a week

You Are About To Be Redirected To Investor Relations Information for U.S.
Thank you for visiting Samsung U.S. Investor Relations. You will be redirected via a new browser window to the Samsung Global website for U.S. investor relations information.Redirect Notification
As of Nov. 1, 2017, the Samsung Electronics Co., Ltd. printer business and its related affiliates were transferred to HP Inc.For more information, please visit HP's website: http://www.hp.com/go/samsung
- * For Samsung Supplies information go to: www.hp.com/go/samsungsupplies
- * For S.T.A.R. Program cartridge return & recycling go to: www.hp.com/go/suppliesrecycling
- * For Samsung printer support or service go to: www.hp.com/support/samsung
Select CONTINUE to visit HP's website.


