Setting Up & Using the Jet™ Stick

Last Update date : 2023-05-07

The Jet™ Stick vacuum has been designed for easier operation by having the buttons in a more convenient position to operate. Not only that, the charging stand makes sure that your Jet™ Stick vacuum is ready in a moments notice, but it also has a handy spot for you store the attachments.

There are a few things however that you will need to put together yourself. Simply follow the guides below.

Jet

Note: If you would like to learn more about cleaning the dustbin and filters of your Jet Stick, please click here.
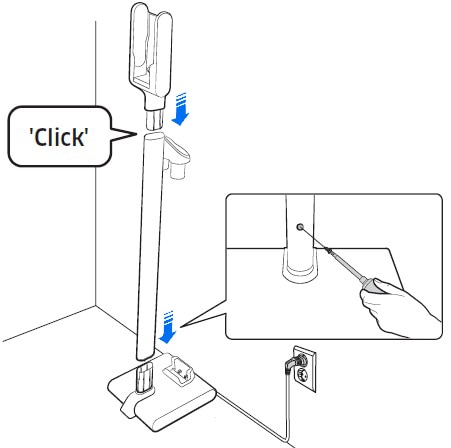
1 Firmly push the stand pipe in to the bottom support so that the screw hole is aligned. Then fix it in place using the small screw provided.
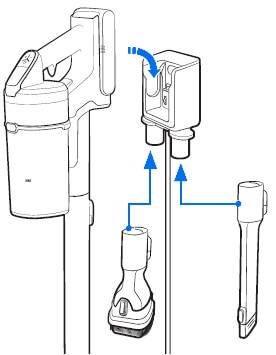
2 Assemble the vacuum charging part to the top of the stand pipe until you hear a click.
Assembling the charging stand.

Note: Do not disassemble it after the assembly.
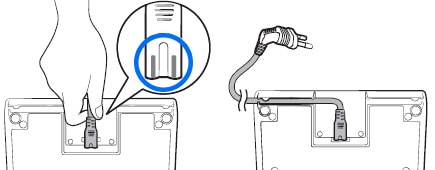
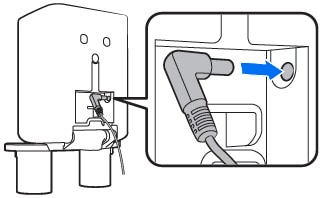
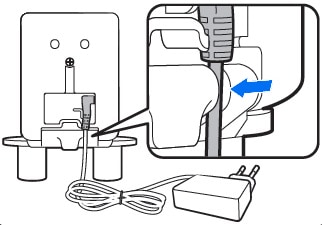
3 Now it’s time to connect the power cord to the rear of the charging stand. You will need to hold the connection part of the cord and push it onto the connection pins firmly until the grey lines on the tip of the cord are not visible. The charging stand can be installed closer to the wall by inserting the cord into the groove on the bottom of the bottom support.
Connect charging cord.
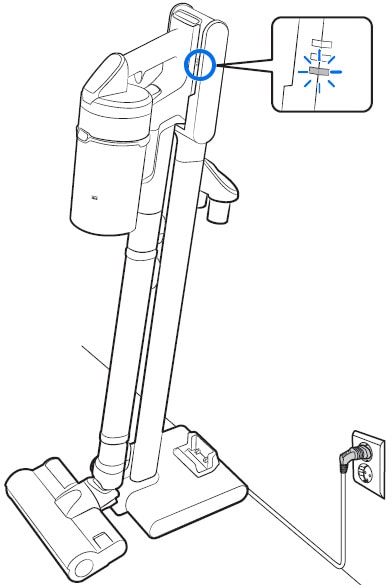
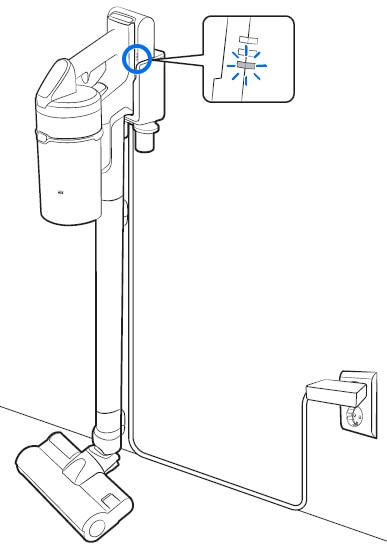
4 Plug in the charging stand. It is recommended to charge the battery prior to its first use.
Charging Jet Stick.

Fixing the hook

1 By holding the fixing hook against the wall, you can use it as a template for marking out where the top and bottom screw holes will be placed on the wall. The top screw will need to be 66cm from the floor. The bottom screw will need to be 60cm from the floor.
2 Carefully drill the holes in the wall using a 6mm drill bit and put the provided anchor screws into the hole. It is recommended that you use a stud finder with live wire detection.
Fix hook to wall.
3 After inserting the screw anchors, fix the fixing hook to the wall with the large screws provided.
4 Hook the groove of the charging stand into the fixing hook.
Place charging stand on to hook.
1 Connect the power cord in the rear of the wall mount and place the cord into the groove below.
Plug in cord to wall mount.
Place cord in groove.
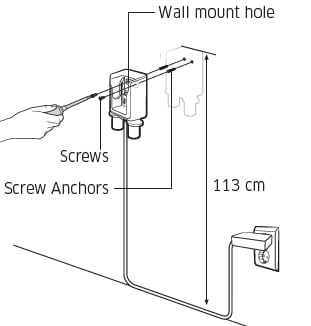
2 The wall mount installation should be set so the top of the wall mount is 113cm from the floor. Install the wall mount on a hard concrete wall. If it is installed on a wood or plastic wall, the product may fail.
3 Hold the wall mount against the wall and use it as a template to mark on the wall where the screw holes will be placed.
Fixing the wall mount to the wall.
4 Drill the holes to a depth of 50mm using a 6mm drill bit and put the provided screw anchors into the hole.
5 Fix the wall mount to the wall using the screws provided.
6 Plug in the wall mount, place the vacuum into the wall mount and then confirm that the battery level indicator is displayed.
Place Jet Stick onto wall mount.
Charging Jet Stick.
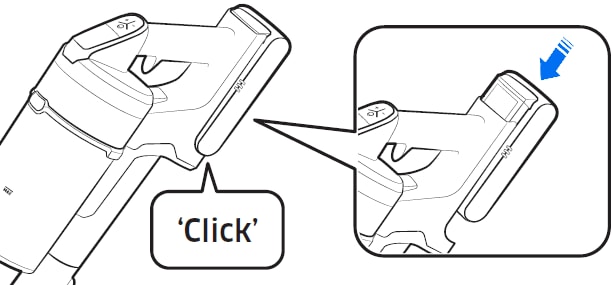
1 Insert the battery into the slot on the back of the Jet™ Stick and slide the battery down until you hear a click.
Slide in battery pack.
2 Press the power button to turn on your Jet™ Stick. The vacuum starts operation in ‘MID’ mode. However, when the wet brush is attached, the vacuum will start in ‘WET’ mode.
Assembling the charging stand.

Note: Some attachments can connect directly onto the Jet™ Stick without the use of the pipe.
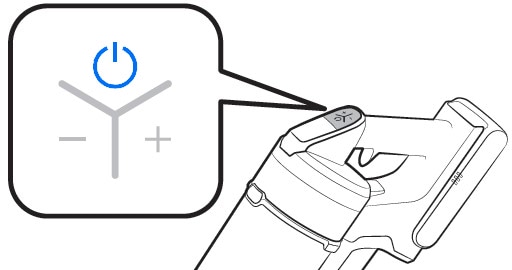
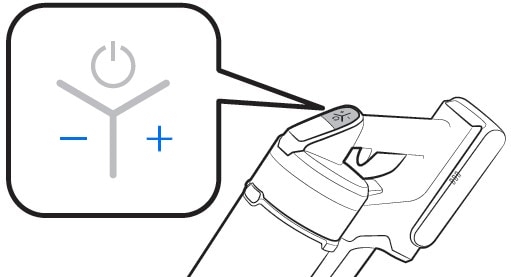
3 Press the Circle icon with a line coming from the top. power button to turn on your Jet™ Stick. The vacuum starts operation in ‘MID’ mode. However, when the wet brush is attached, the vacuum will start in ‘WET’ mode.
Press the power icon.
4 Press the (Plus icon) button to increase suction power or press the (Minus icon) button to decrease the suction power. If you are operating the Jet™ Stick in ‘WET’ mode, the suction power control buttons do not work.
Plus and minus icon o control suction power.


Note: 
For more information on the Jet™ Stick display, please click here.

Note: If you have any questions after verifying the above-mentioned solutions, please call our contact center to get help with your inquiry. Our helpful agents will be there to help you.


Need More Help?

Thank you for your feedback!