Add and manage devices and appliances in SmartThings

Last Update date : May 11. 2023
A hand is holding a Galaxy phone with the SmartThings app opened

With the ever-growing number of smart devices and appliances in your home, you need a way to keep up with them all. What if we told you there's an app for controlling your smart devices on your phone? That is right, the SmartThings app can add and manage all your smart devices in one place.

Note: The provided information refers to devices sold in Canada. The available screens and settings may differ for devices sold in other countries. If you are adding Z-Wave devices that have been connected previously, make sure they have been removed or excluded before adding them to the new hub. You can visit the SmartThings website to check device compatibility and gather more information.

Note: 
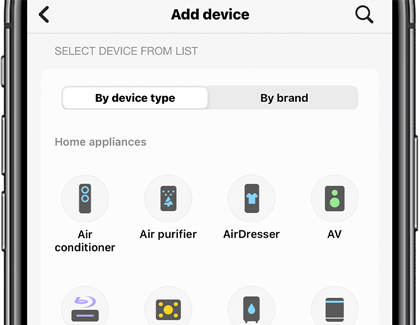
When you are ready to take control of all your smart devices, just use the following guidelines. But first, you should double check if your devices are compatible.

1 Navigate to and open the SmartThings app on your phone.
2 Tap the Devices tab, tap the Home icon, and then choose your desired location for the device.
3 Tap the Add icon (the plus sign).
4 If the device uses Bluetooth., tap Scan nearby and if your device appears, select its name.
A Galaxy phone is showing a SmartThings app screen
5 If your device is not detected, you can add it manually. If it is a Samsung product, tap By device type to select the type of device, such as a hub, TV, etc. If not, tap By brand (SmartThings, ADT, and so on). You can also search for your device in the search bar.
6 From there, read the on-screen instructions to connect your device to SmartThings.
7 When connecting a Samsung smart appliance, you may be required to press a button on the appliance to turn on its smart features and complete the connection. It is similar to agreeing to the terms to use the smart features.

Note: Your devices can be added using your iPhone as well. But first, you should double check if your devices are compatible.

1 Navigate to and open the SmartThings app.
2 Tap the Devices tab, then tap the Home icon, and then choose your desired location for the device.
3 Tap the Add icon (the plus sign). If the device uses Bluetooth, you can tap Scan on Scan for nearby devices.
4 You can also add it manually by tapping either By device type or By brand, and then choosing the device from the list. Or, tap the Search icon to search for it.
You can also add it manually by tapping either By device type or By brand, and then choosing the device from the list. Or, tap the Search icon to search for it.
5 Once you have selected your device, follow the on-screen instructions to complete the setup and connect your device.
6 When connecting a Samsung smart appliance, you may be required to press a button on the appliance to turn on its smart features and complete the connection. It is similar to agreeing to the terms to use the smart features.

Note: 
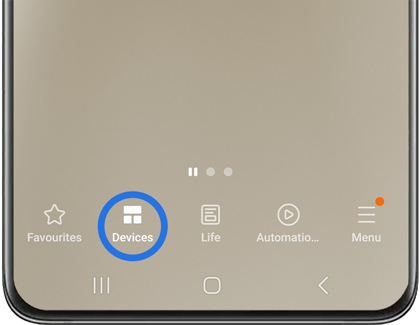
So, you have added a whole bunch of devices - now what? You can easily monitor and control them right from the app. You can also use your phone as a TV remote through SmartThings.

1 Navigate to and open the SmartThings app.
2 Tap the Devices tab (at the bottom of the screen).
Tap the Devices tab (at the bottom of the screen).
3 Tap the Home icon.
4 Select your desired location with the devices you would like to manage, and then tap the drop-down menu. Tap All devices. Here you can view, monitor, and control all your registered devices for the location you selected.

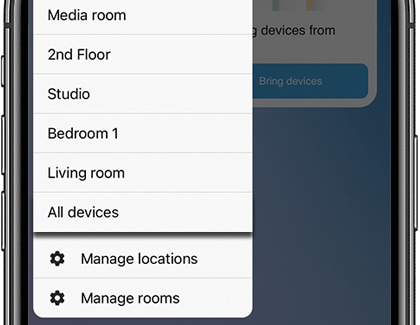
Note: To select a different location, tap the Home icon and tap your desired location. Tap the drop-down menu and then tap All devices again.

5 Select your desired device and use the available settings to perform your desired actions.
6 Sometimes you may be prompted to tap Download so you can download the device’s controller.

Note: The available controls may vary depending on the device.

Note: You can control your devices on your iPhone too, such as turning on a smart bulb or pausing a smart cam.

1 Navigate to and open the SmartThings app.
2 Tap the Devices tab (at the bottom of the screen).
3 Tap the Home icon.
4 Select your desired location with the devices you would like to manage. Then, tap the Home icon again and tap All devices.
Select your desired location with the devices you would like to manage. Then, tap the Home icon again and tap All devices.
5 Tap your desired device to use the available settings.

Note: The available controls may vary depending on the device.

With the Device panel on your Galaxy phone, you can view and access your SmartThings devices and scenes without navigating to the SmartThings app. It is a great shortcut if you want to save some time.

On your phone, swipe down from the top of the screen using two fingers to open the Quick settings panel, and then tap Device control.

A Galaxy phone is showing the Quick settings panel

Your scenes and SmartThings devices will be displayed. If it is your first time using the panel, you will be asked to choose the devices and scenes you would like to appear.

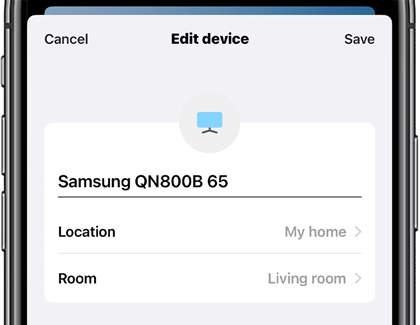
If needed, you can change the name or location of a connected device. For example, maybe you have multiple smart bulbs added and want to give them different names so you can tell them apart. Or, maybe you moved a device to a new room in your house and want to change it in the app as well.

Note: You cannot edit the details for Bluetooth devices.

1 Navigate to and open the SmartThings app.
2 Tap the Devices tab (at the bottom of the screen).
3 Tap the Home icon.
4 Select your desired location, and then swipe through the rooms to find the device you would like to edit.
5 Long press the device’s card, and then tap Edit.
A Galaxy phone is showing a SmartThings app screen

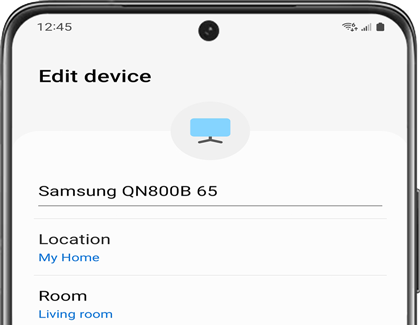
You can adjust the following settings:

  • Device name: Edit the name of the device.
  • Location: Change the device's location.
  • Room: Choose which room the device is in.
  • Set as favourite: Set the device as a favorite device.
  • Add to Home screen: Create a shortcut for the device on the phone's Home screen.
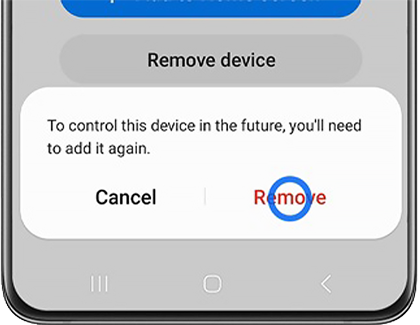
  • Remove device: Remove the device from your SmartThings account.
6 When you are finished editing the device, tap Save.

You can edit the details using your iPhone as well.

Note: You cannot edit the details for Bluetooth devices.

1 Navigate to and open the SmartThings app.
2 Tap the Devices tab (at the bottom of the screen).
3 Tap the Home icon.
4 Select your desired location, and then swipe through the rooms to find the device.
5 Long press the device’s card, and then tap Edit.
6 Adjust the device’s details according to your preferences.
An iPhone is showing a SmartThings app screen

Note: If you just got a new TV and want to remove the old one from SmartThings, it is easy to do so.

1 Navigate to and open the SmartThings app.
2 Tap the Devices tab (at the bottom of the screen).
3 Tap the Home icon.
4 Select your desired location. Swipe through the rooms and then select the device you want to remove.
5 Long press the device’s card, and then tap Edit.
6 Tap Remove device, and then tap Remove to confirm.
A Galaxy phone is showing a SmartThings app screen

Note: 
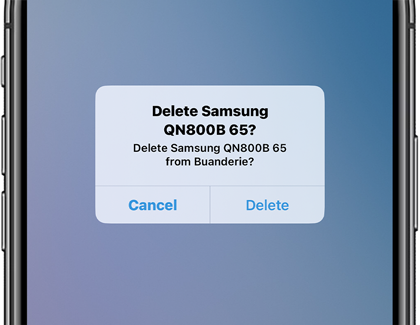
If you are not using a device anymore, you can remove it from your iPhone as well.

1 Navigate to and open the SmartThings app.
2 Tap the Devices tab (at the bottom of the screen).
3 Tap the Home icon.
4 Select your desired location, and then swipe through the rooms to find the device you would like to remove.
5 Long press the device’s card, and then tap Remove.
6 Tap Delete to confirm.
An iPhone is showing a SmartThings app screen

When you are removing home appliance products with touchscreens from the SmartThings app (like Family Hub refrigerators or some ranges or ovens), keep in mind that they may remain logged in to your Samsung account. This is because the appliance maintains your account information on the device itself. A factory reset will clear the information off these appliances.

Thank you for your feedback!

The coding for Contact US > Call > View more function. And this text is only displayed on the editor page, please do not delet this component from Support Home. Thank you