What are the different camera modes and how do I use them?
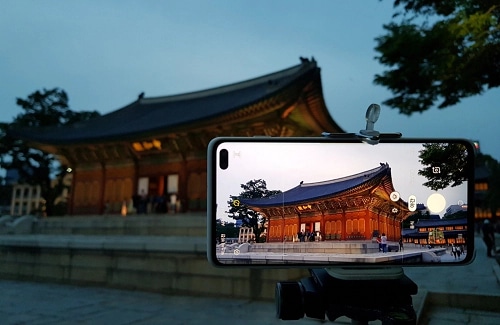
Your Galaxy smartphone camera comes with a variety of different modes that help you capture every unforgettable moment. From gorgeous selfies to stunning panoramas and spectacular slow-mo, there's a camera mode for every occasion.
Please note: the available camera modes will depend on your specific device and operating system, some modes are unavailable on both newer and older devices. It is recommended that your software is kept up to date so that you can always have the latest options available
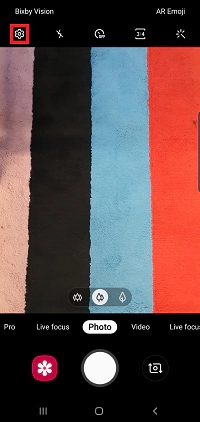
Different camera modes are available within your camera app. The available modes will be dependent on your model and operating system.
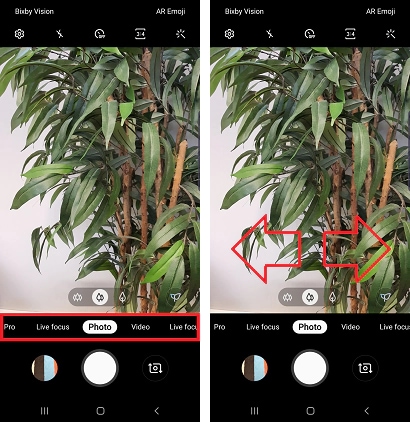
You can swap between camera modes by dragging the camera modes to the left and right or by swiping left and right on the camera screen.
On some Galaxy devices you can downloaded additional camera modes. You can find additional modes by going to the Galaxy Store.
Please note: the latest Galaxy devices come pre-installed with all available camera modes. If you don't have the option to add additional modes, you may already have them on your device
AR (Augmented Reality) Emoji creates an animated version of yourself which can then be used to record your movements and facial expressions. If your device can use the AR Emoji feature, you can find it by opening the camera app, then tapping AR Emoji.

Please note: the fast motion camera mode is no longer available on the latest devices. You can achieve the same effect by using the hyperlapse mode
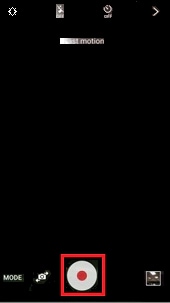
Fast motion allows you to record a video and then play it back at a much faster speed.
Please note: on some devices you may have to tap MODE or swipe across the screen to change to Fast motion

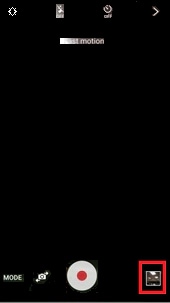

Please note: on some devices you may need to tap the screen or the scissors icon to edit your video


Please note: the Flaw Detection feature is only available on the following devices: Galaxy Note 9, Galaxy S10 range, Galaxy Fold 5G
Flaw detection is an intelligent camera feature that will notify you if it detects something unusual about a picture, giving you the chance to take the shot again. If flaw detection is not available on your device, try using the shot suggestions and scene optimiser features instead.
There are four types of flaw detection notifications:
- Eye blink measures the eye size in preview. It then detects any change in eye size when the shutter clicks, to check if anyone is blinking
- Motion Blur detects any blur caused by moving subjects or shaky hands
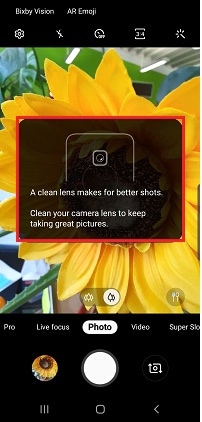
- Lens smudge detects any dirt on the camera lens. This notice will only be displayed once within the first 10 seconds of opening the Camera app
- Back light detects saturated areas of the image. For example, if there's a bright light in the background

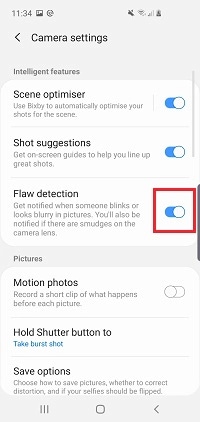
Please note: blink and blur detection work best when there are up to three people in the frame and the subject is up to 1.5 metres away from the camera. The lens smudge and backlight detection notifications may only appear once within a 24-hour period
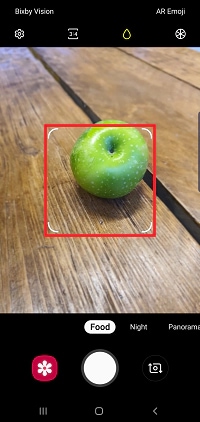
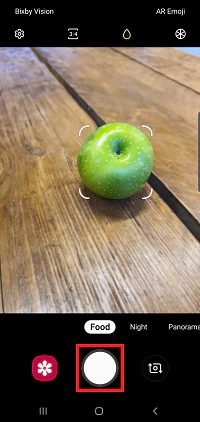
Food Mode will automatically adjust the colours of food in the frame, making them appear more vibrant and making your meal look even more delicious.
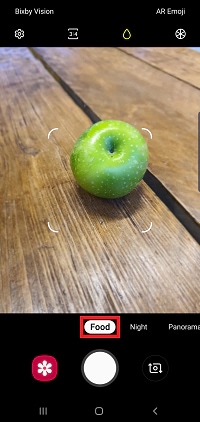
Please note: depending on your device, you may have some additional options. Icons to adjust the colour and add a radial blur will appear if available

Please note: hyperlapse mode is only available on the following devices: Galaxy Note 10 range, Galaxy S10 range, Galaxy Note 9, Galaxy S9 range, Galaxy Note 8, Galaxy S8 range, Galaxy S7 range
Hyperlapse allows you to create your own time-lapse video, converting much longer footage into bite-sized chunks. Hyperlapse mode can be set to record at different speeds, giving you the controls that you need, no matter the subject.
Find out more about Hyperlapse mode
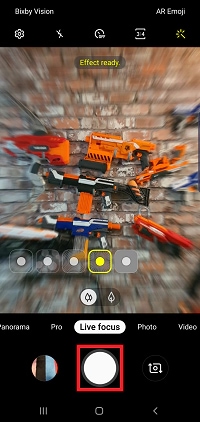
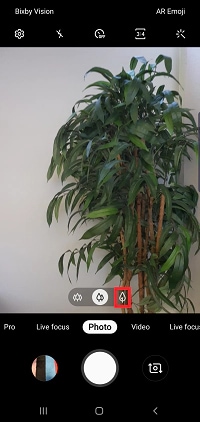
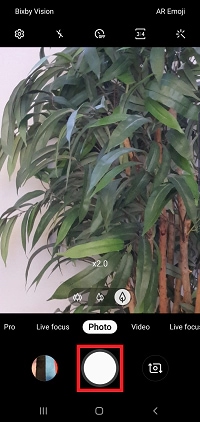
Live focus gives you direct control over the bokeh effect, allowing you to adjust the level of background blur in real time. You can even adjust the blur after your photo has been taken, making sure that you always get the perfect shot.
Please note: depending on your device, you may need to tap Mode or swipe the screen to select Live focus

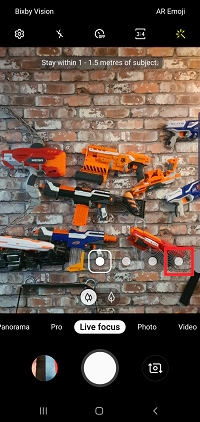
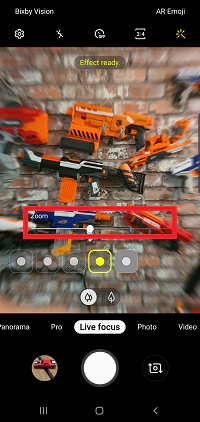
Please note: for best results, the subject should be between 1m and 1.5m from the camera lens
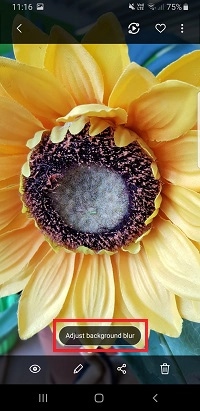
If you are unhappy with the blur in the picture after it has been captured, you can adjust your Live focus pictures in the Gallery.
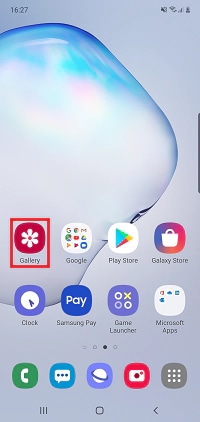
Please note: this option will only appear for pictures that have been taken with Live focus
Night mode gives you the power to take great photos in low light conditions, letting you get a clear shot even if it's night or you're in a dimly lit room. Night mode recognises the light levels in a scene and automatically adjusts the exposure and white balance, letting you capture details you can't see yourself.
For the best results, your phone should be kept as steady as possible while taking a night mode shot. If possible, use a tripod to get the perfect picture.
Please note: if you have scene optimiser enabled, you may be prompted to switch to night mode in low light situations
Panorama allows you to capture a whole new perspective by combining multiple images to create a photo with a huge field of view. Galaxy devices with ultra wide cameras take even better panoramas, as their greater vertical and horizontal fields mean you can pan less but capture more.
On some devices you can also create videos using Motion Panorama. However, this feature has been removed on the most recent models.
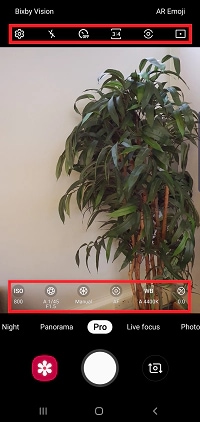
Pro mode gives you manual control over your camera settings, allowing you to take your picture in exactly the way you want. You can manually adjust settings such as ISO, shutter speed, exposure, filters, focus and white balance. Once you have changed the settings you will be shown a preview of the shot, helping you find the look you want.
To adjust your Pro mode settings, use the icons at the top and bottom of the screen.
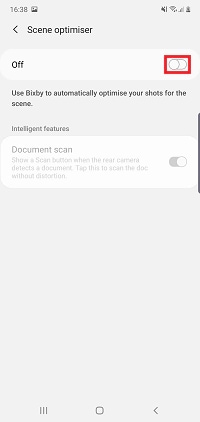
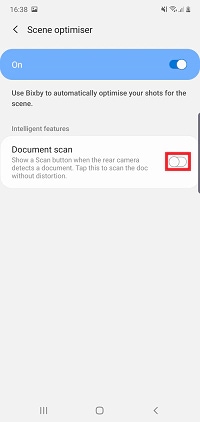
Please note: the scene optimiser feature is only available on the following devices: Galaxy Note 10 range, Galaxy S10 range, Galaxy Fold 5G, Galaxy Note 9. The range of available scenes will also differ by device
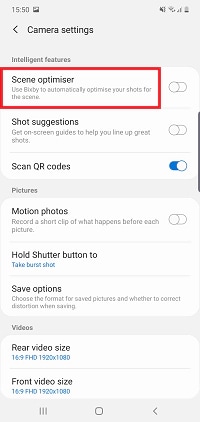
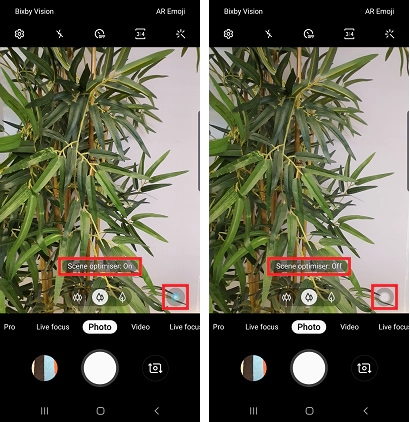
Scene optimiser is an intelligent photo assistant that automatically detects what is in frame and adjusts your camera settings to help you capture the best shot available. Scene optimiser can adjust a number of settings while also selecting from around 30 modes to find the most suitable one for your image.
Optimised scenes include: Food, Animals, Sky, Watersides, Snow, Portraits, Lanscapes, Mountains, Street scenes, Birds, Flowers. Greenery, Beaches, Night scenes, Backlit, Indoor scenes, Tress, Sunrises and sunsets, Waterfalls, Text, Clothing, Vehicle, Face, Drink, People, Cat, Shoe, Dog, Stage and Baby.
Please note: if the Scene optimiser option is greyed out, try switching to the rear facing camera
If Scene optimiser has been turned on in the settings, it can be quickly enabled and disabled by tapping the icon at the bottom right of the screen. A notification will appear when the feature is turned on and off.
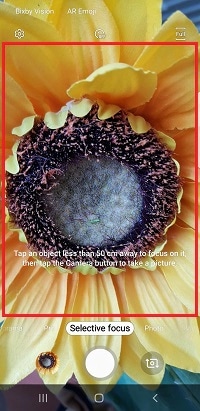
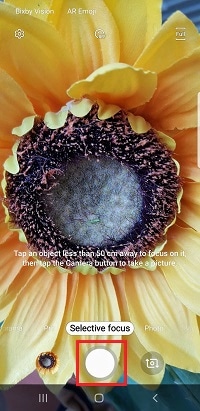
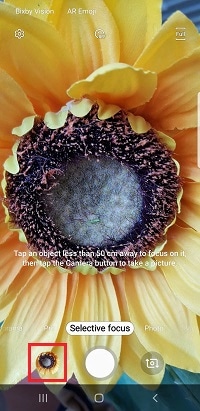
Please note: Selective focus mode is not available on the latest devices. Instead use Live focus to edit your pictures in real time
Selective focus allows you to take photos with the bokeh effect, blurring the background while keeping the subject in crisp focus. This is perfect for taking beautiful portrait photos or for highlighting the subject of your image.
Please note: depending on your device you may have to tap Mode or swipe to select Selective focus
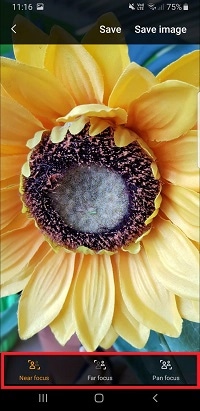
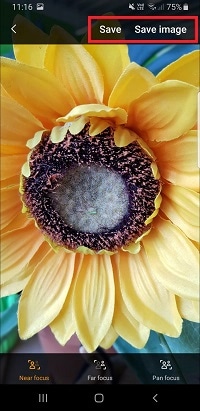
Near focus - will focus on the image in the foreground and blurs the background
Far focus - blurs the foreground and will focus on the background image
Pan focus - will make the entire picture come into focus
Please note: Selfie Focus is not an available mode on the latest devices. You can use the front facing camera and Live focus mode to achieve the same effect
Selfie focus allows you to take stunning selfies that focus on your face while blurring the background and adjusting your skin tone. Galaxy devices make it even easier to take great selfies as you can activate the camera by showing your palm or saying 'cheese'.
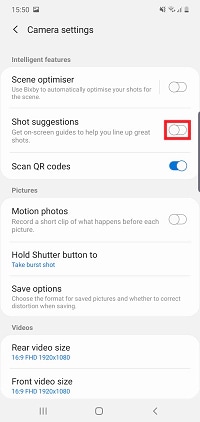
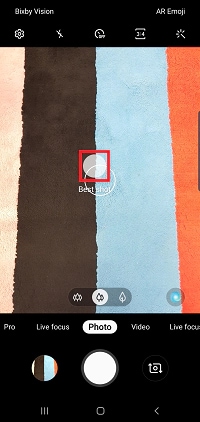
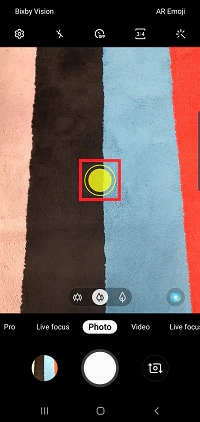
Shot suggestions help you line up great shots to get the perfect picture. This feature uses a library of millions of photos combined with the rules of photography used by professionals to suggest the ideal composition.
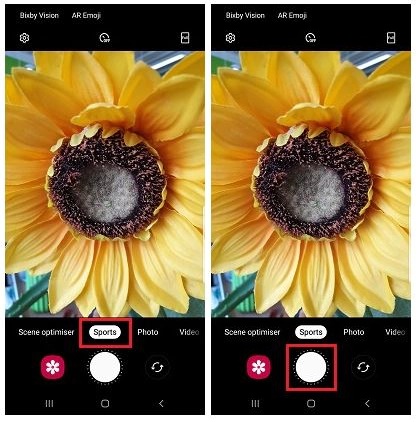
Please note: sports mode is no long available on the latest devices. You can achieve the same results by adjusting your settings in pro mode or by holding down the capture button to take a burst shot
Sports mode allows you to take a clear and blur-free pictures of fast moving subjects. To use Sports Mode, tap or swipe to select it.
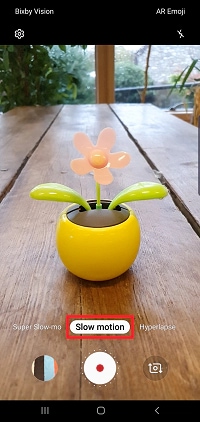
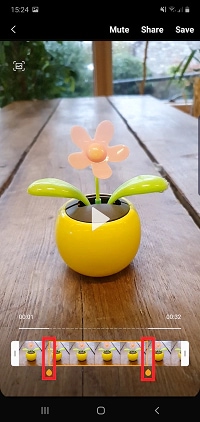
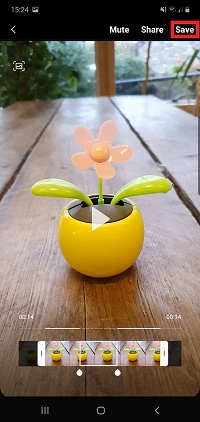
Slow Motion allows you to record a video then play it back at up to eight times slower than normal, perfect for filming action shots and creating unique videos.
Please note: depending on your device you may have to tap Mode or swipe the screen to select Slow motion

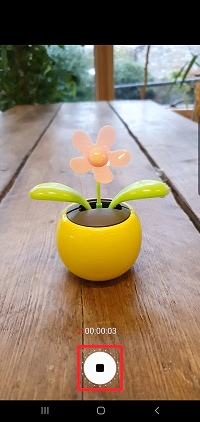

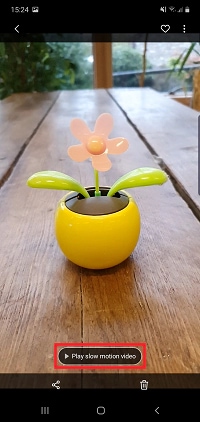
Please note: if you can't see any editing options, try tapping on the screen

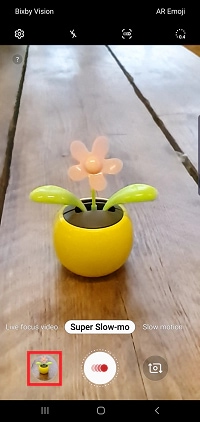
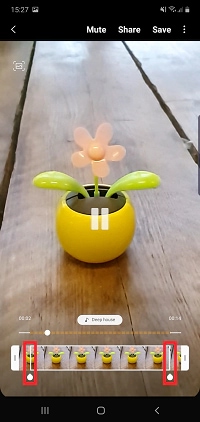
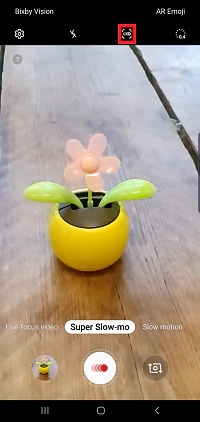
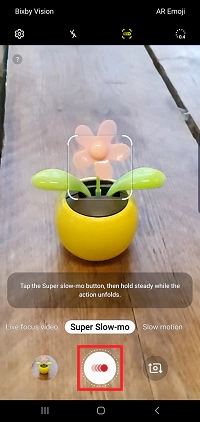
Super Slow-mo captures video at an incredible 960 frames per second (fps), which is four times faster than reglar slow motion. When played back at the average video speed of 30 fps, your Super Slow-mo video will appear 32 times slower than it did in real life Super Slow-mo gives you the power to make everyday moments look epic.
You can choose to capture Super Slow-mo video manually or trigger them automatically when something moves in your shot.
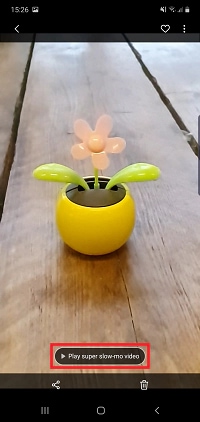
Taking a manual Super Slow-mo video
Please note: depending on your device, you may have to tap Mode or swipe the screen to select Super Slow-mo


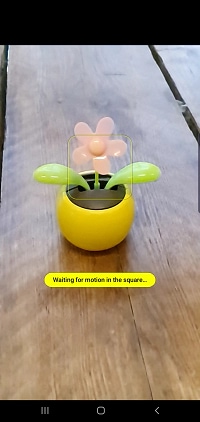
Taking an automatic Super Slow-mo video
If you're trying to capture something moving at high speed, it may help to enable automatic capture. In this mode a box will appear in the centre of the screen. When something moves within this area the camera will automatically start recording, taking all of the pressure away from the photographer.
For the best results you should try and stay as still as possible or consider using a tripod to avoid accidentally setting off the recording.
Please note: while the camera on most Galaxy devices feature digital zoom, only select devices have a telephoto lens. Devices with a telephoto lens are: Galaxy Note 9, Galaxy S10, S10+, S10+ 5G, Galaxy Note 10 range
Unlike cameras with digital zoom, telephoto lenses allow you to zoom in on a scene or single subject without losing the details, giving you the freedom to get up close without worrying about how it will look. Telephoto lenses create a shallow deth of field making it easy to blur the background and place your subject in the spotlight.
Please note: Virtual shot is no longer available on the latest devices. If you would like to know more about 360° photography you may be interested in the Gear 360
Using Virtual shot you can take a series of photos of an object to create a 360° image. Once your image has been created you can move it around to view your object from all angles.
Video collage makes you a master visual storyteller, letting you tell the bigger picture with your favourite videos and photos. Use your camera roll alongside music and text to create a moving college of your best moments.
If you're experiencing unusual behaviour on Samsung mobiles, tablets or wearables, you can send us an error report or ask us a question in the Samsung Members app.
This allows us to take a closer look at what is happening. The data is anonymised and only held for the duration of the investigation. Find out more about sending an error report through the Samsung Members app.
Thank you for your feedback!
Please answer all questions.