How to install my fridge freezer
Installing a fridge can be hazardous and if performed incorrectly can cause issues to the running of the fridge. Seeking professional assistance to ensure that your Samsung fridge is installed and levelled correctly is recommended. Samsung offers support with installation but if you intend to install your fridge yourself, follow the steps outlined in the video below or as explained in the text.
Please Note: The design of your refrigerator may differ depending on your model.
The steps for installing a Samsung fridge are similar across different models however it is important that you check your user manual to get specific dimensions and steps. The steps provided in this FAQ are for two popular models in a double and single style.
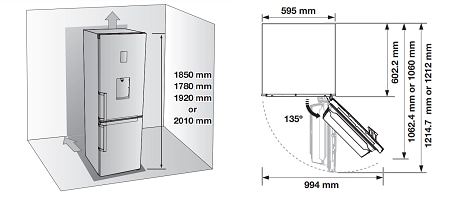
Before you begin check the suitability of the location. The fridge should be installed:
- Out of direct sunlight: Select a location without direct exposure to sunlight.
- On a flat floor: Select a location with level (or nearly level) flooring.
- In ample space: Select a location with enough space for the refrigerator on a flat surface.
- Away from a heat source: Make sure there are no other appliances or radiators within the vicinity producing heat.
- Within the correct temperature range: Most refrigerators should be installed in a room between 5 °C and 43 °C.
- Within reach of a power socket: Check the cord length can reach the wall socket before installing.
These include Smart, French Door and American style fridges (dimensions may vary).
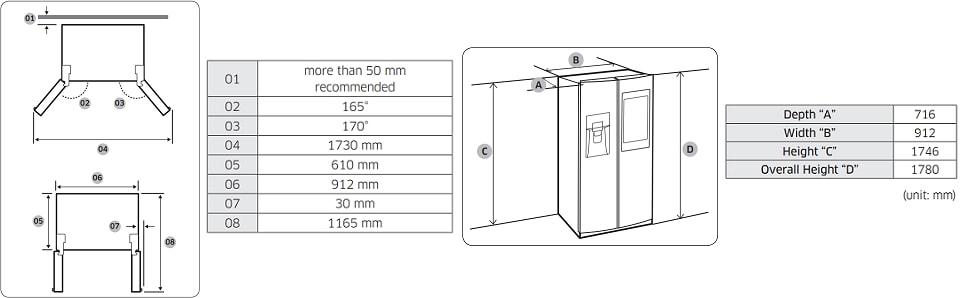
Please Note: These diagrams are an example. The dimensions shown are for the RS8000 Family Hub American Style Fridge Freezer. Dimensions will vary for different model. Check your user manual for details.
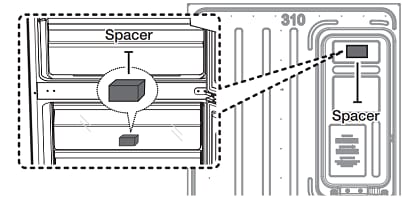
Spacing
Some models come provided with a spacer which is used to maintain space and improve airflow to the rear of the fridge for better energy efficiency. If your model doesn't come with a spacer leave an appropriate gap (more than 50mm) between the fridge rear and the wall.
Flooring
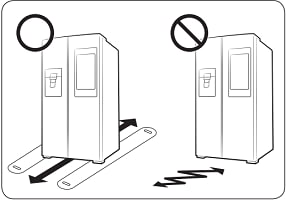
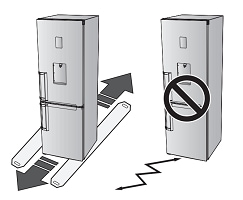
When installing your refrigerator make sure the floor is strong enough to support a fully loaded fridge. It should also be even and level. To protect the floor, put a large piece of cardboard on each leg of the refrigerator. Once the fridge is in its final position do not move it unless necessary to protect the floor. If you need to move the fridge use thick paper or cloth to guide it along its movement path.
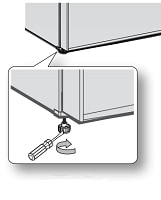
Leveling
The refrigerator must be levelled on a flat, solid floor and with an empty fridge. Failing to do so can cause damage to the refrigerator or physical injury. Make sure there are no food items inside the refrigerator.
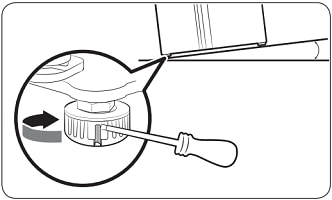
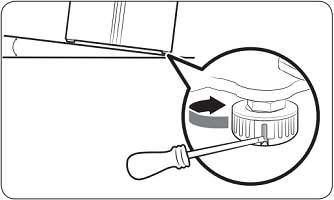
The refrigerator can be levelled using a special screw (leveller) on the front legs. Use a flat-head screwdriver for levelling. For safety reasons, adjust the front side a little higher than the rear side.
Adjust the height of the freezer side:
Adjust the height of the fridge side:
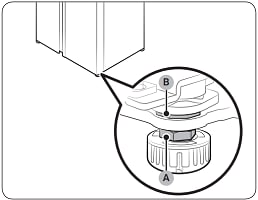
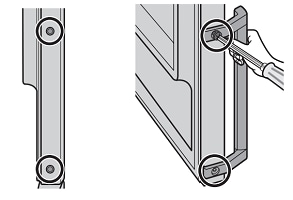
Adjust the door height and door gap
The height of a door can be adjusted using the clamp nut and the height nut on the front bottom of each door.
Connecting to a water supply
It is recommended that you seek assistance from a qualified technician when connecting your water line.
Please Note: The warranty for your refrigerator does not cover the water line installation.
For written instructions consult your user manual.
Final steps
To complete installation plug the power cord into the wall socket and set the temperature to the coldest setting available for about an hour then adjust depending on the temperature in your home. Open the door to check that the door light is functioning and the fridge has power. Once the refrigerator has reached the set temperature it is ready to use.
Please Note: These diagrams are an example. The dimensions shown are for the RB31 Fridge Freezer. Dimensions will vary for different model. Check your user manual for details.
Spacing
Some models come provided with a spacer which is used to maintain space and improve airflow to the rear for better energy efficiency. If your model doesn't come with a spacer leave an appropriate gap (more than 50mm) between the fridge rear and the wall.
Flooring
When installing your refrigerator make sure the floor is strong enough to support a fully loaded fridge. It should also be even and level. To protect the floor, put a large piece of cardboard on each leg of the refrigerator. Once the fridge is in its final position do not move it unless necessary to protect the floor. If you need to move the fridge use thick paper or cloth to guide it along its movement path.
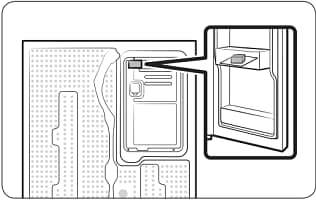
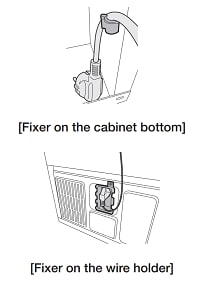
When you move the refrigerator, the Power Cord should be fixed with the fixer on the back side of the fridge. Some model’s fixers can be found on the cabinet bottom or in the wire holder.
Leveling
The refrigerator must be levelled on a flat, solid floor and with an empty fridge. Failing to do so can cause damage to the refrigerator or physical injury. Make sure there are no food items inside the refrigerator.
It is recommended to adjust the front side a little higher than the rear side as this will help ensure the door swings shut easily.
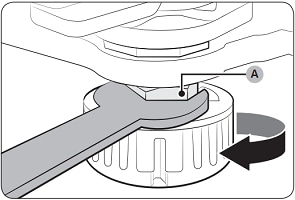
Raising the left leg:
Turn the left adjusting leg clockwise until the appliance is level.
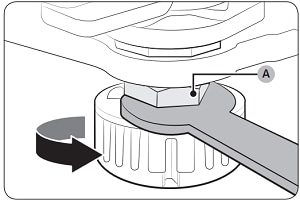
Raising the right leg:
Turn the right adjusting leg clockwise until the appliance is level.

Installing your fridge handles (applicable models only)
If your refrigerator does not fit through the entrance to your home or kitchen you may need to have the doors removed before the installation. Some fridges also offer the option to reverse the fridge doors. If you need this procedure to be completed contact Samsung Support, we do not recommend removing the doors on your own.
If you're looking for information on how to troubleshoot your ice maker read our FAQ on what to do if your ice maker doesn't produce enough ice. If you have issues with a leaking fridge read our FAQ on what to do if your fridge freezer is leaking water or if there is ice outside your fridge read what to do when ice forms on the bottom of your freezer.
Thank you for your feedback!
Please answer all questions.